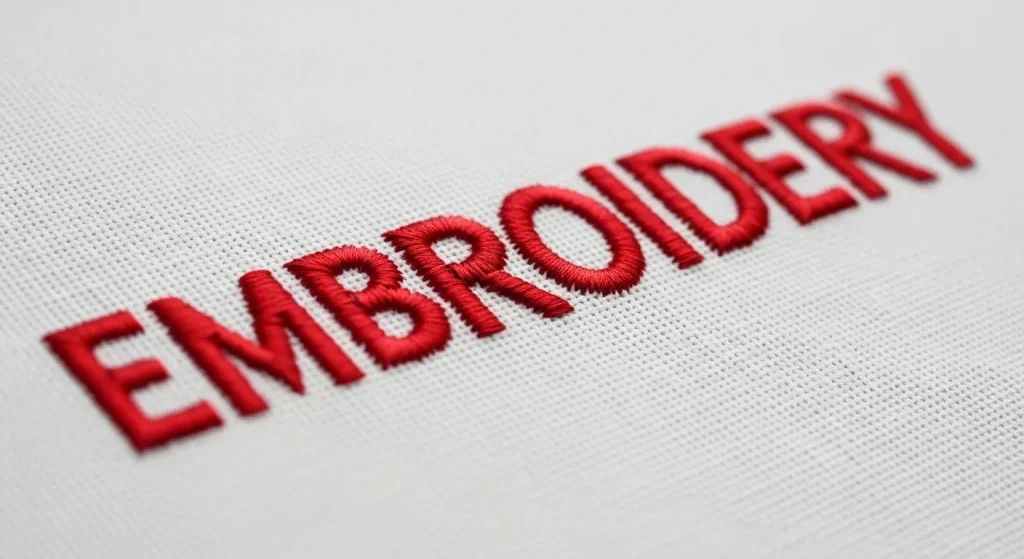
How to Fix Small Text in Embroidery Digitizing
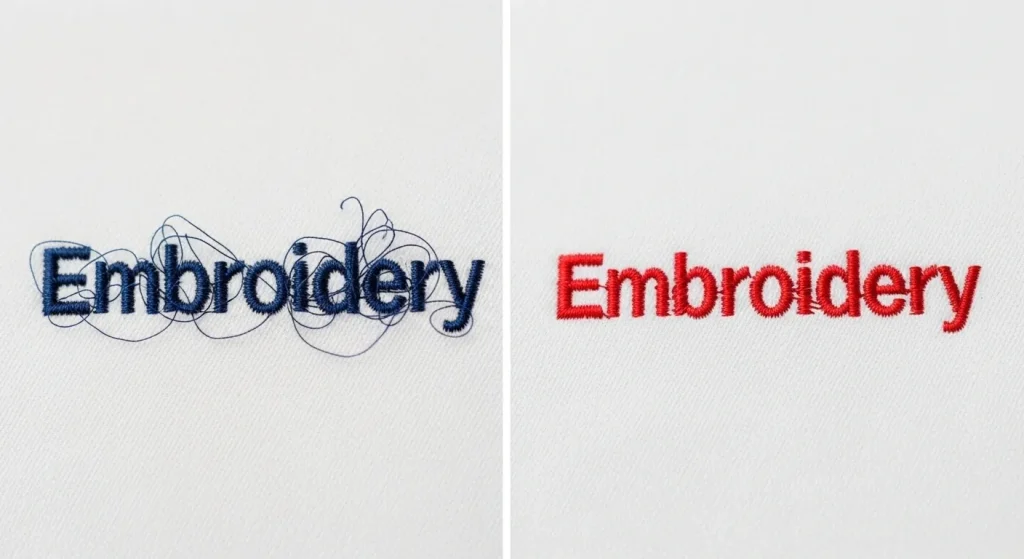
If you’ve ever had a customer squint at their embroidered logo and ask, “Can you clean up those letters a little bit?” you know exactly what frustration feels like. Small text in embroidery is notoriously tricky. When letters are too small or poorly digitized, they turn into an unreadable mess of thread that looks more like a blob than a name or slogan.
The good news? With the right digitizing techniques, you can transform messy, illegible lettering into clean, sharp, professional text that your customers will love. In this guide, we’ll walk you through exactly how to clean up small embroidery letters step by step.
Why Small Letters Look Messy
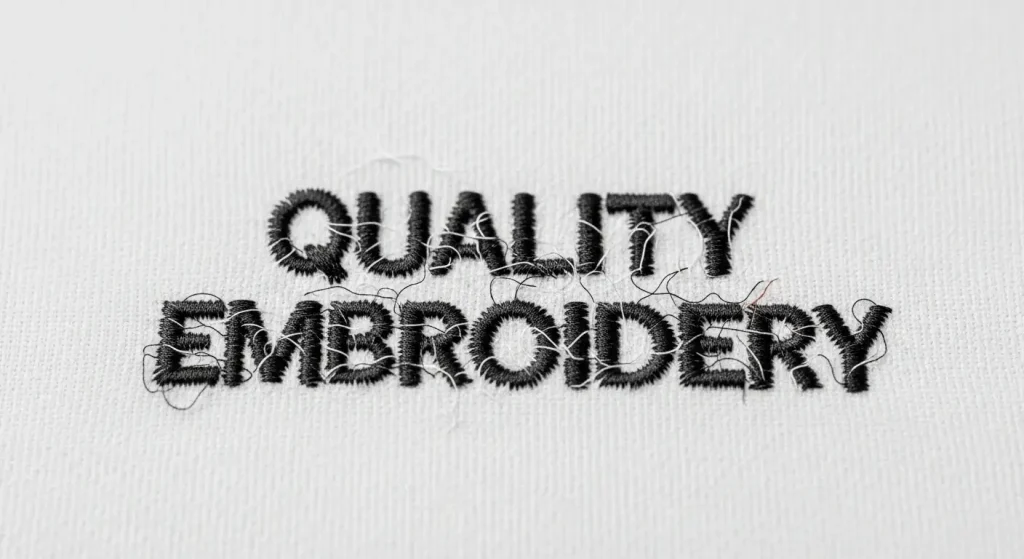
Small embroidery letters fail for a few specific reasons. When text is under 10mm in height, standard digitizing settings simply don’t work. The stitch density becomes too high, letters start touching each other, and the centers of letters like “e,” “a,” and “o” fill in completely.
Here’s what typically goes wrong:
Too Much Density: Standard satin stitch density causes thread buildup, making letters look thick and distorted.
Poor Letter Spacing: When letters are too close together, they merge into each other and become unreadable.
Wrong Stitch Type: Using fill stitches or satin stitches on very small text creates a muddy appearance.
Incorrect Stitch Direction: Poorly planned stitch angles make thin strokes disappear or thick strokes look bulky.
If you want professional results, you need to treat small text differently than large logos. Let’s fix this.
Step 1: Reduce Stitch Density
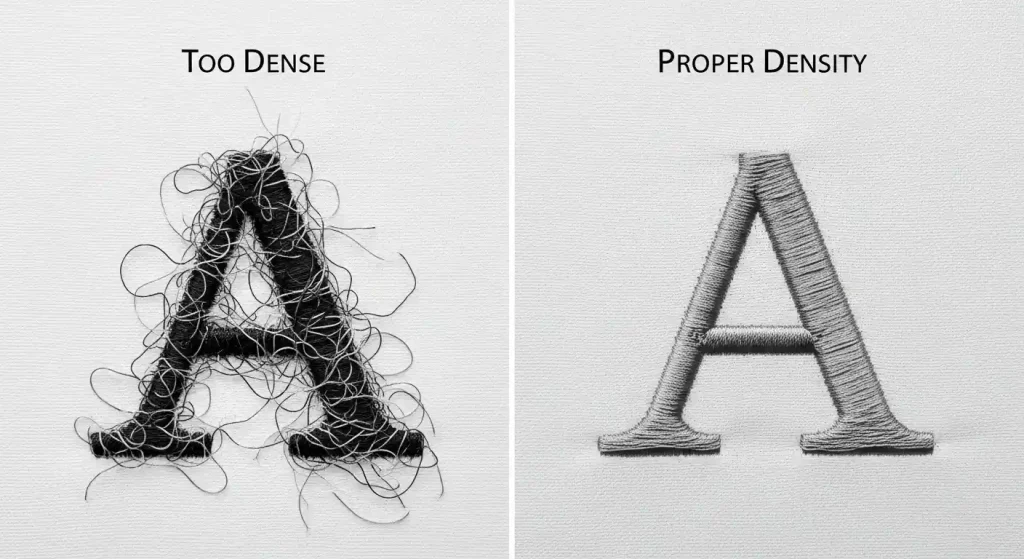
The first rule of cleaning up small letters is to reduce the stitch density. Standard density settings (around 4-5 lines per mm) are too tight for letters under 10mm. When stitches are packed this tightly on tiny letterforms, the thread piles up and the design loses definition.
What to do: Lower your stitch density to 3-3.5 lines per mm for small text. This allows the individual stitches to sit flatter and gives each letter breathing room. The fabric will show through slightly, but the text will look sharper and cleaner.
If you’re working with a professional embroidery digitizing service, they’ll adjust density automatically based on letter size. At Sassy Digitizing, we test every file to ensure small text remains crisp and readable on all fabric types.
Step 2: Increase Letter Spacing
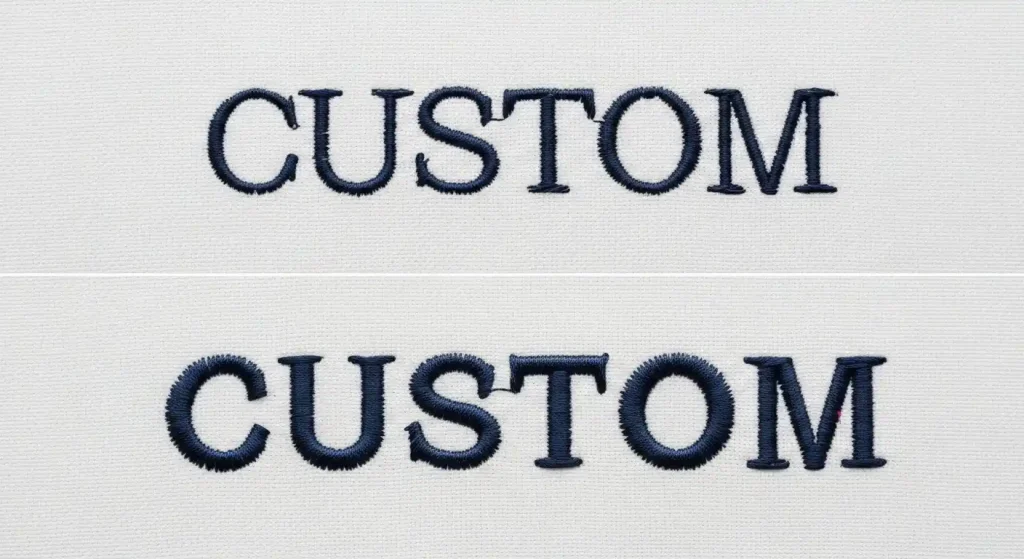
Cramped letters are one of the biggest causes of messy embroidery. When letters are digitized too close together, they start bleeding into each other, especially after the first wash. Even if the stitches look separate on screen, the physical bulk of the thread causes them to touch.
What to do: Add at least 0.5mm to 1mm of space between each letter. This small adjustment makes a huge difference in readability. The text will look more open and polished, and individual letters will stay distinct even on textured fabrics like fleece or towels.
Letter spacing is something that manual digitizers control with precision. Automated software often defaults to tight spacing, which is why professional digitizing makes such a difference for small text.
Step 3: Use Running Stitch for Outlines
For very small letters (under 6mm), switching from satin stitch to running stitch is often the best solution. A running stitch creates a thin, clean line that stays readable no matter how small the text gets. It’s especially effective for script fonts or detailed letterforms.
What to do: Digitize the outline of each letter using a single or double running stitch. This gives you a fine, elegant line without any bulk. Some digitizers add a very light satin stitch on top for a slightly bolder look, but the running stitch does most of the work.
Running stitch is also much more forgiving on stretchy fabrics. If you’re embroidering on performance wear or knitwear, this technique prevents puckering and distortion that satin stitches can cause.
Step 4: Adjust Stitch Direction
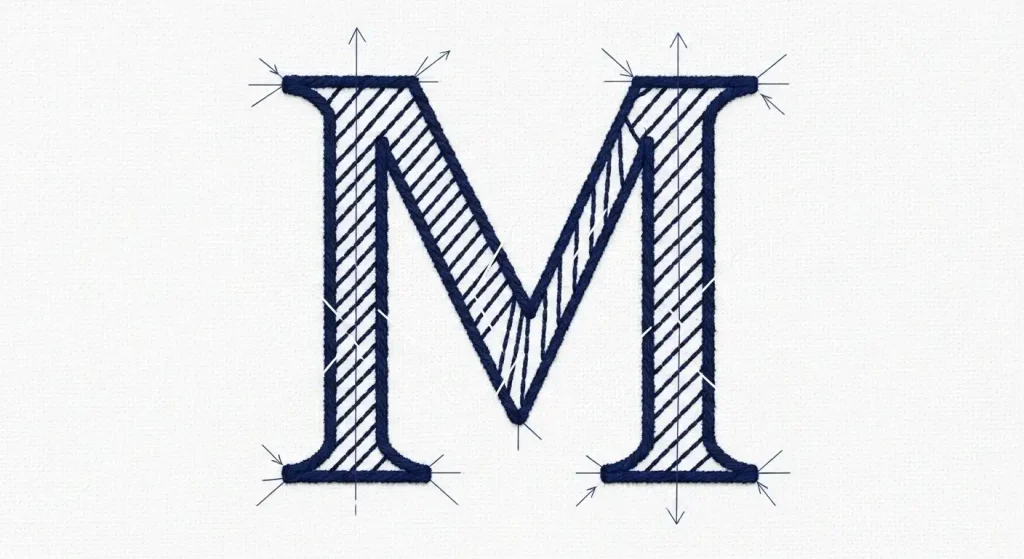
Stitch direction controls how light reflects off the thread and how the letter edges appear. For small text, the wrong stitch angle can make thin strokes vanish or cause thick strokes to look uneven.
What to do: Set your stitches to run perpendicular to the letter stroke. For example, vertical strokes should have horizontal stitches, and diagonal strokes should have stitches running at a 90-degree angle to the stroke direction. This creates a smooth, even surface that enhances legibility.
Adjusting stitch direction is a manual process that requires skill and experience. Automated digitizing software rarely handles this correctly for small fonts, which is why working with a professional digitizer ensures your text looks polished and professional.
Step 5: Test and Refine
Once you’ve made your adjustments, the final step is to test the design. Run a sample on the actual fabric you’ll be using, at the exact size your customer needs. Small text behaves differently on polo knits versus canvas bags, so testing ensures there are no surprises.
What to do: Embroider a test sample and examine it closely. Check for:
- Clean letter edges with no thread buildup
- Readable centers in closed letters (e, a, o, d)
- Consistent spacing that looks balanced
- No puckering or distortion on the fabric
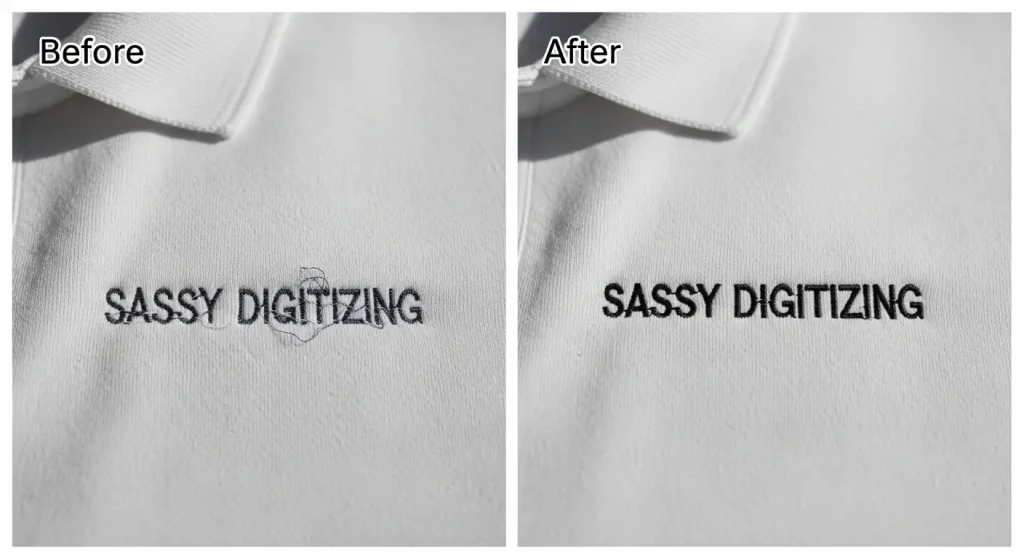
If something still looks off, go back and tweak the density, spacing, or stitch type. Professional digitizers test every file before delivery to guarantee quality. At Sassy Digitizing, we include free revisions so you can request adjustments until the text is perfect.
When to Use Professional Digitizing
Hand-cleaning small text is a skill that takes time to develop. If you’re working with tight deadlines, complex fonts, or high-volume orders, outsourcing to a professional digitizing service saves time and eliminates frustration.
DIY Cleanup:
- Time-consuming for each design
- Requires digitizing software and experience
- Risk of trial-and-error waste
Professional Digitizing:
- Fast turnaround (4-6 hours standard)
- Tested files guaranteed to sew cleanly
- Expert adjustments for any font or fabric
If you need small text digitized correctly the first time, Sassy Digitizing specializes in precise lettering for caps, left chest logos, and detailed designs. Our manual digitizing process ensures every letter is crisp, balanced, and production ready.
Summary
Cleaning up small embroidery letters comes down to five key adjustments: reducing stitch density, increasing letter spacing, using running stitch for very small text, setting proper stitch direction, and testing on real fabric. These techniques transform messy, illegible text into sharp, professional embroidery that your customers will proudly wear.
If you’re tired of redoing text or dealing with customer complaints, working with a professional digitizing service eliminates the guesswork. Whether you need a single logo cleaned up or ongoing support for your embroidery business, Sassy Digitizing delivers fast, reliable, high-quality results every time.
About the Author
Keith Blair | Senior Quality Control (HOD)
Keith Blair serves as the Head of Department for Quality Control at Sassy Digitizing, bringing 12 years of commercial embroidery experience to the team. His role focuses on the technical mechanics of digitizing, specifically adjusting stitch densities and lengths to suit different fabric types.
A specialist in advanced production methods, Keith oversees the digitizing standards for complex 3D puff, appliqué, and small lettering projects. He ensures that every file is tested for efficiency and run ability before it reaches the customer, bridging the gap between digital design and physical production.


