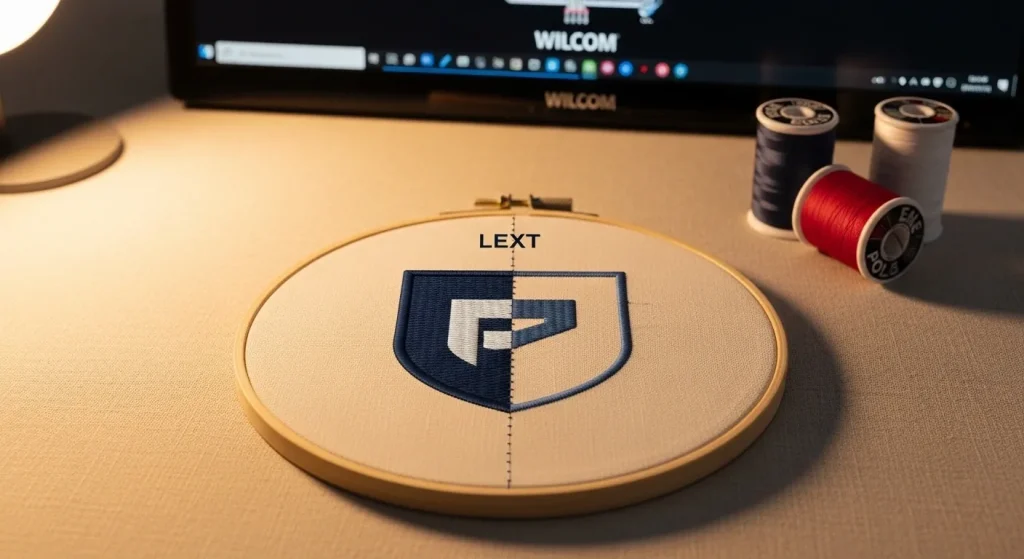
You sent a perfectly designed logo. Your machine ran the file without errors. And yet — the final result looks slightly off. The text doesn’t sit straight. The logo feels heavy on one side. The edges look rough instead of clean.
The design isn’t broken. The machine isn’t faulty. The problem is almost always stitch direction in embroidery and it’s one of the most overlooked settings in embroidery digitizing.
In this guide, we’ll break down exactly what stitch direction in embroidery is, why incorrect embroidery stitch direction causes embroidery alignment issues, and how to fix it once and for all.
What Is Stitch Direction in Embroidery?
Why Does Wrong Stitch Direction Cause Misalignment?
1. Thread Tension Pulls the Fabric
Every stitch puts mechanical tension on the fabric. When all the stitches in a section run against the grain of the fabric or against adjacent stitches, that tension adds up and physically pulls the design out of position. This is why logo embroidery not lining up is such a common complaint.
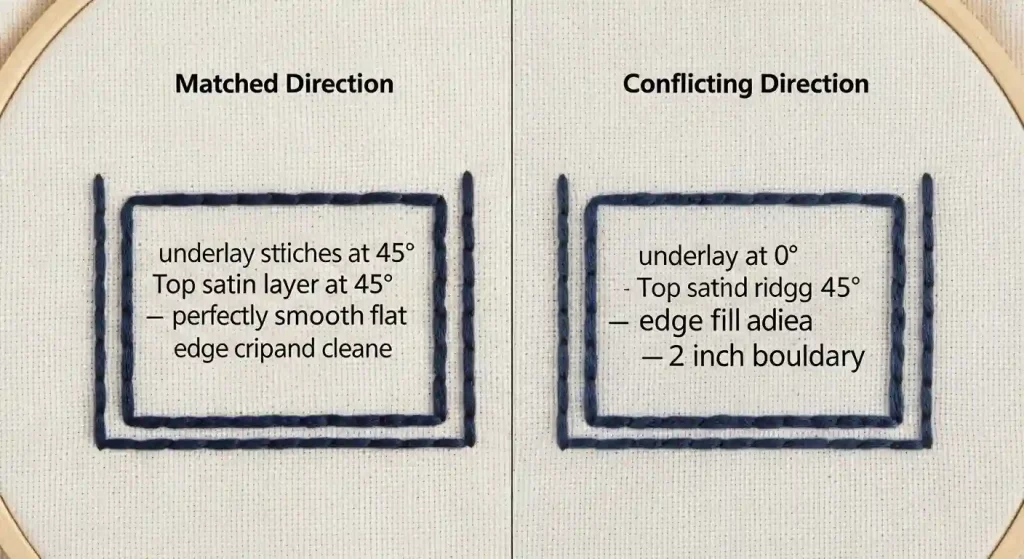
2. Stitches Block Each Other
When the digitizer places two adjacent fill sections with conflicting stitch angles say, one at 0° and the next at 90° the second layer of stitching has to push through the first. This creates uneven density, raised ridges, and seams that look like borders where there should be a smooth transition.
3. Underlay Conflicts
Underlay stitches the foundation layer placed before the main design must also align with the top stitch direction. If they conflict, the top layer floats and shifts during production, especially on stretchy or loosely woven fabrics.
| 💡 Pro Tip: If your logo looks perfect on the first run but shifts slightly after 50 or 100 pieces in a batch, the underlay stitch direction is almost certainly mismatched with the top stitch layer. |
Step-by-Step: How Stitch Direction Should Be Set
Proper stitch direction in embroidery is set during the digitizing process, before the file reaches the embroidery machine. Here is how a professional digitizer approaches it.
Step 1: Analyze the Design Structure
Before placing a single stitch, the digitizer breaks the logo into its elements: text, outlines, fills, and shadows. Each element type needs its own stitch direction logic.
- Text/lettering: always digitized to run perpendicular to the stroke direction this maximizes sharpness and readability.
- Curved shapes: use a radial stitch direction that follows the curve, preventing flat spots.
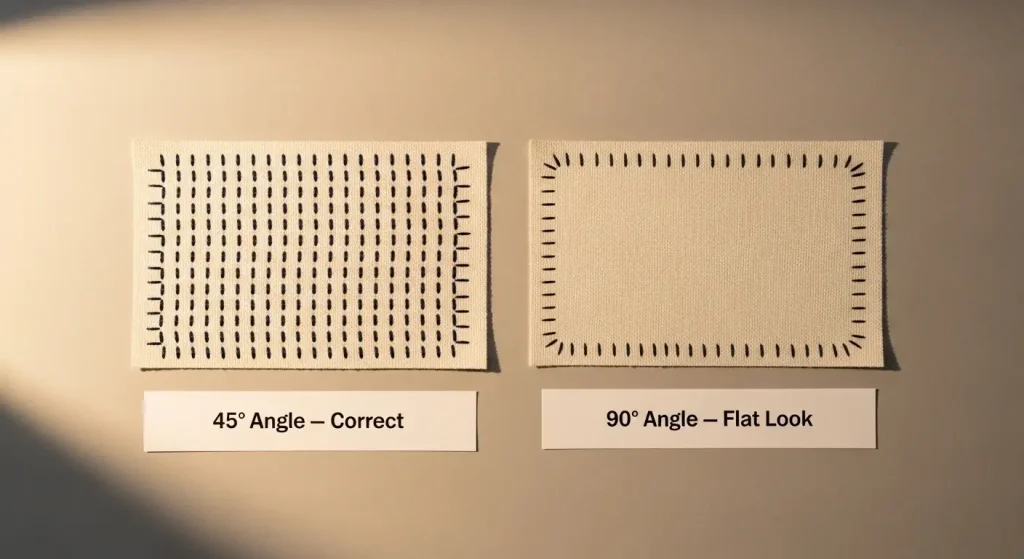
- Flat fills: typically set at 45° to the dominant edge of the shape this balances tension evenly across the fabric.
Step 2: Set the Angle for Each Element Individually

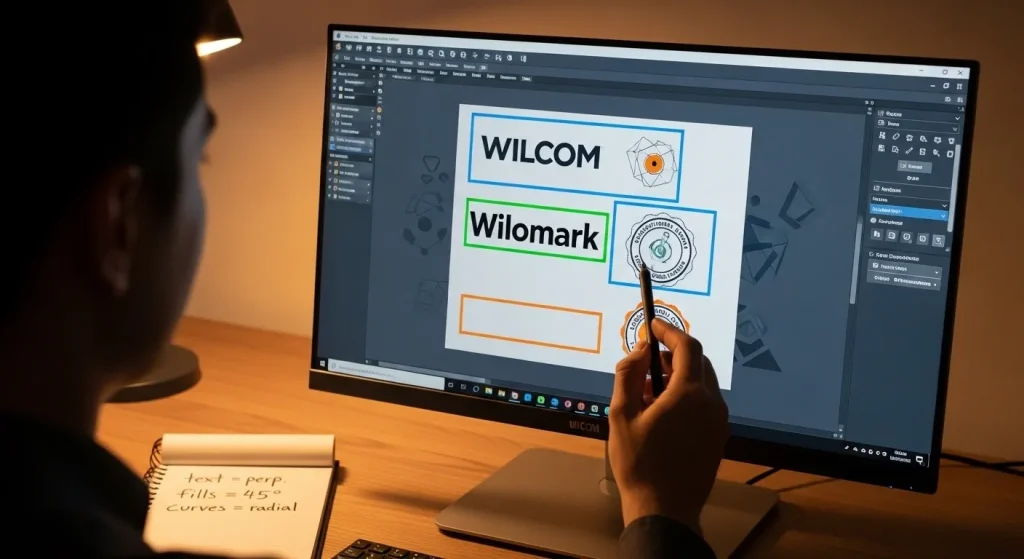
This is where the real skill is. In professional digitizing software like Wilcom, each element can be given its own stitch angle property. A common mistake by automated digitizing tools is applying one global angle to the entire design this is why auto-converted files often look flat and misaligned.
Step 3: Match Underlay Direction to Top Stitch
The underlay layer is the invisible foundation that determines whether the top stitches lie flat. It should always run at a perpendicular or complementary angle to the top stitch.
- Run stitch underlay: best for thin elements runs at a slightly different angle than the top fill.
- Zigzag underlay: ideal for wide fills provides a grid that anchors the top stitches evenly.
- Edge walk underlay: used on outlines to define the border before the main fill is applied.
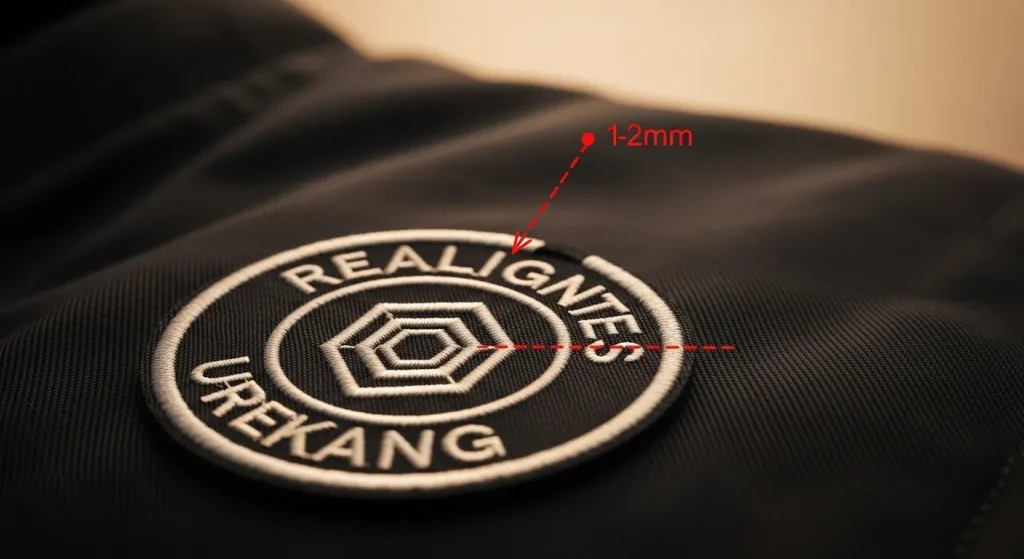
Step 4: Account for Pull Compensation
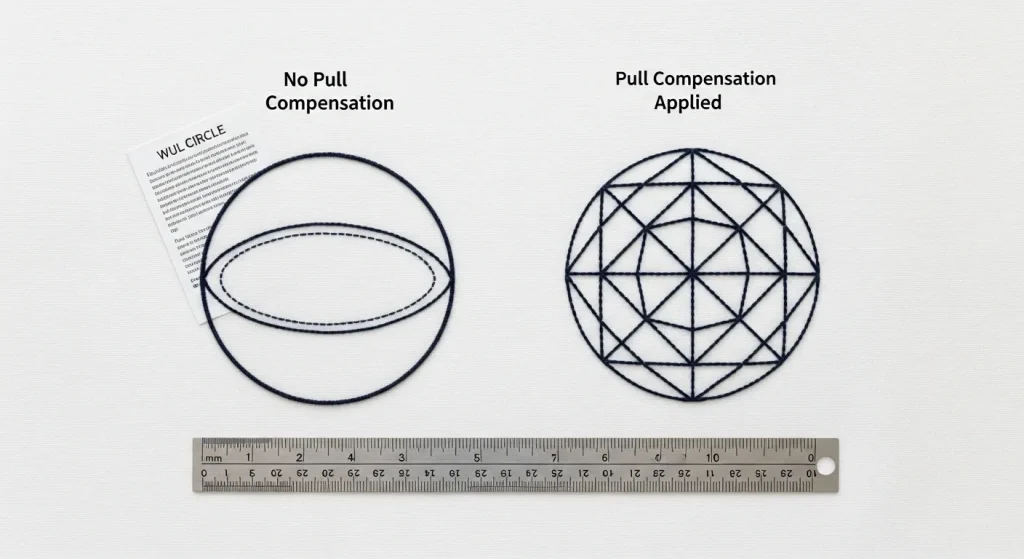
Stitches physically pull the fabric inward as they tighten. This is called pull compensation, and it works hand-in-hand with stitch direction. The digitizer adds a small amount of extra width to each element in the same direction as the stitch angle so that when the stitches tighten, the element ends up at the correct size.
Without proper pull compensation set in alignment with the stitch direction in embroidery, your circular logo becomes an oval, and your straight text baseline curves slightly upward on one side.
Step 5: Test Sew and Adjust
No digitized file no matter how carefully set up skips the test sew. Running the design on the actual fabric type at the actual size catches any direction conflicts before they affect a full production run.
- Check all edges for clean definition fuzzy edges signal underlay conflicts.
- Check fills for even sheen dull patches in a satin fill mean the angle is wrong for the light source.
- Check corners and intersections where two elements meet is where direction conflicts are most visible.
How Stitch Direction Changes for Different Fabric Types
Not all fabrics behave the same way under stitch direction in embroidery. The fabric’s weave, stretch, and pile height all affect how stitches settle. Here’s how professional digitizers adjust embroidery stitch direction for common fabric types.
Cotton Twill & Woven Fabrics
Standard stitch direction at 45° works perfectly on stable woven fabrics like cotton twill, canvas, and denim. These fabrics have minimal stretch, so the digitizer can use aggressive pull compensation without worrying about distortion.
Knit & Polo Fabrics
Knit fabrics stretch in multiple directions, which means stitch direction in embroidery must follow the fabric grain. Digitizers set the stitch angle to run vertically (0° or 90°) to minimize stretching. Underlay is critical here without proper underlay stitch direction, knit fabrics pucker visibly.
Fleece & Terry Cloth
High-pile fabrics like fleece absorb stitches into the pile, making satin stitch direction less visible. Digitizers use denser stitching and set the stitch angle perpendicular to the pile direction so the stitches sit on top of the fabric rather than sinking in.
Leather & Vinyl
Non-woven materials like leather don’t have a grain, so stitch direction is less critical for fabric stability. However, these materials are prone to perforation damage, so digitizers reduce stitch density and carefully plan the stitch path to minimize needle penetrations.
Common Stitch Direction Mistakes (and How to Spot Them)

Puckering Around Fills
If the fabric is gathering or puckering around a large, filled area, the stitch direction in embroidery is perpendicular to where it should be. The fix is rotating the fill angle to run parallel with the longest axis of the shape.
Dull or Flat-Looking Satin Stitches
Satin stitches get their shine from reflecting light uniformly. If the angle is set wrongly relative to the dominant viewing angle of the garment (usually the front), the stitches will absorb light instead of reflecting it making the design look dull and unexpectedly dark.
Wavy or Uneven Text Baseline
Small lettering is extremely sensitive to stitch direction in embroidery. Each letter column must be digitized individually for direction. If the angle is applied globally to a word, the letters at the ends of a curved text path will look tilted or misaligned.
How to Check Stitch Direction in Your Digitized File
If you’ve received a digitized file and suspect the stitch direction is wrong, here’s how to verify it before running a full production batch.
Using Embroidery Software (Wilcom, Hatch, PE-Design)
- Open the file in your embroidery software and enable stitch view mode. This shows the exact path and angle of every stitch.
- Look for stitch angle indicators most software displays small arrows showing the direction of each fill element.
- Check for underlay visibility toggle underlay on/off to see if it matches the top stitch direction.
Checking on the Machine (Without Software)
- Run a test sew on a scrap piece of the same fabric you’ll use in production.
- Inspect the edges of filled areas if they’re fuzzy or uneven, the stitch direction in embroidery likely conflicts with the underlay.
- Check for fabric distortion if circles become ovals or straight lines curve, pull compensation is misaligned with the stitch direction.
When to Get Professional Help
If your logo is complex multiple overlapping elements, gradients, small text, or curved paths manually correcting stitch direction in embroidery in a consumer-level software tool can take hours and still produce sub-par results.
At Sassy Digitizing, every design is manually digitized using Wilcom never auto converted. Our team sets stitch direction, underlay type, and pull compensation individually for every element in your logo. The result is a file that sews correctly the first time, on every fabric type, at every size. Check our portfolio to see examples of professional embroidery stitch direction work.
Whether you need embroidery digitizing services for a cap logo, a jacket back, or a complete uniform program, our files are production-tested and ready to run.
And if your artwork is pixelated or blurry, our vector art services can clean it up before digitizing so the stitch paths are built from a crisp, accurate source file from the start.
Frequently Asked Questions About Stitch Direction in Embroidery
What is stitch direction in embroidery?
Stitch direction in embroidery refers to the angle at which the embroidery machine lays thread across each design element. It determines how light reflects off the stitches and how tension is distributed across the fabric.
Why does my embroidered logo look misaligned?
Misalignment is usually caused by incorrect stitch direction in embroidery, conflicting underlay angles, or insufficient pull compensation. These issues cause the fabric to distort during stitching.
Can I fix stitch direction in my existing embroidery file?
Yes, but it requires re-digitizing the file in professional embroidery software like Wilcom. Auto-conversion tools cannot fix stitch direction issues only manual digitizing can.
What is the best stitch angle for embroidered logos?
For most logos, a 45-degree stitch angle provides balanced tension and good light reflection. However, curved elements need radial stitch direction, and text needs perpendicular angles for sharpness.
How does underlay stitch direction affect embroidery quality?
Underlay stitch direction provides the foundation for the top stitches. If the underlay runs in the same direction as the top layer, the stitches will float and shift. Underlay should always run perpendicular or at a complementary angle to the top stitch direction in embroidery.
Summary
Stitch direction in embroidery is not a visual preference it is an engineering decision that directly determines whether your embroidered logo looks professional or looks off. Getting the embroidery stitch direction right means analyzing every element individually, matching underlay angles to top stitches, and applying pull compensation in the correct direction.
If your current digitized file is giving you embroidery alignment issues, the fastest fix is to have it properly re-digitized by hand. Contact Sassy Digitizing we’ll review your file and fix the stitch direction issues, so your next run sews out perfectly.
About the Author
Keith Blair | Senior Quality Control (HOD)
Keith Blair serves as the Head of Department for Quality Control at Sassy Digitizing, with 12 years of commercial embroidery experience. He specializes in the technical mechanics of digitizing specifically adjusting stitch densities, directions, and underlay types for different fabric behaviors. Keith oversees the digitizing standards for complex 3D puff, appliqué, and small lettering projects, ensuring every file is tested and production-ready before it reaches the customer.


