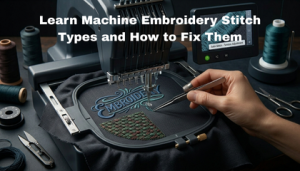
Appliqué embroidery is more than just a technique; it is a smart solution for bold, high-impact designs. Whether you are looking at a varsity jacket or a large corporate logo, appliqué allows you to use fabric to fill large areas, significantly reducing the stitch count and saving production time.
However, as many embroidery shop owners know, a poorly digitized appliqué file can be a disaster on the machine. If the placement is off or the tackdown isn’t secure, you end up with frayed edges and ruined garments. In this guide, we will break down the professional way to digitize appliqué to ensure your machine runs smoothly every time.
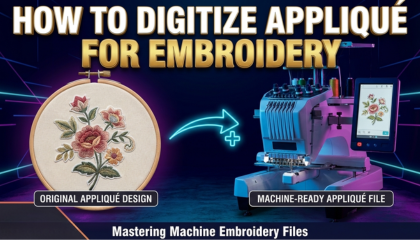
Understanding the Appliqué Logic

The secret to a perfect appliqué lies in the sequence. Unlike standard embroidery where the machine just keeps stitching, appliqué requires the machine to stop at specific points so you can place and trim the fabric.
A professional digitizer thinks about the “layers.” You aren’t just creating a design; you are creating a workflow for the machine operator.
Step 1: The Placement Stitch
The first step in digitizing is the placement stitch. This is a simple running stitch that outlines the shape of the appliqué on the base garment. Its only job is to show the operator exactly where to place the scrap fabric.
In your software, make sure this is a different color than the rest of the design. This forces the embroidery machine to stop (a “Color Stop”), allowing the person at the machine to lay down the appliqué fabric over the outline.
Step 2: The Tackdown Stitch
Once the fabric is placed, you need to secure it. This is where the tackdown stitch comes in. Usually, a zigzag or a double running stitch is used for this purpose.
The tackdown stitch needs to be slightly inside the placement line to ensure that when the final border is applied, the edges are completely covered. If the tackdown is too loose, the fabric might shift during the final stitching, leading to misalignment.
Step 3: The Trimming Phase
After the tackdown is complete, the machine stops again. At this point, the operator trims the excess fabric as close to the stitches as possible. If you are using pre-cut fabric (cut with a laser or a plotter), your placement and tackdown stitches must be 100% precise to match the pre-cut shape perfectly.
Step 4: The Final Satin Border
This is the “beauty” layer. The final border—usually a dense satin stitch—covers the raw edges of the appliqué fabric.
When digitizing this part, you must pay attention to the width of the satin stitch. If it’s too narrow, the fabric might peek out or fray over time. A professional width is usually between 3.0mm to 4.0mm. This provides enough coverage to hide the tackdown stitches and the raw edge of the fabric completely.
Why Professional Digitizing Matters
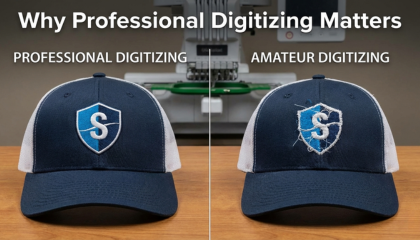
Appliqué might seem simple, but managing the “push and pull” of two different fabrics (the base and the appliqué piece) is tricky. If the digitizing isn’t balanced, the fabric will pucker, and the design will look cheap.
This is why most successful shops in the USA don’t rely on auto-tracing or basic software features. They partner with experts. If you are looking for the best embroidery digitizing company in United State, you need a team that understands the mechanical limits of the embroidery machine, not just someone who knows how to use software. A professional service ensures that the stitch density is perfect and the “stops” are programmed correctly.
Choosing the Right Fabric and Stabilizer
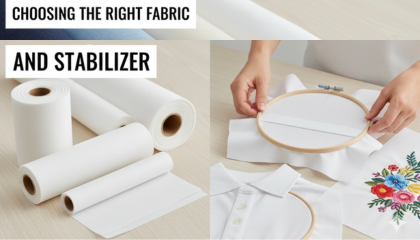
The choice of fabric for your appliqué is just as important as the digitizing.
Twill: Great for sports logos and heavy jackets.
Felt: Excellent for vintage looks and doesn’t fray easily.
Jersey: Good for a soft, “distressed” look on t-shirts.
Always match your stabilizer to the base fabric. If you are applying a heavy twill appliqué onto a thin t-shirt, you will need extra cut-away stabilizer to prevent the weight of the appliqué from sagging the shirt.
Final Thoughts: Practice Makes Perfect
Digitizing appliqué is a skill that combines technical precision with artistic flair. It saves thread, adds texture, and gives your designs a premium feel that standard embroidery simply can’t match.
If you have a complex project coming up and want to ensure it’s done right the first time, don’t forget that we offer your first logo conversion for free. It’s the perfect way to test our “Sassy Quality” and see how a professionally digitized appliqué file can transform your production workflow.
About the Author
Keith Blair | Senior Quality Control (HOD) Keith Blair serves as the Head of Department for Quality Control at Sassy Digitizing, bringing 12 years of commercial embroidery experience to the team. His role focuses on the technical mechanics of digitizing, specifically adjusting stitch densities and lengths to suit different fabric types.
As a specialist in advanced production, Keith ensures that every appliqué file is optimized for the machine, preventing the common pitfalls of fabric shifting and thread breaks.
FAQS
1. What is the difference between Appliqué and standard embroidery?
Standard embroidery uses only thread to fill a design, which can lead to high stitch counts. Appliqué uses a piece of fabric to fill the main areas, which is then secured with stitches. This saves time, thread, and creates a unique 3D texture.
2. Which file format is best for Appliqué embroidery?
Most industrial machines like Ricoma or Tajima use .DST files for appliqué. However, the format depends on your specific machine. The key is how the “Color Stops” are programmed in the file to allow for fabric placement and trimming.
3. Why is my appliqué fabric puckering or shifting?
Puckering usually happens due to incorrect stabilizer choice or poor digitizing. If the “push and pull” compensation isn’t set correctly in the software, the fabric will shift. Using a high-quality cut-away stabilizer and professional digitizing can solve this.
4. Can I use any fabric for Appliqué?
Most fabrics work, but stable fabrics like felt, twill, and denim are the easiest to handle. If you use stretchy fabrics like jersey or fray-prone fabrics like satin, you must use a heat-seal backing or extra stabilization to keep the edges clean.
5. How wide should the final satin border be?
For a professional and durable finish, the satin border should be between 3.0mm and 4.0mm wide. This ensures that the raw edges of the appliqué fabric are completely covered and won’t fray after washing.