How to Fix Embroidery Push Problems
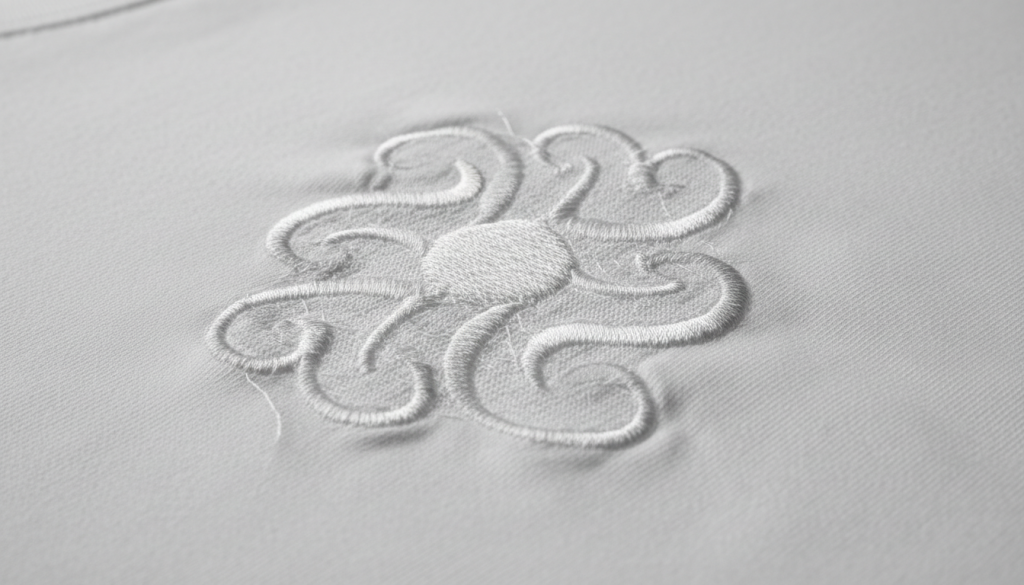
You ran the design. The stitching looks tight. But the fabric around it is bunching, rippling, and pushing outward. You are dealing with too much push in embroidery, and it is one of the most frustrating problems in production.
The good news: it is almost always fixable without changing your machine. The cause is in the file, the settings, or the hooping setup.
What Does “Too Much Push” Actually Mean?
Push in embroidery happens when the stitches physically shove the fabric outward as the machine sews. The design itself may look fine, but the surrounding fabric gathers, ripples, or puckers away from the stitched area.
This is different from pull where fabric gets dragged inward. Push pushes outward. Both are digitizing problems, but they have different causes.
Cause 1: Pull Compensation Is Set Too High
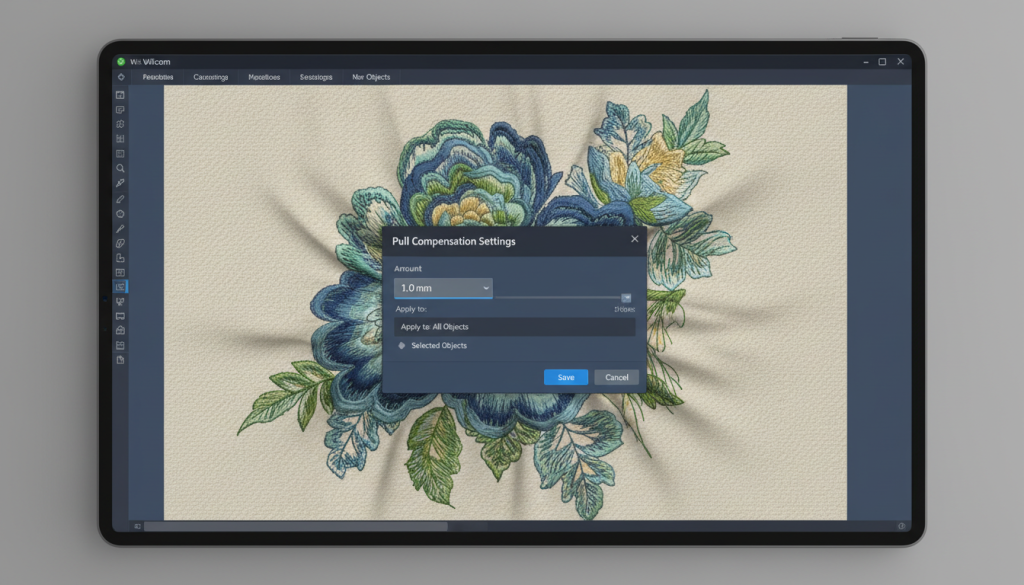
Pull compensation is a setting in your digitizing software that adds a tiny amount of extra width to each stitch column to compensate for how fabric naturally pulls inward when stitched.
When this value is set too high, the stitches become wider than they should be. They overlap each other and push the surrounding fabric outward. The result is exactly what you are seeing a bloated, distorted design with pushed fabric around it.
Pro Tip: For most standard fabrics, pull compensation should sit between 0.3mm and 0.5mm. Values above 0.6mm are almost always too aggressive for left chest or cap logos.
If your embroidery digitizing file was built with excessive pull compensation, the file itself needs to be corrected resizing the design will not fix it.
Cause 2: Too Much or Wrong Underlay
Underlay stitches are the foundation layer that goes down before your top stitching. They stabilize the fabric and give the top stitches something to grip onto.
But when the underlay is too dense, uses the wrong type, or has too many passes, its over-compresses the fabric before the top stitching even starts. By the time the main fill or satin stitches come down, the fabric is already being forced outward.
Too much underlay = built-in push. Your digitizing services file should be reviewed and the underlay reduced or changed to a lighter type like edge walk or single zigzag for most standard designs.
Cause 3: Soft Fabric with a Weak Stabilizer
Stretchy, soft, or thin fabrics need strong support. If your stabilizer is too light for the fabric you are hooping, the fabric shifts and pushes around as the machine stitches. The stitches themselves may be perfectly digitized, but the fabric has nowhere stable to anchor.
Fabric type and stabilizer must match. For knits and stretch fabrics, use a firm cutaway stabilizer. For light wovens, a medium cutaway still beats a tearaway for push control. Adding a topping on the surface also helps keep stitches sitting flat instead of pushing into the fabric pile.
How to Fix Too Much Push: Step-by-Step
Work through these steps in order:
Step 1: Check pull compensation in the file. Open the file in your software and look at the pull compensation value. If it is above 0.5mm on standard fabric, reduce it and test again.
Step 2: Review your underlay. Look at underlay type and density. For most flat fills and satin columns on standard apparel, a single edge walk or light zigzag underlay is enough.
Step 3: Match your stabilizer to your fabric. Soft, stretchy, or thin fabrics need cutaway backing. Never use a tearaway on knit fabrics if push is a recurring problem.
Step 4: Check your hoop tension. The fabric should be drum tight in the hoop, not loose. Loose hooping allows the fabric to shift with every needle strike, adding to the push effect.
Step 5: Test on scrap first. Always run a test stitch on the same fabric type before running on the final garment.
DIY Fix vs. Professional Re-Digitizing
You can adjust pull compensation and hooping yourself if the issue is minor. But if the push is significant and comes from a poorly built file wrong underlay structure, stitch direction errors, or over-built density the file needs to be professionally re-digitized, not just adjusted at the machine.
At Sassy Digitizing, we specialize in rebuilding files that have push, pull, or density problems. Every file we deliver is tested for production quality before it reaches you.
Summary
Too much push in embroidery almost always traces back to one of three things: pull compensation set too high, over-built underlay, or a fabric and stabilizer mismatch. Work through each cause, test on scrap fabric, and if the file itself is the root problem, get it re-digitized properly.
If you need your file reviewed or rebuilt, send it to Sassy Digitizing we will find the problem and fix it fast.
Frequently Asked Questions
What causes too much push in embroidery? The most common causes are pull compensation set too high, excessive or wrong underlay stitching, and soft fabrics hooped with inadequate stabilizer.
Can I fix embroidery push without re-digitizing? Sometimes yes if the issue is hooping tension or stabilizer choice. But if the push comes from the file itself (pull compensation or underlay settings), the file needs to be corrected.
What pull compensation setting should I use? For most standard apparel fabrics, pull compensation between 0.3mm and 0.5mm is appropriate. Go higher only for very stretchy knit fabrics and always test first.
About the Author
Keith Blair | Senior Quality Control (HOD)
Keith Blair serves as Head of Department for Quality Control at Sassy Digitizing with 12 years of commercial embroidery experience. He specializes in stitch density, pull compensation, underlay structure, and production-ready file testing across all fabric types and machine formats.