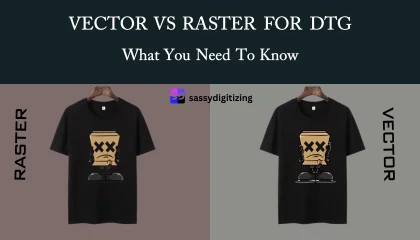
Vector vs Raster for DTG: What You Need to Know
When you step into the world of custom apparel, specifically Direct to Garment (DTG) printing, you are suddenly hit with a lot of technical jargon. The most common debate? Vector vs. Raster. While it might seem like a small detail for a graphic designer, for a printer, it is the difference between a satisfied customer and a wasted t-shirt.
At Sassy Digitizing, we see hundreds of files every week. We know that the beauty of a DTG print lies in its ability to capture detail, but that detail is only as good as the file you start with. Let’s break down everything you need to know about these two formats and how they impact your final product.
What Exactly is a Raster Image?
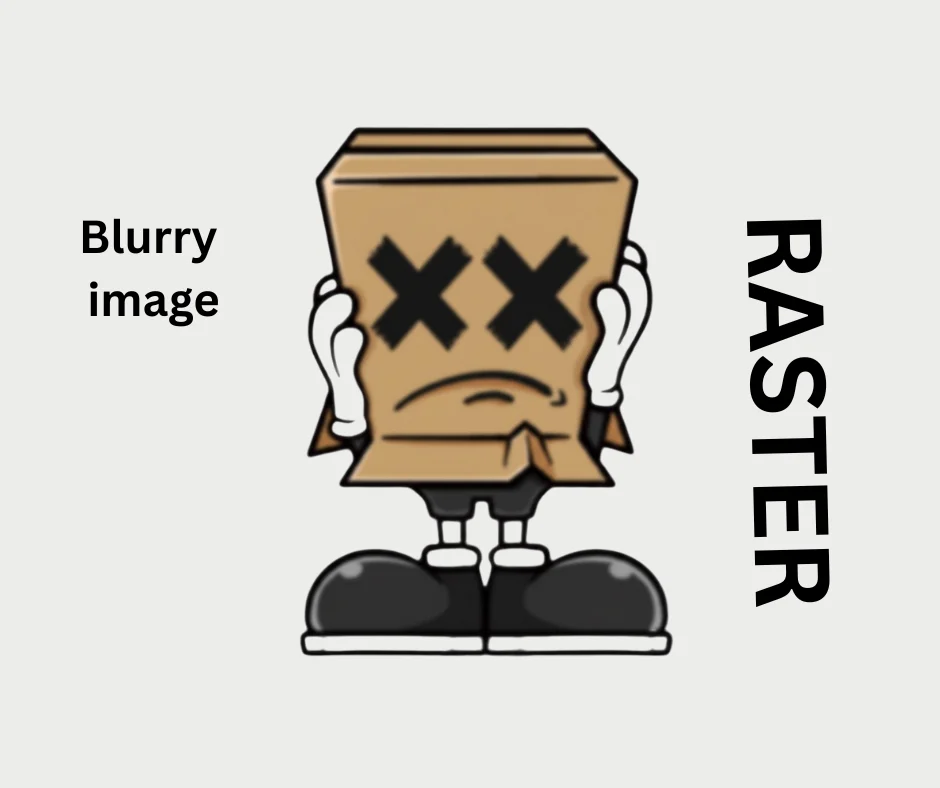
Raster images are what most people are familiar with. When you take a photo with your phone or download an image from the internet, you are looking at a raster file. These are made up of a fixed grid of colored pixels.
The main advantage of Raster for DTG is its ability to handle “photorealistic” designs. If your design has complex shadows, skin tones, or thousands of different colors blending into each other, Raster is actually the preferred choice. However, the limitation is resolution. If your file is 72 DPI (dots per inch), it might look fine on a phone screen, but when printed on a shirt, it will look “blocky” or blurred. For DTG, a Raster file must be high resolution ideally 300 DPI at the final print size to look professional.
The Magic of Vector Art
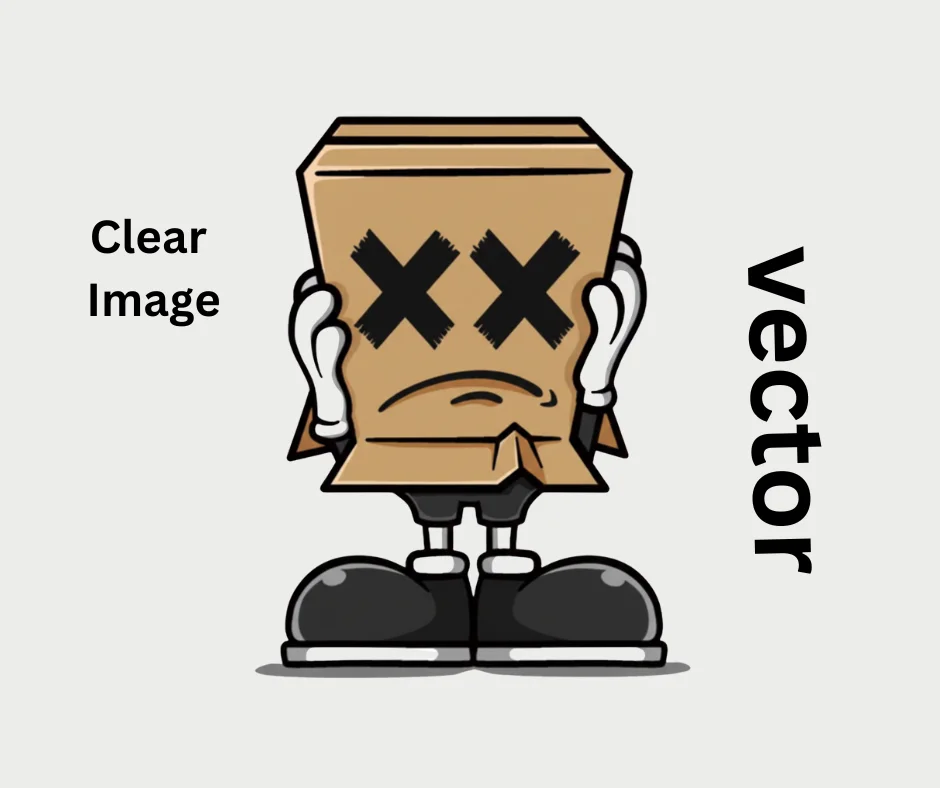
Vector art works on a completely different logic. Instead of pixels, it uses mathematical formulas to create points, lines, and curves. Because it is based on math rather than a fixed grid, a vector file has no resolution limits. You can scale a vector logo from a tiny business card to a massive storefront sign, and the edges will remain perfectly crisp and sharp.
For DTG printing, Vector is the king of logos, typography, and sharp-edged illustrations. When you use a vector file, the printer knows exactly where the edge of a letter starts and stops. This results in a “retail-ready” look that feels clean and high end. Common vector formats include AI, EPS, and SVG.
Why DTG Operators Prefer Certain Formats
DTG, the ink is sprayed through tiny nozzles. If the artwork is blurry (common in low-quality rasters), the printer tries to replicate that blurriness by mixing light ink around the edges. This often results in a “halo” effect or a design that looks muddy.
By using a clean vector file, or a very high-resolution raster with a transparent background, you ensure that the white underbase (the layer of white ink printed under colors on dark shirts) is perfectly aligned. Sassy Digitizing experts always recommend checking your edges; if you see “stairs” or jagged steps when you zoom in on your screen, that is exactly how it will look on the t-shirt.
The Sassy Digitizing Standard for Artwork
We often have clients come to us with a low-quality PNG (Raster) that they want to print. Our first piece of advice is almost always: “Let’s vectorize this.” Converting a shaky raster into a clean vector ensures that your brand’s identity is protected. It allows the DTG machine to do what it does best print vibrant, sharp, and durable designs.
Whether you are a hobbyist or running a large-scale print shop, taking the time to understand your file types will save you time, money, and fabric. If you are ever in doubt, remember that it is always better to start with a vector and convert to raster if needed, rather than trying to “fix” a low-quality raster file.
Conclusion
Vector and Raster both have their place in the DTG world. Raster is for the art, the photos, and the gradients. Vector is for the brand, the logo, and the sharp lines. Knowing when to use which and ensuring they are optimized is what separates the pros from the amateurs.
About the Author
Keith Blair | Senior Quality Control (HOD)
Keith Blair serves as the Head of Department for Quality Control at Sassy Digitizing, bringing 12 years of commercial embroidery experience to the team. His role focuses on the technical mechanics of digitizing specifically adjusting stitch densities and lengths to suit different fabric types. A specialist in advanced production methods, Keith oversees the digitizing standards for complex 3D puff, appliqué, and small lettering projects. He ensures that every file is tested for efficiency and run-ability before it reaches the customer, bridging the gap between digital design and physical production.