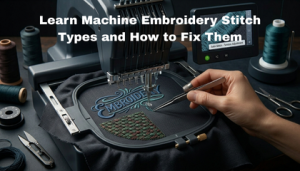
The Bridge Between Art and Stitching
Embroidery is an art form that has evolved from hand-stitching to high-tech machine precision. However, a common wall that many creators hit is the technicality of file formats. You might have a stunning logo in a JPG or PNG format, but your embroidery machine—specifically if it’s a Brother or Baby Lock—doesn’t “see” pixels. It sees stitches.
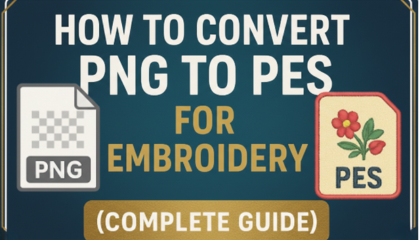
To bring your vision to life, you must convert designs to PES format. This process, known as digitizing, is the most crucial step in the embroidery workflow. In this massive guide, we will dive deep into every aspect of PES conversion, from software choices to technical parameters that ensure your needle never breaks and your fabric never puckers.
Understanding the PES Format: Why It Matters

1. What exactly is a PES File?
A PES file is a proprietary file format developed by Brother. It is a “machine-readable” file. While a regular image file (like a PNG) tells a screen which colors to display, a PES file tells an embroidery machine:
Where to move the hoop (X and Y coordinates).
When to drop the needle.
When to trim the thread.
Which color comes next in the sequence.
2. Why PES for Brother and Baby Lock?

Every machine brand has its “native tongue.” For Tajima, it’s .DST; for Husqvarna, it’s .VP3. For Brother, .PES is the language of precision. Using the native format ensures that the machine understands the “trim” and “jump” commands perfectly, leading to a much cleaner finish.
Essential Requirements for a High-Quality Conversion
Before you start the conversion, you need the right toolkit. Without these, your PES file might look okay on the screen but fail on the fabric.
1. Compatible Digitizing Software
You cannot create a PES file in Photoshop or Canva. You need specialized software:
Wilcom Embroidery Studio: The “Gold Standard” for professionals. It offers the best control over stitch types.
Hatch Embroidery: Designed by Wilcom but made user-friendly for home businesses.
Brother PE-Design: The official software from Brother, which naturally handles PES versions perfectly.
Ink/Stitch: A free, open-source plugin for Inkscape (Best for those on a budget).
2. Input File Quality
The “Garbage In, Garbage Out” rule applies here.
Vector Files (AI, SVG, EPS): These are the best for conversion because they have clean lines that the software can easily turn into stitch paths.
High-Res Raster (300 DPI JPG/PNG): If you don’t have a vector, make sure your image is sharp. Blurry edges lead to messy stitching.
Step-by-Step Guide: How to Convert Designs to PES Format
Step 1: Preparing and Cleaning the Artwork
Don’t just import and click. Clean up your design first. Remove gradients (which are hard to stitch) and simplify small details that are less than 1mm. If a detail is too small, the needle will just create a hole in your fabric.
Step 2: Choosing the Digitizing Method
Auto-Digitizing: Most software offers an “Auto-Stitch” feature. Use this ONLY for very simple shapes like circles or squares.
Manual Digitizing: This is where you manually trace the design. This allows you to choose the Stitch Direction. For example, a leaf looks better with a diagonal satin stitch, while a sky looks better with a horizontal tatami fill.
Step 3: Setting the “Foundation” (Underlay)`
Underlay is the most ignored part of PES conversion. These are the stitches that go down before the visible design. They act like a foundation for a house, stabilizing the fabric and preventing it from shifting.
Step 4: Adjusting Pull Compensation
Fabric is flexible. As the needle pulls the thread, the fabric “pushes” and “pulls.” If you don’t adjust for this, your circles will look like ovals. A professional PES file always has built-in Pull Compensation.
Step 5: Exporting the Correct PES Version
Brother has updated the PES format many times (Version 1 to 11). If you have an older machine (like a Brother PE770), it might not read Version 11. Always check which version your machine supports before saving.
Common Mistakes to Avoid in PES Conversion
Too Much Density: Beginners think more stitches mean better quality. False! Too many stitches will make the embroidery feel like a “bulletproof vest” and can break your machine’s timing.
Incorrect Hoop Size: If your design is 10.1cm and your hoop is 10cm, the machine will not show the file. Always set your hoop size in the software before converting.
Ignoring Jump Threads: A poorly converted PES file will have “spider webs” (jump threads) all over it. Professional digitizing minimizes these jumps.
Why Choose a Professional Service in the USA?
Many embroidery business owners realize that their time is better spent stitching and selling rather than fighting with software for 4 hours.
If you want a flawless result, it’s often best to hire the best embroidery digitizing company in United State. Professionals don’t just “convert” the file; they optimize it. They look at your fabric type (is it a towel? a cap? a hoodie?) and adjust the PES file’s density and underlay specifically for that material.
At Sassy Digitizing, we’ve seen every mistake in the book, and we know how to fix them. Our files are designed to run fast, with zero thread breaks, saving you money on every production run.
Frequently Asked Questions (FAQs)
Q: Can I convert a photo of my pet to a PES file?
A: Yes, but this requires a special technique called “Photo-Stitch” or highly detailed manual digitizing. It’s not a simple one-click conversion.
Q: Is there a free way to convert to PES?
A: Yes, Ink/Stitch is free. However, it has a steep learning curve and lacks the advanced optimization features of paid software.
Q: Why does my machine say “File Format Not Supported”?
A: This usually happens if the USB is too large (use 8GB or smaller), the file name is too long, or the PES version is too new for your machine.
Q: How can I get a free PES conversion to test the quality?
A: We offer your first logo conversion for free! Just send us your artwork, and we will provide a production-ready PES file so you can see the “Sassy Quality” for yourself.
About the Author
Keith Blair | Senior Quality Control (HOD) With over 12 years of hands-on experience in the commercial embroidery industry, Keith Blair leads the Quality Control team at Sassy Digitizing. Keith has a deep understanding of the technical “mechanics” of PES files. He ensures that every design—from 3D puff to delicate small lettering—is optimized for high-speed production on Brother machines. His goal is simple: Create files that stitch perfectly the first time, every time.