Pfaff embroidery machines are known for their sophisticated engineering and the ability to handle intricate designs. However, unlike a simple printer, you cannot just send a JPEG or a PNG file directly to these machines. To see your logo come to life on fabric, you need to go through a process called “Embroidery Digitizing.”
Whether you are a hobbyist or running a small business, understanding how to properly convert your files will save you from thread breaks, broken needles, and ruined garments.
Understanding Pfaff-Specific File Formats
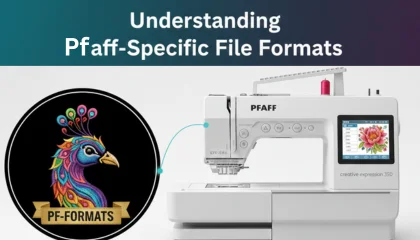
Before you start converting, you must know what your machine is looking for. While some machines accept multiple formats, Pfaff machines primarily work with:
.VP3: This is the most modern and preferred format for almost all newer Pfaff models.
.VIP: An older Pfaff format, still widely used for legacy machines.
.PCS: Used for some very early Pfaff home embroidery models.
If you try to plug in a .DST (Tajima) or .PES (Brother) file, your Pfaff machine might read it, but you may lose important data like specific thread colors or hoop positions. Always aim for .VP3 for the best results.
Step 1: Preparing Your Artwork
The conversion process always starts with a clean image. If your logo is blurry or has too many gradients, the embroidery software will struggle to create clean paths.
Before converting, make sure your logo has solid colors and clear outlines. If your image is low-resolution, it is highly recommended to convert it into a vector art file first. This ensures that when the stitches are generated, they follow smooth lines rather than jagged pixels.
Step 2: Using Digitizing Software
To convert a logo, you will need embroidery software like 6D, Premier+ 2, or MySewnet (which are specifically designed to work well with Pfaff).
Import: Load your image file (JPEG/PNG/Vector).
Scale: Set the size according to your Pfaff hoop (e.g., 120mm x 120mm).
Digitize: You can use “Auto-Digitizing” features, but for a professional look, manual digitizing is better. Manual work allows you to set the stitch direction and density.
Export: Select “Save As” or “Export” and choose the .VP3 format.
Step 3: Setting the Correct Stitch Density
Pfaff machines are very precise, which means they can handle high stitch counts, but you shouldn’t overdo it. For standard cotton fabric, a density of 0.4mm is usually perfect. If you are stitching on delicate silk or heavy denim, you will need to adjust these settings in your software before exporting the file.
Step 4: Transferring the File to Your Machine
Once you have your .VP3 file ready:
Copy the file to a USB stick (ensure it is formatted to FAT32, which most Pfaff machines require).
Avoid using long file names or special characters (like @, #, $) as some Pfaff models might not show the file on the screen.
Plug the USB into your machine and select the design from the menu.
Why “Auto-Conversion” Often Fails
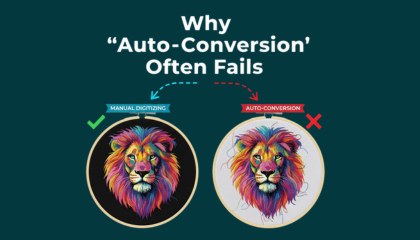
Many people try to use “Free Online Converters.” While they might give you a .VP3 file, these tools don’t understand the “mechanics” of embroidery. They don’t know where to put the “Tie-offs” (nodes that prevent unravelling) or how to manage the “Push and Pull” of the fabric.
This is why professional digitizing is essential for high-end machines like Pfaff. A file that is poorly converted will cause the machine to “bird-nest” or shift the alignment of the logo.
Get a Professional Start for Free
If you have a Pfaff machine and a logo that you just can’t get right, let us help. At Sassy Digitizing, we understand the specific requirements of Pfaff machines. To show you the difference between a bot-generated file and a hand-digitized masterpiece, we offer your first logo conversion for free. Send us your design, and we will provide a production-ready .VP3 file that will run smoothly on your machine from the first stitch to the last.
About the Author
Keith Blair | Senior Quality Control (HOD) Keith Blair serves as the Head of Department for Quality Control at Sassy Digitizing, bringing 12 years of commercial embroidery experience to the team. His role focuses on the technical mechanics of digitizing, specifically adjusting stitch densities and lengths to suit different fabric types.
A specialist in advanced production methods, Keith oversees the digitizing standards for complex 3D puff, appliqué, and small lettering projects. He ensures that every file is tested for efficiency and run-ability before it reaches the customer, bridging the gap between digital design and physical production.