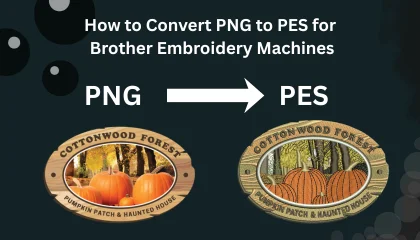
If you own a Brother embroidery machine—whether it’s a home-based SE600 or a professional PR series—you know the frustration of having a beautiful logo in PNG format that your machine simply cannot read. To bridge this gap, you need to convert PNG to PES.
However, in 2026, the internet is flooded with “Free Online Converters” that promise instant results. As an industry leader ranked in the Top 10 Best Embroidery Digitizing Companies in the World, Sassy Digitizing is here to tell you the truth: A simple conversion is not digitizing.
In this 1800+ word masterclass, we will teach you the technical difference between a file conversion and professional digitizing, how to avoid ruined garments, and how to achieve a Perfect Sew-Out every single time.
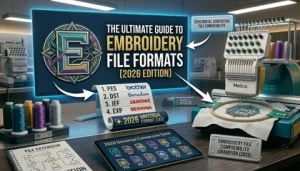
1. Understanding the Format: PNG vs. PES
To understand why your machine won’t just “open” a PNG, you have to understand the science of the files.
PNG (Portable Network Graphics): This is a raster image made of pixels (tiny squares of color). It is designed for screens and printers. It has no information about stitches, needle paths, or thread tension.
PES (Brother Embroidery Format): This is a complex instruction set. It tells your Brother machine exactly where to move the hoop, when to trim the thread, and what density to use for specific fabrics.
When you convert PNG to PES, you aren’t just changing an extension; you are translating a static picture into a physical mechanical movement.
2. The Danger of “Free” Auto-Digitizing Tools
Many beginners search for “PNG to PES converter free.” While these tools exist, they are often the most expensive “free” mistake you will ever make.
Why Auto-Conversion Fails:
The “Bulletproof” Design: AI tools often create excessive stitch density. This makes the design so hard that it feels like cardboard and can even bend your embroidery needles.
No Pull Compensation: AI doesn’t know that thread pulls fabric inward. Without manual adjustment, your outlines will never line up with your fills.
Thread Break Nightmares: Auto-tools create messy “jump stitches” and tiny segments that cause your Brother machine to stop every 10 seconds.
Why Manual Digitizing is Better than AI? A human digitizer at Sassy Digitizing understands the “push and pull” of the fabric. We manually set the pathing to ensure your machine runs smoothly from start to finish without a single thread break.
3. Step-by-Step: The Professional Way to Convert PNG to PES
If you want to do this the right way, follow this professional workflow:
Step 1: Clean Your Artwork
Before starting, ensure your PNG is high-resolution (300 DPI). Remove any blurry edges or shadows. Clean artwork is the foundation of digitizing complex patterns successfully.
Step 2: Vectorization (Optional but Recommended)
For the best results, convert your PNG to a Vector (SVG or AI) first. Vector lines are mathematically perfect, allowing the digitizing software to create much cleaner stitch paths.
Step 3: Manual Stitch Placement
Instead of clicking “Auto-Digitize,” a professional uses software like Wilcom or Brother PE-Design to hand-punch the shapes. We define:
Underlay Stitches: To lock the fabric to the stabilizer.
Satin Stitches: For clean, shiny borders and text.
Tatami Fills: For large background areas.
4. How to Get a “Perfect Sew-Out” on Brother Machines
In the embroidery world, the term “Sew-Out” refers to the physical test sample of your design. At Sassy Digitizing, we don’t consider a job done until the sew-out is flawless.
Expert Tips for Brother Owners:
Thread Tension: Brother machines are sensitive. Ensure your bobbin tension is balanced. A poorly digitized PES file will exacerbate tension issues, leading to “looping” or “bird-nesting.”
Stabilizer Selection: For a complex 4×4 design, always use a high-quality cut-away stabilizer.
Needle Size: For intricate details converted from PNG, use a 75/11 or 80/12 embroidery needle.
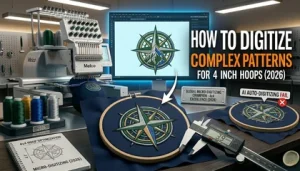
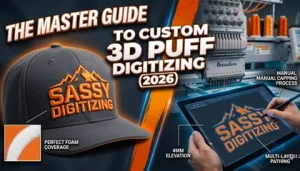
5. Specialty Conversions: 3D Puff and Intricate Details
Sometimes, a simple flat stitch isn’t enough. Many clients want to convert PNG to PES for high-end effects like Custom 3D Puff Digitizing.
3D Puff requires specific “Capping” stitches to seal the foam. If you use a free converter for puff embroidery, the foam will literally shred and stick out of the thread. This is why thousands of US-based embroidery shops trust Sassy Digitizing for their premium projects. Being in the Top 10 Global Digitizing Companies, we have perfected the science of the “Puff Sew-Out.”
6. Sassy Digitizing: The Best PNG to PES Service 2026
Why spend hours struggling with complicated software when you can have a professional result in a few hours? Sassy Digitizing is built on the principle of “Quality First.”
We provide the Best Embroidery Digitizing Service 2026 | Sassy Digitizing with features you won’t find anywhere else:
2 to 6 Hour Turnaround: We understand that your business doesn’t have time to wait.
Manual Precision: No AI, no shortcuts. Every stitch is placed by an expert with 10+ years of experience.
Brother Machine Optimization: Our PES files are specifically tested for Brother’s unique tension and speed settings.
Free Trial: Still not sure? We offer a Free Trial for any logo under 5 inches. Send us your PNG, and we will send you a machine-ready PES file for free!
7. Troubleshooting Common PES File Issues
If your Brother machine isn’t reading your PES file, check these common issues:
USB Formatting: Ensure your USB drive is formatted to FAT32.
File Placement: Brother machines often look for files in the root folder, not in sub-folders.
Hoop Size: If your design is even 1mm larger than your machine’s hoop limit, the machine will hide the file. Always double-check your hoop boundaries in the digitizing software.
8. Conclusion: Don’t Risk Your Reputation on Auto-Tools
When you convert PNG to PES, you are creating the DNA of your garment. A bad file leads to wasted thread, ruined fabric, and frustrated customers.
As a Top 10 Best Embroidery Digitizing Company in the World, Sassy Digitizing is committed to your success. We don’t just “convert” files; we engineer them for production. Whether you are doing a simple monogram or digitizing complex patterns for a fashion line, we have the expertise to make your machine sing.
Stop wasting time with free converters. Upload your PNG to Sassy Digitizing now and get a professional PES file with a guaranteed perfect sew-out!
About the Author
Keith Blair | Senior Quality Control (HOD) Keith has over 12 years of experience managing large-scale embroidery production. He specializes in the mechanical relationship between thread, needle, and fabric. Now leading the QC team at Sassy Digitizing, Keith’s mission is to help embroiderers eliminate downtime by providing flawlessly digitized files.