High stitch count embroidery slows down your machine, and it happens more often than most people realize. If your embroidery runs are taking too long, two problems are almost always responsible: too many stitches and too many thread color changes.
First, these two issues waste time on every single piece. Moreover, they increase thread breaks, wear out your machine faster, and reduce your profit on every order. Fortunately, both problems are fixable, and the fix starts at the digitizing stage, before the design ever touches your machine.
Why High Stitch Count Kills Your Production Speed
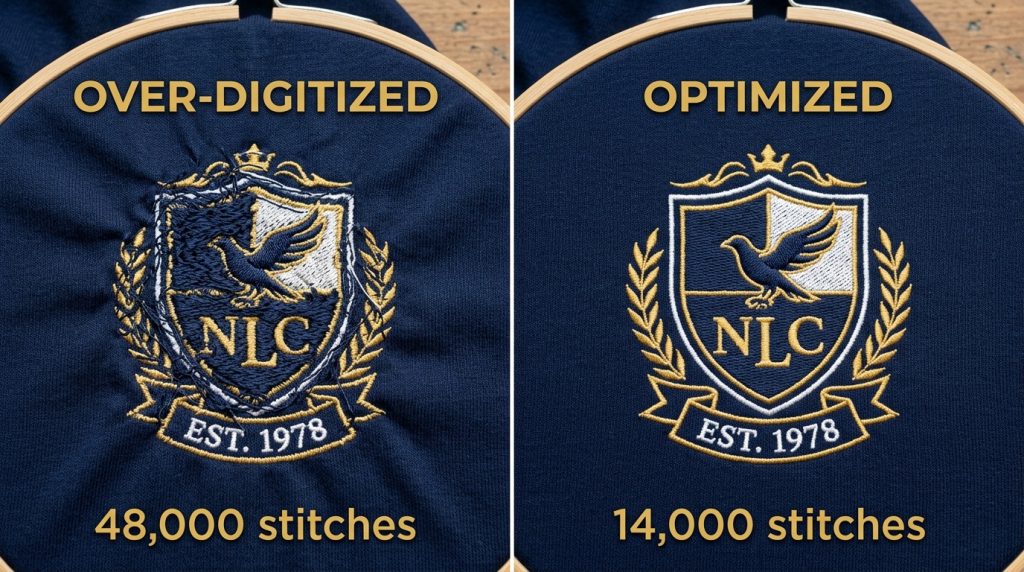
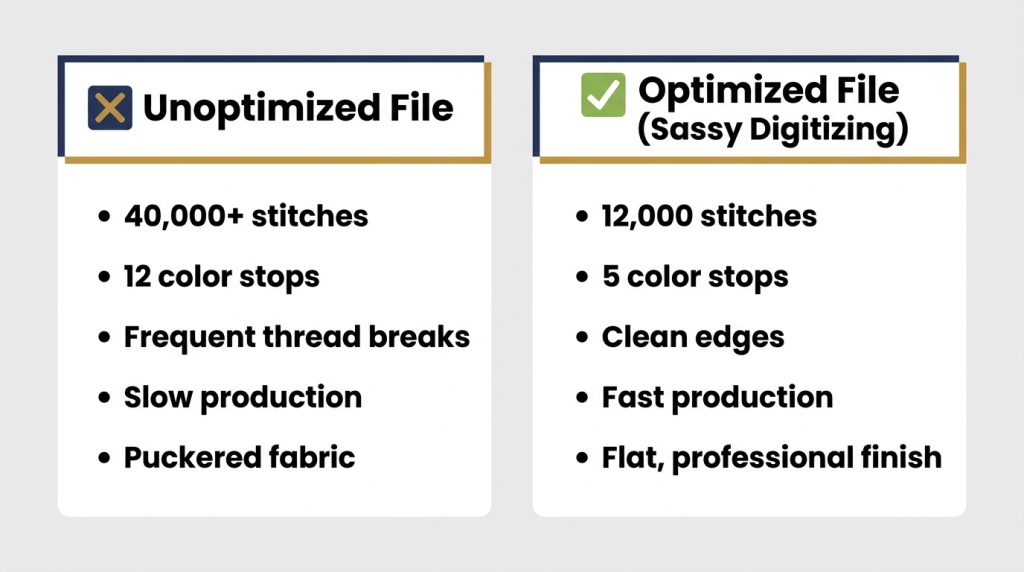
Every stitch your machine sews takes time. A poorly digitized design can run 30,000 to 50,000 stitches for a logo that should only need 12,000. That’s not better quality that’s wasted time and extra thread pulling on your fabric.
High stitch counts happen when a digitizer overlap fills unnecessarily, uses the wrong stitch type for a shape, or doesn’t account for the actual size of the design. The result is a file that runs slow, puckers the fabric, and breaks thread more often.
Why Too Many Thread Colors Slow Everything Down
Most home and commercial embroidery machines stop completely every time a thread color changes. You or your operator must manually re-thread and restart. On a design with 12 color changes, that can add 15 to 20 minutes to a single piece.
For bulk orders, this time multiplies fast. 50 pieces with 12 color stops each equals hundreds of unnecessary interruptions in a single production run.
Step 1: Audit Your Stitch File Before Production
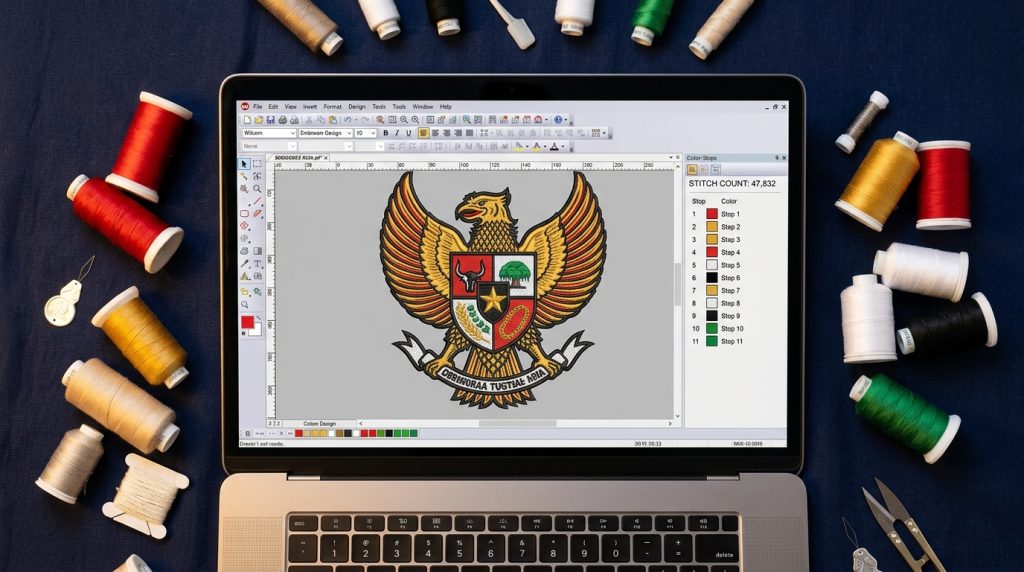
Before you load any design onto your machine, open the file in your embroidery software and check two things: the total stitch count and the color sequence list. If your left-chest logo is showing over 15,000 stitches or more than 6 color stops, it needs to be reviewed. These numbers alone tell you the file is not production-optimized.
Pro Tip: A standard left-chest logo should run between 8,000 and 14,000 stitches. A jacket back can run 25,000 to 40,000 anything above that needs a second look.
Step 2: Simplify Your Color Sequence
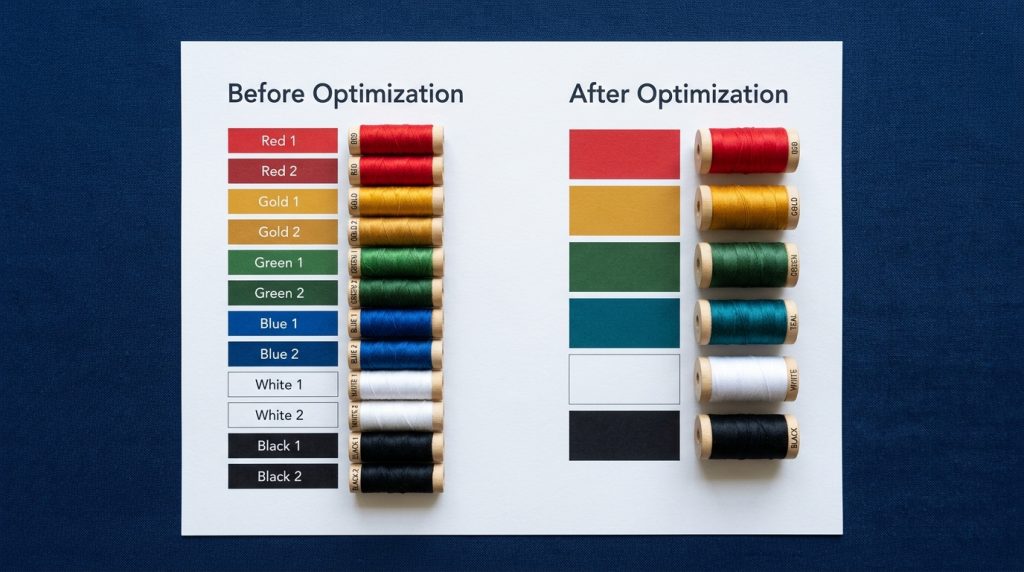
A skilled digitizer can merge stitching of the same color that appears in different parts of the design, so the machine sews all of one color in one pass, instead of stopping and restarting. This is called color consolidation, and it is one of the fastest ways to cut your production time in half.
For example, if your logo has gold outlines around three different shapes, a good file sews all three outlines in one single color run not three separate stops.
Step 3: Choose the Right Stitch Type for Each Area
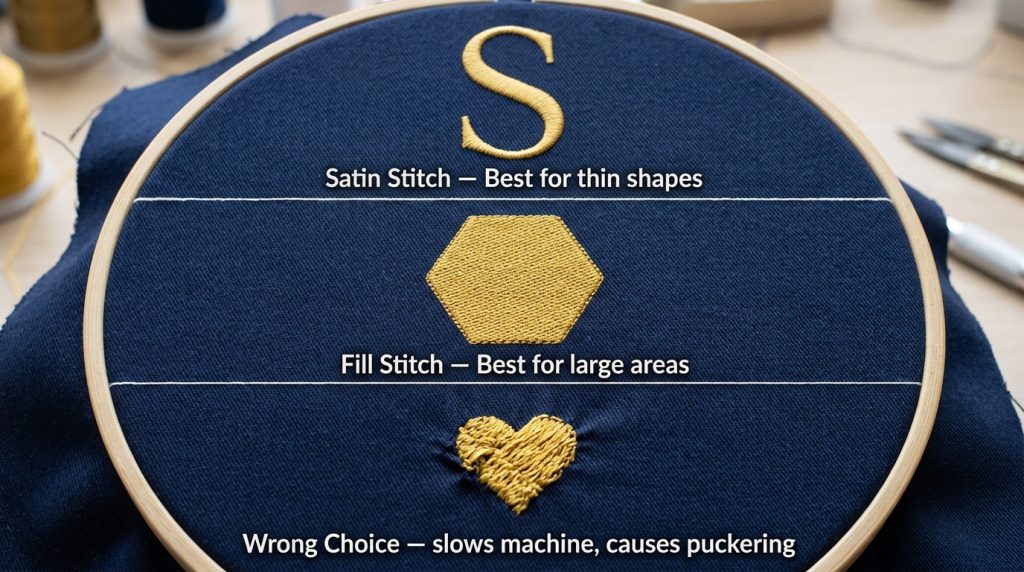
Using a satin stitch where you should use a fill stitch or vice versa is one of the most common causes of inflated stitch counts. Here is the basic rule:
- Satin stitch: Best for thin shapes, borders, and lettering under 8mm wide
- Fill/Tatami stitch: Best for large solid areas
- Running stitch: Best for fine details, thin outlines, and underlay only
Using the wrong stitch type on the wrong shape can easily double the stitch count of a file without improving the result at all.
Step 4: Reduce Unnecessary Underlay
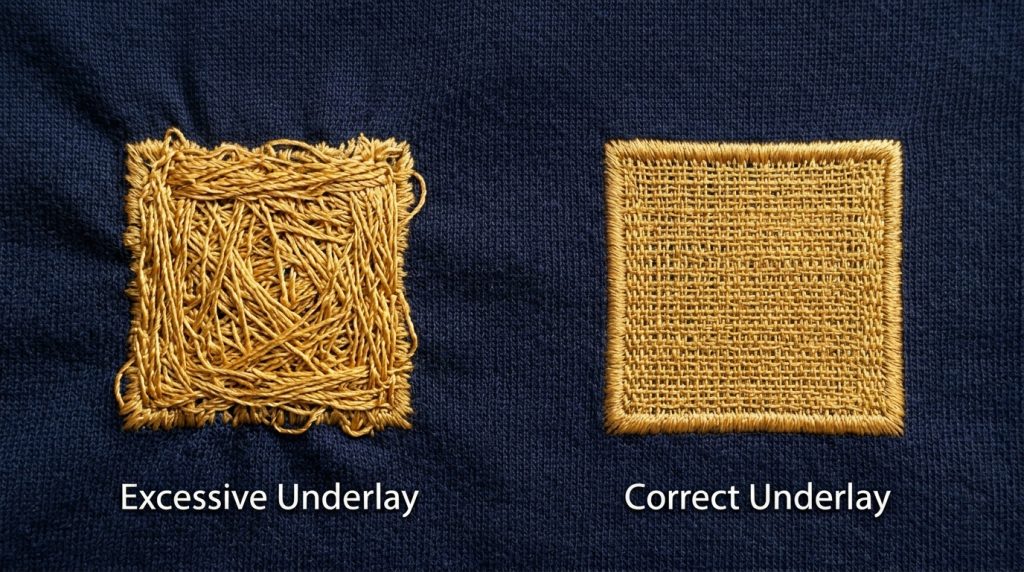
Underlay stitches are laid down before the main design to stabilize the fabric. They are essential but too much underlay silently adds thousands of stitches to your file. A well-digitized design uses only the underlay that is actually needed for that specific fabric type.
For most standard fabrics, a single edge walk underlay or zigzag underlay is enough. Stacking three or four underlay layers on a medium-weight fabric just adds run time with no visible benefit.
Step 5: Get Your File Professionally Re-Digitized
If your current file is already outdated or was auto-converted from a PNG, there is no amount of machine-side adjustment that will fix a poorly built stitch file. The most effective solution is to have the design manually re-digitized from scratch by a professional.
At Sassy Digitizing, every file is hand-built using Wilcom software by digitizers who understand exactly how different fabrics, stitch types, and densities interact. We don’t auto-convert we build each file stitch by stitch to ensure it runs efficiently, looks sharp, and doesn’t waste your production time.
If your logo is blurry or pixelated, our Vector Art Services can clean it up first, so the digitizer has a crisp, clear outline to work from.
DIY Fix vs. Professional Digitizing: What’s the Real Difference?
You can manually reduce colors in your embroidery software and trim a few thousand stitches by hand. But without knowing the exact pull compensation values, underlay rules, and stitch angle logic for your specific design and fabric, you’re guessing.
A professionally digitized file from Sassy Digitizing is built with the production run in mind not just the visual appearance. That means fewer machine stops, less thread waste, faster turnaround per piece, and a final result that holds up after washing.
If you need custom patches alongside your embroidered apparel, our Custom Patches service uses the same production-optimized approach so every patch runs clean and consistent.
Summary
High stitch count and too many color changes are not design features they are digitizing problems. Fixing them at the file level before production starts is the single most effective way to speed up your embroidery output without sacrificing quality.
Whether you need a current file optimized or a new design built from scratch, Sassy Digitizing offers fast, affordable embroidery digitizing services with a standard turnaround of 4 to 6 hours and pricing starting at just $1 per 1,000 stitches.
Send us your artwork today and get a clean, production-ready file that your machine will thank you for.
ABOUT THE AUTHOR
Keith Blair | Senior Quality Control (HOD) Keith Blair serves as the Head of Department for Quality Control at Sassy Digitizing, bringing 12 years of commercial embroidery experience to the team. His expertise covers stitch density calibration, underlay optimization, and production-run efficiency for all fabric types and machine formats.