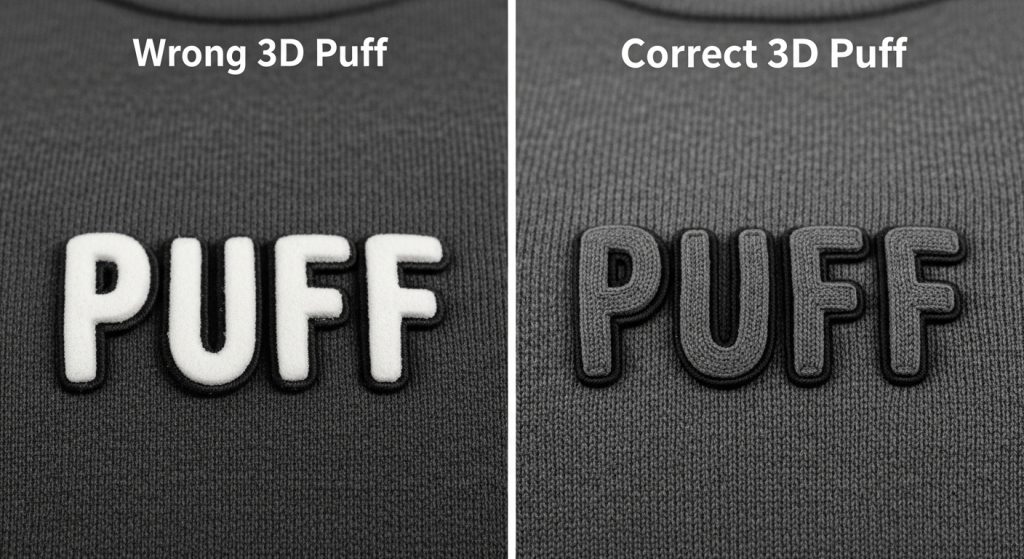
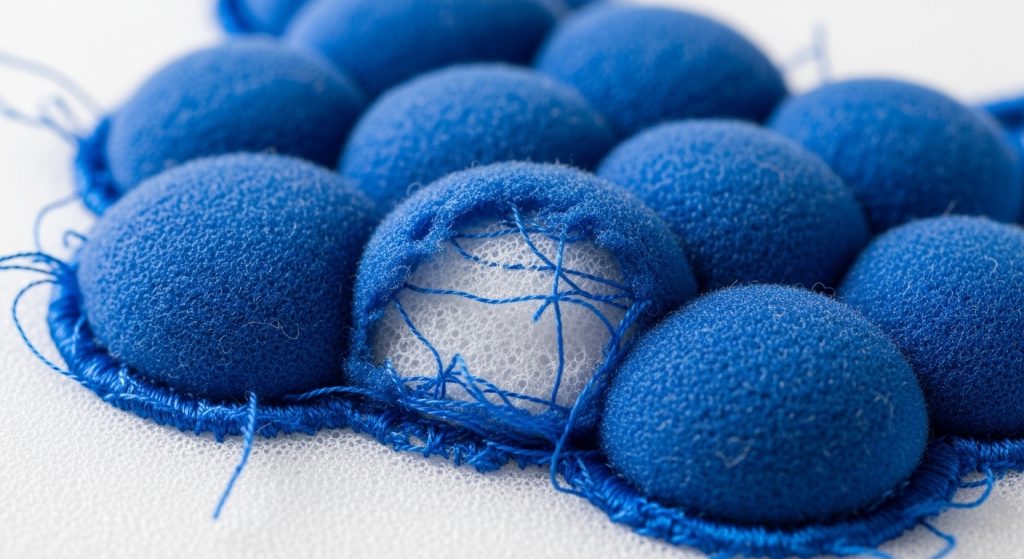
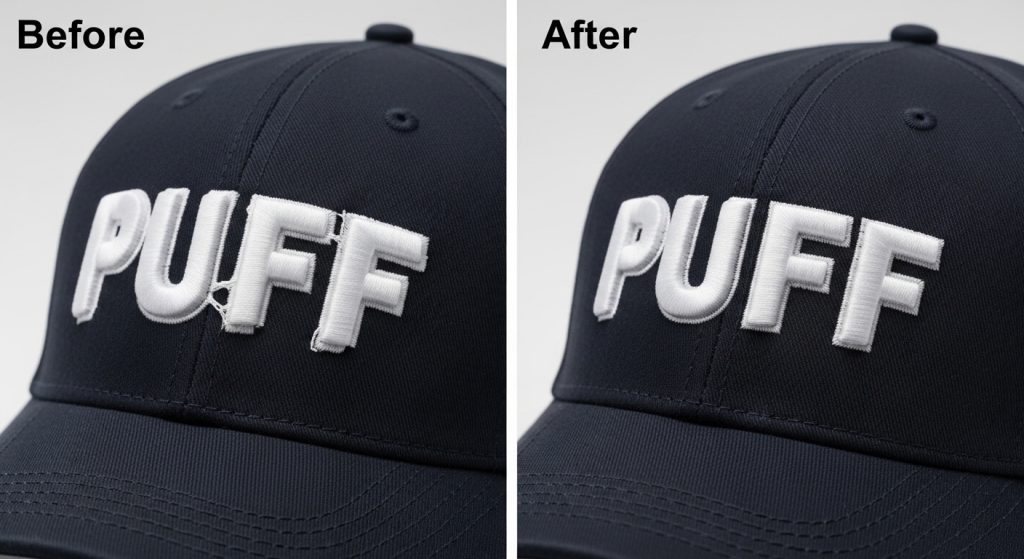
3D puff embroidery gives your designs a bold, raised look that stands out on caps, jackets, and sportswear. But here’s the problem: if your digitized file is missing color stops, the foam stays exposed, the stitches look thin, and the whole design falls apart after a few washes.
This is one of the most common mistakes in 3D puff digitizing, and it happens because the embroidery machine doesn’t pause at critical moments. Without stops, the operator can’t insert foam or trim threads properly, leading to messy, unprofessional results.
In this guide, we’ll show you exactly where to add color stops in your 3D puff files so your designs come out clean, raised, and production-ready every single time.
What Are Color Stops in 3D Puff Embroidery?
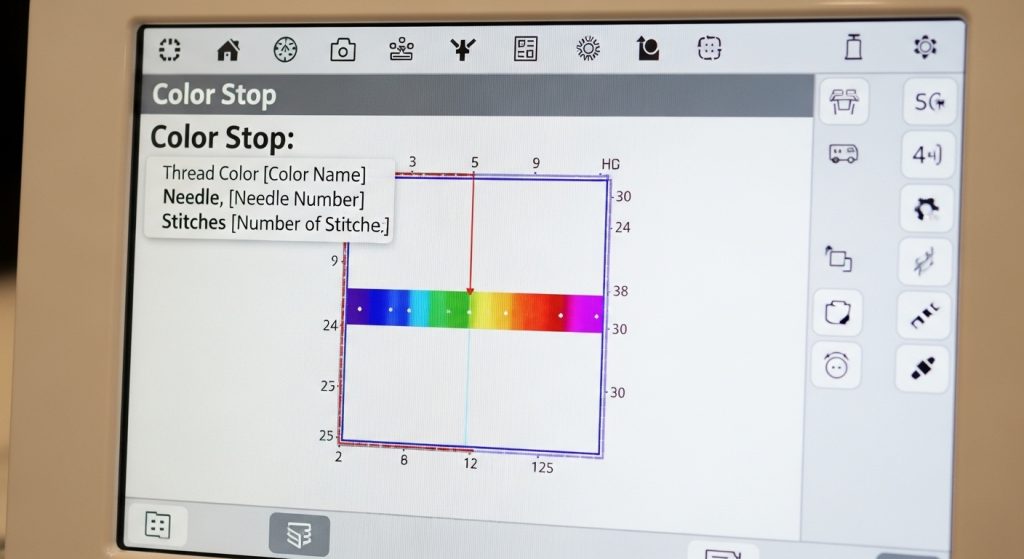
A color stop is a pause command inserted into your embroidery file. When the machine hits a stop, it pauses stitching, allowing the operator to:
- Place foam on top of the underlay stitches
- Trim jump threads before the next color layer
- Check alignment before continuing
Without these stops, the machine runs continuously, which means the foam either gets buried under too many stitches or stays exposed because the capping layer never covers it properly.
Why Missing Stops Happen
Here are the most common reasons digitizers forget to add stops:
- Auto-digitizing software doesn’t add stops by default
- Inexperienced digitizers skip this step to save time
- File conversions lose stop commands when switching formats (DST, PES, etc.)
- Template misuse – copying a flat design and adding foam without adjusting the sequence
The result? Exposed foam, uneven coverage, and designs that look amateur instead of professional.
Step 1: Add a Stop After the Foam Underlay
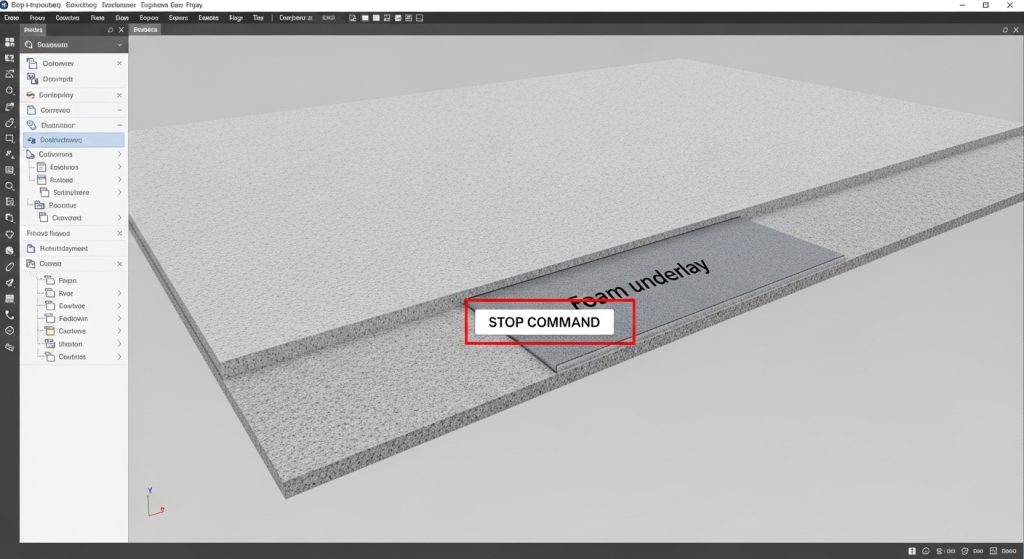
The first stop should come immediately after the foam underlay stitches. This is the layer that holds the foam in place.
Here’s what the sequence should look like:
- Underlay stitches (typically running stitch or zigzag)
- STOP COMMAND ← Insert here
- Satin capping stitches (the raised layer that covers the foam)
When the machine stops, the operator places the foam sheet on top of the underlay. Then the machine continues and stitches the capping layer, which locks the foam underneath and creates the raised effect.
Pro Tip: Use a trim and stop command instead of just a stop. This cuts any loose threads before the operator adds foam, keeping the design clean.
Step 2: Add a Stop After the Capping Stitches
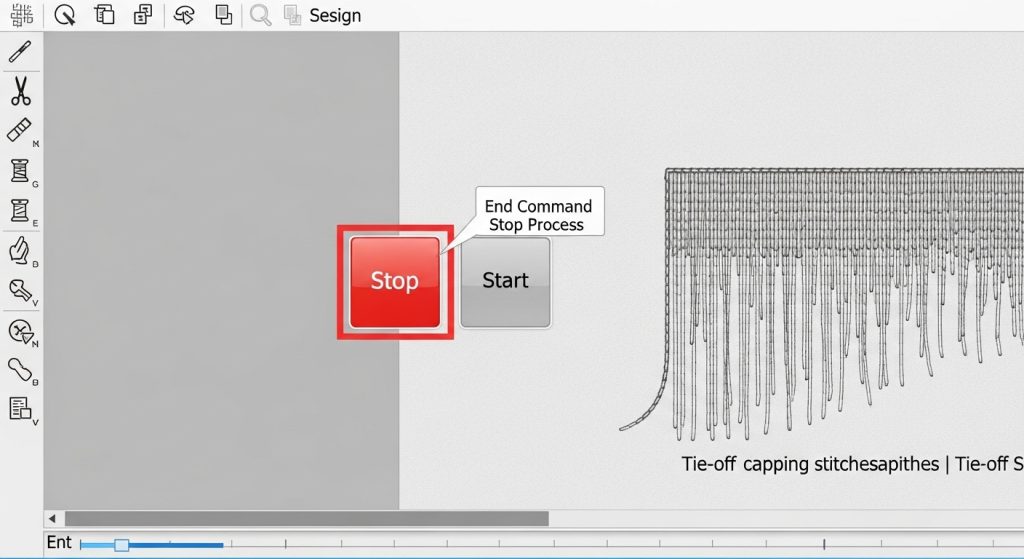
The second stop should come after the satin capping layer. This gives the operator a chance to:
- Remove excess foam that extends beyond the stitched area
- Trim any jump threads before adding borders or detail work
- Inspect the puff quality before moving to the next layer
If you skip this stop and go straight into detail stitching or borders, the foam can shift or bunch up, ruining the final appearance.
Your stitch sequence should now look like this:
- Underlay stitches
- STOP (operator places foam)
- Satin capping stitches
- STOP (operator trims excess foam)
- Border or detail stitches (if needed)
Step 3: Test Your File on Actual Fabric
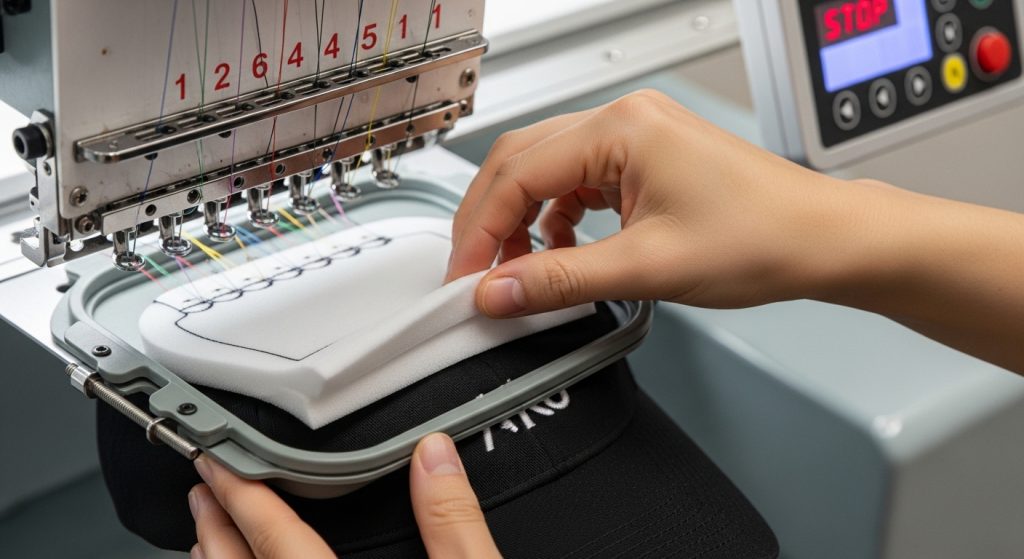
Before running a full production batch, always test your file. Here’s how:
- Load the file into your embroidery machine
- Run it on the same fabric type you’ll use for production (twill, caps, jackets, etc.)
- Make sure the machine pauses at each stop
- Check that the foam sits flat and the capping stitches seal it completely
If the foam still shows through or the edges look messy, go back and adjust your stitch density or add more capping passes. Don’t skip this step—it’s the difference between a professional result and a failed order.
DIY Digitizing vs. Professional Services
You can fix missing stops yourself if you have access to digitizing software like Wilcom, Hatch, or PE-Design. But if you’re working with complex logos, tight deadlines, or multiple design variations, manual fixes can take hours.
DIY Approach:
- Time Required: 30 minutes to 2 hours per design
- Skill Level: Requires knowledge of stitch sequencing
- Risk: High (if you’ve never digitized 3D puff before)
Professional Digitizing Services:
- Time Required: 4-6 hours turnaround
- Skill Level: Handled by experts
- Risk: Low (files tested before delivery)
If you need perfectly digitized 3D puff files with all stops included, Sassy Digitizing specializes in 3D puff, appliqué, and chenille digitizing. Our team manually inserts every stop, adjusts density for foam compression, and tests each file to ensure production-ready quality.
Summary
Missing color stops in 3D puff embroidery files lead to exposed foam, uneven coverage, and wasted production time. To fix this:
- Add a stop after the foam underlay so the operator can place foam
- Add a stop after the capping stitches so excess foam can be trimmed
- Test your file on actual fabric before running production
If you’re outsourcing digitizing or need help fixing existing files, Sassy Digitizing offers professional embroidery digitizing services with guaranteed quality and fast turnaround.
About the Author
Keith Blair | Senior Quality Control (HOD)
Keith Blair serves as the Head of Department for Quality Control at Sassy Digitizing, bringing 12 years of commercial embroidery experience to the team. His role focuses on the technical mechanics of digitizing, specifically adjusting stitch densities and lengths to suit different fabric types.
A specialist in advanced production methods, Keith oversees the digitizing standards for complex 3D puff, appliqué, and small lettering projects. He ensures that every file is tested for efficiency and run ability before it reaches the customer, bridging the gap between digital design and physical production.