Stop Thread Loops Before They Ruin Your Hat Embroidery
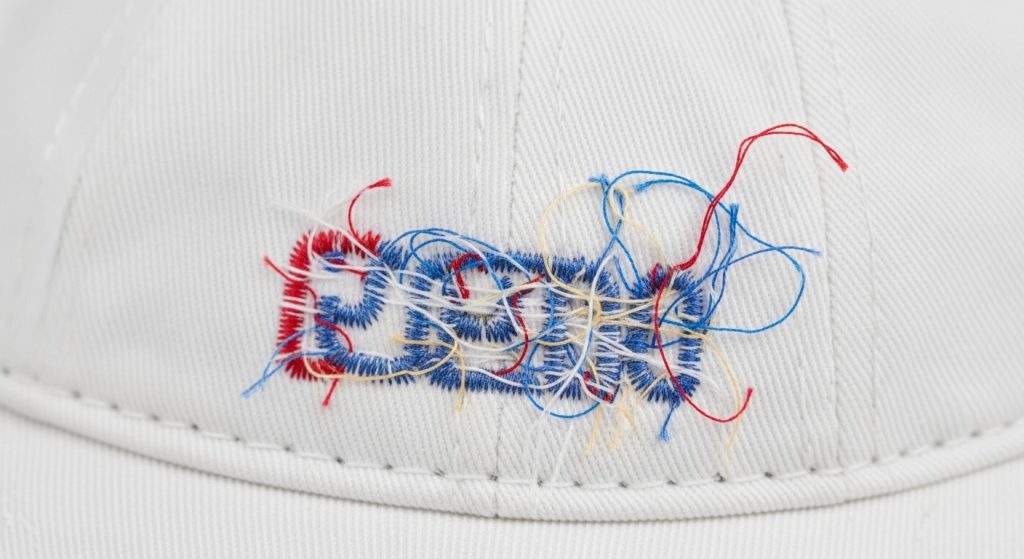
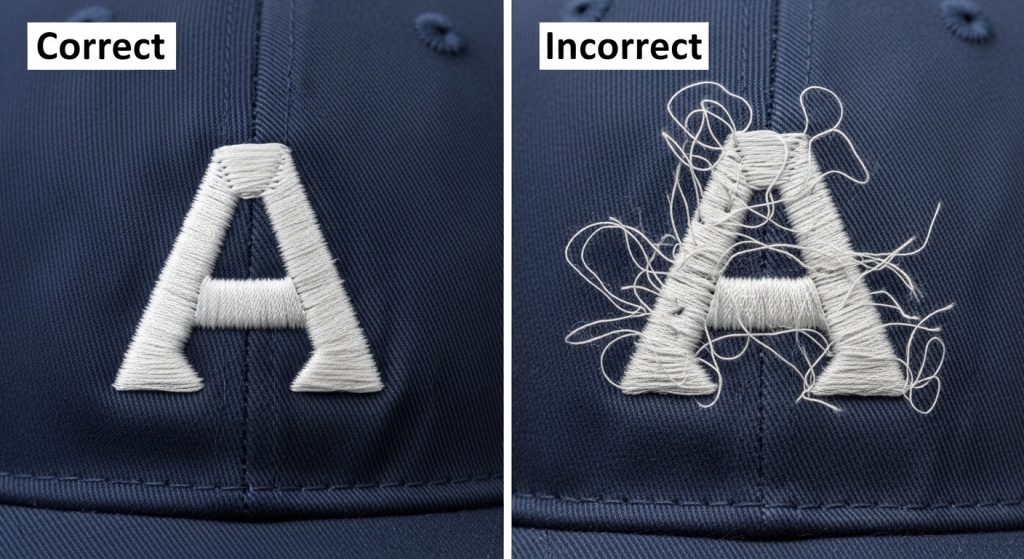
Nothing ruins a clean hat logo faster than messy thread loops showing through the back. If you’ve ever pulled a finished cap off the hoop only to see loose threads dangling everywhere, you already know how frustrating this problem can be.
The good news? Most thread loop issues come down to one simple choice: using the wrong stabilizer backing. Whether you choose cutaway or tear-away backing directly impacts how clean your finished embroidery looks, especially on curved surfaces like caps and structured hats.
In this guide, we’ll break down exactly why thread loops happen, how to choose the right backing material, and what professional digitizing services do differently to avoid these issues entirely.
Why Thread Loops Happen on Hats
Thread loops appear when the embroidery stabilizer gets pulled away too aggressively or when there isn’t enough support under the stitches. Hats are especially tricky because:
- The fabric is curved and stretches unevenly
- Most caps use structured twill or mesh that shifts during stitching
- The visor area has zero stretch, while the crown has some flexibility
When you remove a tear-away stabilizer from a finished design, those differences in tension cause threads to pull loose. The result? Visible loops on the underside that look unprofessional and feel rough against the skin.
Pro Tip: If you’re consistently getting thread loops on caps, it’s almost always a stabilizer issue—not a tension or needle problem.
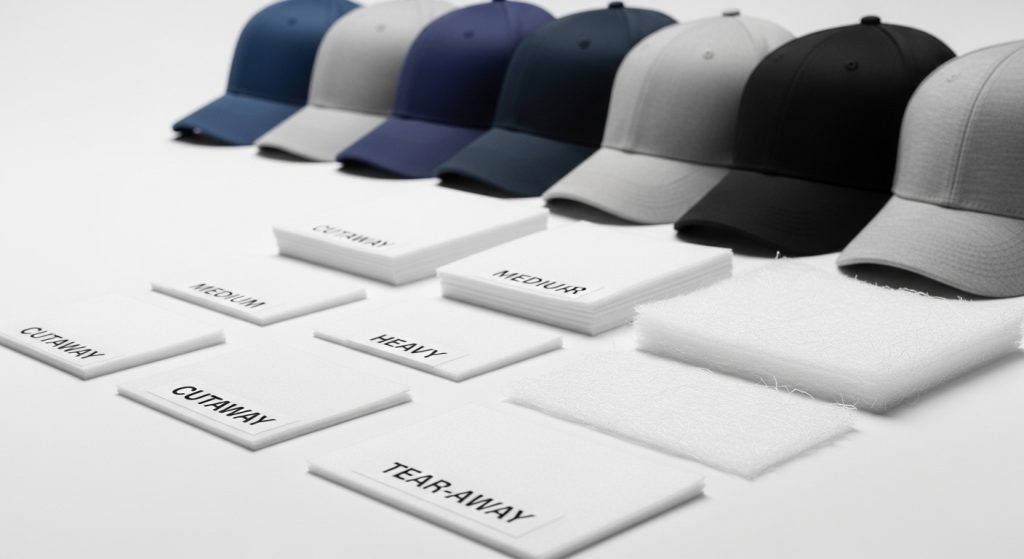
Cutaway vs Tear-Away: What’s the Difference?
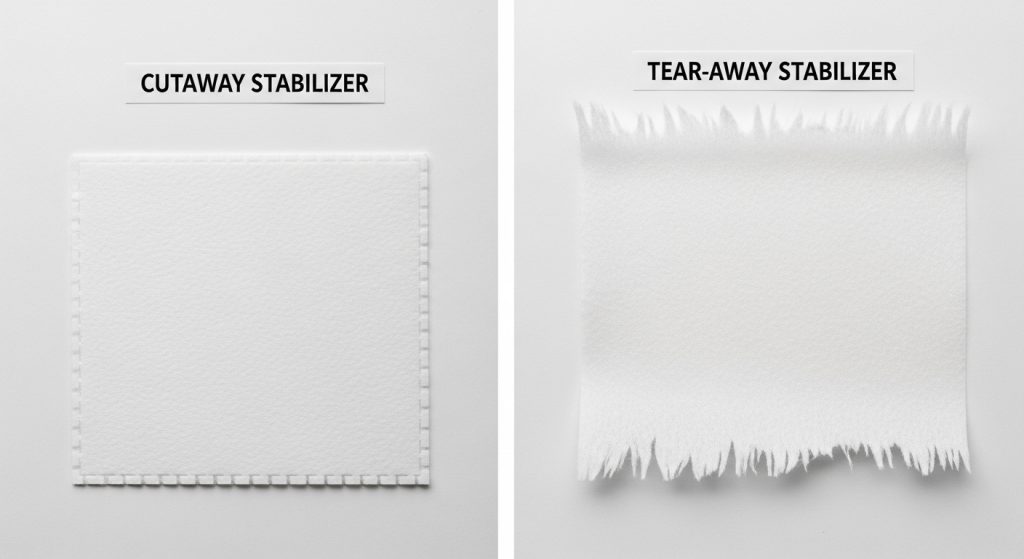
Tear-Away Stabilizer
Tear-away backing is designed to be removed after embroidery by gently pulling it away from the stitches. It’s affordable, fast, and works well on flat, stable fabrics like t-shirts or tote bags.
Best for:
- Knit fabrics
- Lightweight garments
- Designs with low stitch density
Not ideal for:
- Hats and caps
- Heavy stitch areas
- Curved or stretchy surfaces
Cutaway Stabilizer
Cutaway backing stays permanently under the embroidery. Instead of tearing it away, you trim the excess with scissors after the design is complete. This provides long-term support and prevents distortion.
Best for:
- Caps and structured hats
- Jackets and polos
- High-density logos
- Designs with fine details
Why it works: Cutaway stabilizer keeps supporting the stitches even after production, so there’s no pulling or shifting that causes thread loops.
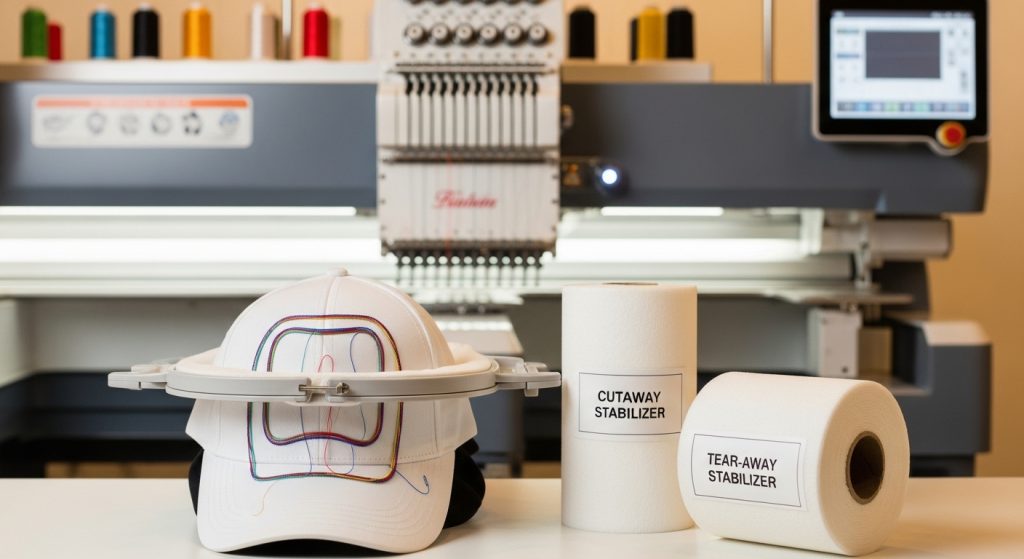
Step 1: Hooping Your Hat Properly

Before you even think about backing material, you need to hoop the cap correctly. Poor hooping is the second-biggest cause of thread loops (right after using the wrong stabilizer).
- Use a hat hoop or cap frame designed for curved surfaces
- Keep the fabric drum-tight without over-stretching
- Make sure the stabilizer sits flat against the underside of the cap
If the backing wrinkles or folds during hooping, your stitches won’t sit evenly, and loops are almost guaranteed.
Step 2: Choosing the Right Backing for Your Hat
For 99% of hat embroidery, cutaway stabilizer is the correct choice. Here’s a quick decision chart:
- Flat brim snapback or dad hat? → Use medium-weight cutaway
- Structured trucker cap with mesh back? → Use heavy-weight cutaway
- Lightweight cotton bucket hat? → You might get away with tear-away, but cutaway is still safer
If you’re working with custom patches or small left-chest logos, tear-away can work. But for caps? Always go with cutaway.
Step 3: Digitizing Matters More Than You Think
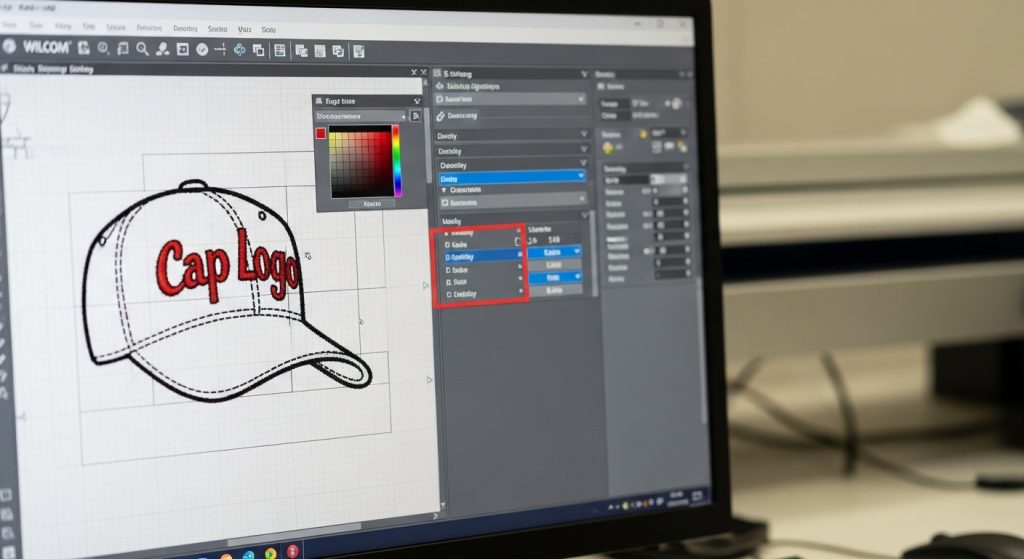
Even with the right stabilizer, a poorly digitized design will cause thread loops. Professional cap digitizing adjusts for:
- Pull compensation: Accounts for fabric stretch on curved surfaces
- Underlay stitches: Creates a stable foundation so top stitches don’t sink
- Stitch density: Keeps coverage tight without overloading the fabric
If you’re using auto-digitizing software or generic downloaded files, this is probably why you’re getting loops. Manual digitizing with proper settings eliminates most backing-related issues before you even start sewing.
Note: If your design file doesn’t account for hat-specific adjustments, even the best stabilizer won’t save you. Consider using professional digitizing services for consistent, production-ready results.
Step 4: Trimming Cutaway Stabilizer the Right Way
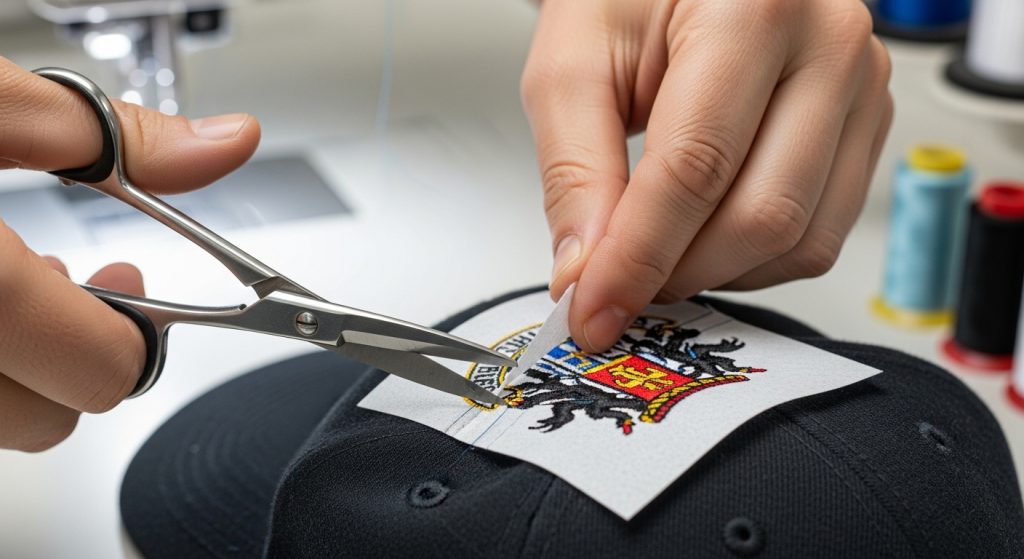
Once your embroidery is done, you’ll need to trim away the excess cutaway backing. Here’s how to do it without damaging the stitches:
- Use sharp embroidery scissors or a trimming tool
- Cut as close to the edge of the design as possible without nicking threads
- Leave about 2-3mm of backing around the entire logo for long-term support
Some people try to tear cutaway backing to save time. Don’t do this. It defeats the entire purpose and will cause the exact thread loops you’re trying to avoid.
Common Mistakes That Cause Thread Loops
Even experienced embroiderers make these errors:
Mistake #1: Using Tear-Away on Structured Caps Structured caps have stiff fronts that don’t flex. When you tear the backing away, the stitches pull and create visible loops.
Mistake #2: Skipping Underlay Stitches Underlay acts like a foundation. Without it, your top stitches have nothing to grip, so they shift and loop.
Mistake #3: Over-Tensioning the Thread If your thread tension is too tight, the stitches will pull through the fabric when you remove the backing. This is especially common with metallic or polyester threads.
Cutaway vs Tear-Away: Quick Comparison
Here’s a fast breakdown to help you decide:
Tear-Away Stabilizer
- Time Required: Fast removal
- Best For: Flat, stable fabrics like t-shirts
- Durability: Temporary support only
- Cost: Budget-friendly
Cutaway Stabilizer
- Time Required: Requires trimming
- Best For: Hats, jackets, structured garments
- Durability: Permanent support
- Cost: Slightly higher, but worth it
If you need high-quality hat embroidery for a business, sports team, or apparel line, cutaway is the only professional choice. Sassy Digitizing uses cutaway backing on all cap projects to guarantee clean, loop-free results every time.
Summary
Thread loops on hats are almost always caused by using the wrong stabilizer or poor digitizing. Cutaway backing provides the permanent support that caps need, while tear-away backing works better for flat garments.
By hooping correctly, using the right stabilizer, and working with professionally digitized files, you can eliminate thread loops entirely and produce clean, retail-quality embroidery.
Whether you’re running a small embroidery shop or managing large production runs, choosing the right backing is a simple fix that makes a massive difference. For expert cap digitizing and production-ready files, Sassy Digitizing ensures every logo runs smoothly the first time.
About the Author
Keith Blair | Senior Quality Control (HOD)
Keith Blair serves as the Head of Department for Quality Control at Sassy Digitizing, bringing 12 years of commercial embroidery experience to the team. His role focuses on the technical mechanics of digitizing, specifically adjusting stitch densities and lengths to suit different fabric types.
A specialist in advanced production methods, Keith oversees the digitizing standards for complex 3D puff, appliqué, and small lettering projects. He ensures that every file is tested for efficiency and run ability before it reaches the customer, bridging the gap between digital design and physical production.