If your hat embroidery keeps pinching in the same place on every single cap you run, this is not a machine fault or a bad batch of hats. It is a repeatable, fixable problem and it almost always comes from your digitizing file. This guide covers every cause of hat embroidery pinching in the same place and gives you the exact step-by-step fixes to stop it permanently.
What Does Pinching Mean in Cap Embroidery?
Pinching is when a small fold or gather of fabric gets pulled and trapped under the embroidery design during sewing. It creates a visible wrinkle or ridge on the cap front panel right at or near the embroidery area.
If it happens once, it is likely a hooping issue. If hat embroidery pinching in the same place happens on every single cap in a run, the cause is almost always the digitizing file specifically the stitch direction, underlay, or pull compensation settings.
Why Hat Embroidery Keeps Pinching in the Same Place
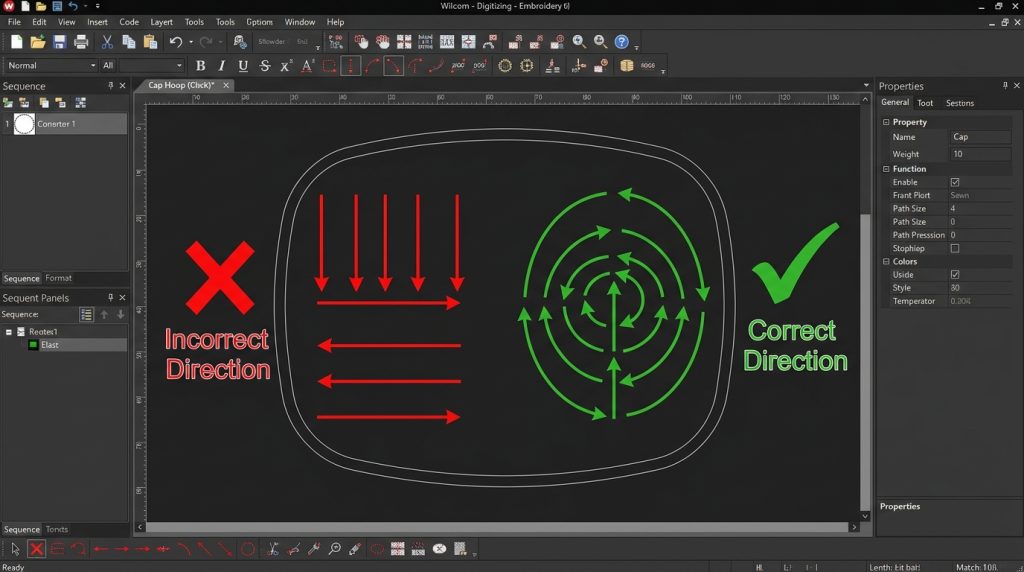
Cause 1: Wrong Sewing Direction Causes Hat Embroidery Pinching
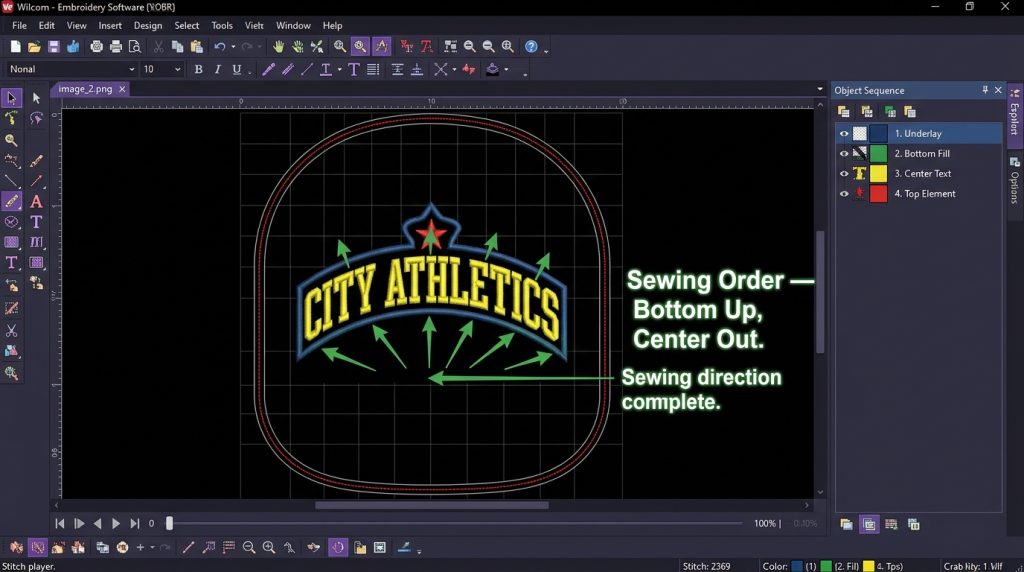
The most common cause of hat embroidery pinching in the same place. Cap embroidery must always sew from the bottom up and from the center outward. If your file sews top-down or side-to-side, the stitches push loose fabric ahead of the needle instead of pushing it away. That loose fabric gathers and pinches in the same spot every single run.
Cause 2: Missing Underlay
Underlay stitches lock the cap fabric down before the main design sews. Without proper underlay, the cap fabric floats under the presser foot and folds under the main stitches causing hat embroidery to pinch in the same place every run because the fabric has no anchor at that point.
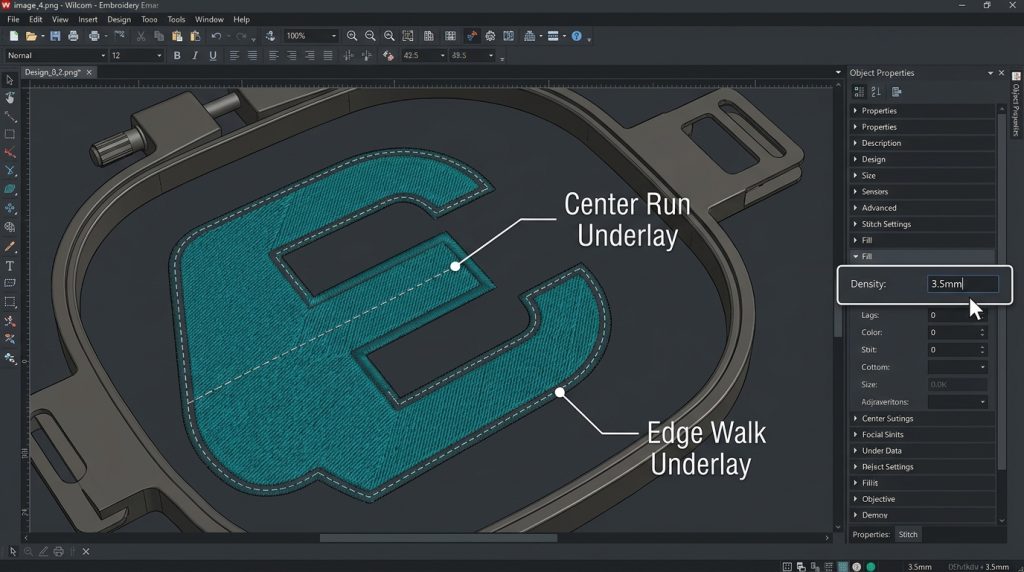
Fix: Use a center run underlay plus an edge walk underlay for cap designs. Set underlay density to 3mm – 4mm for structured twill caps.
According to Madeira’s embroidery technical guide, proper underlay is the single most critical factor in preventing fabric movement on structured cap fabric during production runs.
Cause 3: Incorrect Pull Compensation
Pull compensation adjusts stitch widths to account for the natural compression that happens when stitches pull fabric inward. On caps, the curved surface changes how fabric behaves if pull compensation is set too low or too high, the design drags fabric toward one area and causes hat embroidery to pinch in the same place repeatedly.
This is one of the most technical fixes in cap embroidery digitizing and the primary reason why a flat-garment file always fails on a cap.
Recommended pull compensation for structured caps: 0.4mm – 0.6mm
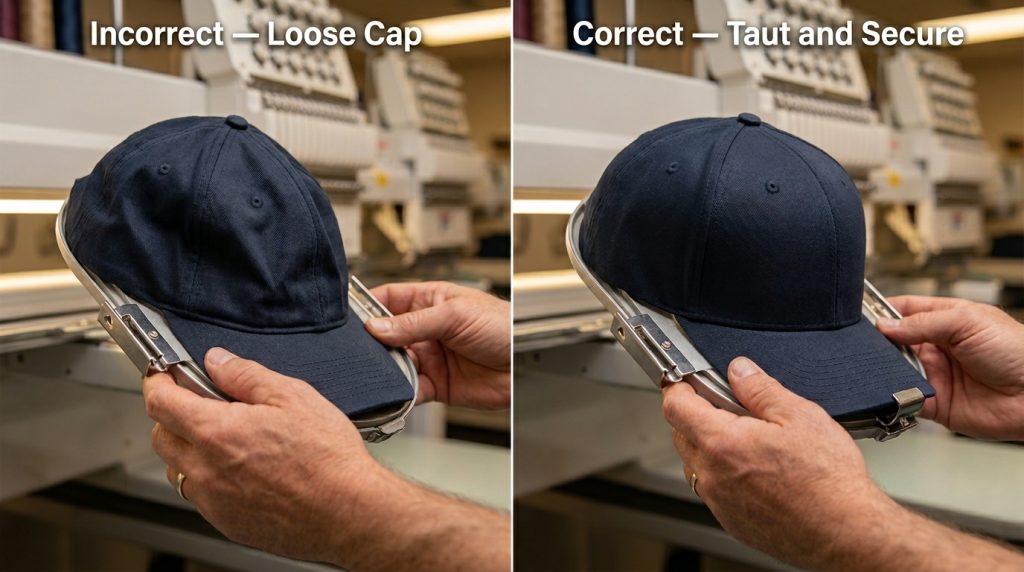
Cause 4: Loose Cap in the Frame
Even a perfectly digitized file will produce hat embroidery pinching in the same place if the cap is not seated properly. A loose cap shifts slightly with each stitch sequence and by the time the needle reaches a certain area, enough fabric has moved to create a pinch.
Check before every run:
- Cap sits flush against the frame plate with no gaps
- Bill is anchored securely against the frame
- Fabric across the front panel is taut but not over-stretched
Step-by-Step Fix for Hat Embroidery Pinching in the Same Place
Step 1: Check Sewing Order to Fix Hat Embroidery Pinching
Open your cap file in Wilcom or your digitizing software. Confirm:
- First objects sew at the bottom of the design
- Sequence moves upward and outward from center
- No large fill area sews toward an already-stitched section from outside in
In Wilcom, verify this in the Object Sequence panel on the right side of your canvas.
Step 2: Add Proper Underlay to Stop Pinching
If underlay is missing from the area where hat embroidery keeps pinching, add it now:
- Center run underlay: single run stitch through the middle of each fill object
- Edge walk underlay: run stitch tracing the outer edge of the shape
- Density: 3mm – 4mm for structured twill cap fabric
This anchors the fabric and eliminates the floating surface that causes the pinch. Our digitizing team at Sassy Digitizing sets underlay specifically for each cap fabric type on every order see our portfolio for results.
Step 3: Adjust Pull Compensation
Locate pull compensation settings for fill objects in the pinching area. Increase gradually:
- Start at 0.4mm test sew
- Still pinching? Increase to 0.5mm test again
- Adjust only the objects near the pinching area not the entire design at once
Always specify your cap style when ordering digitizing. Structured and unstructured caps need different pull compensation values. At Sassy Digitizing, we ask for cap type on every order before touching the file.
Step 4: Re-Hoop and Test Sew
Re-hoop the cap correctly and run the corrected file:
- Cap flush against frame plate, no gaps
- Bill clip fully engaged
- Front fabric taut before locking
- Run speed: 600 stitches per minute for caps

DIY Fix vs. Professional Re-Digitizing
DIY Fix
- Requires Wilcom or Hatch software access
- Time-consuming to test per cap type
- Best for single cap styles with time to experiment
Professional Re-Digitizing Sassy Digitizing
- File corrected and returned in 4–6 hours
- Pull compensation, underlay, sewing order all set for your specific cap
- In-house test sew before delivery
- Best for client orders and bulk production runs
If hat embroidery pinching in the same place is costing you caps and time, send your file to Sassy Digitizing for a professional re-digitize. Check our pricing or contact us for a free consultation.
Summary
Hat embroidery pinching in the same place is caused by wrong sewing direction, missing underlay, incorrect pull compensation, or loose hooping. Fix the sewing order first, add proper underlay, adjust pull compensation for your cap type, and always re-hoop tightly before testing. If pinching continues, a full professional re-digitize built for cap production is the fastest solution.
About the Author
Keith Blair | Senior Quality Control (HOD) Keith Blair leads Quality Control at Sassy Digitizing with 12 years of commercial embroidery experience, specializing in stitch density, pull compensation, and cap embroidery production standards.