
You stitched a clean white logo on a dark navy beanie but instead of bold, solid white coverage, the dark fabric is bleeding through the stitching. The design looks faded, thin, and unprofessional.
This is one of the most common complaints in beanie embroidery digitizing, and it has nothing to do with your thread color. The problem is almost always in how the file was built.
What Does This Problem Look Like?
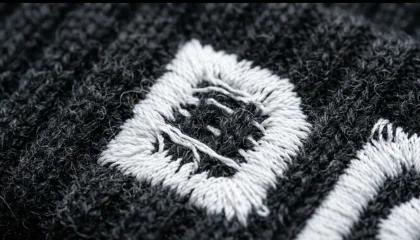
White embroidery on a dark beanie should look crisp and fully opaque. When fabric shows through, you will see:
- Dark fibers visibly poking through white stitch areas
- The design looking grey or washed out instead of bright white
- Uneven coverage across the logo surface
- The problem getting worse after one wash
Note: This issue is almost always worse on beanies than on flat garments because beanie fabric is knit, stretchy, and has loops that swallow stitches.
Cause 1: Stitch Density Is Too Low
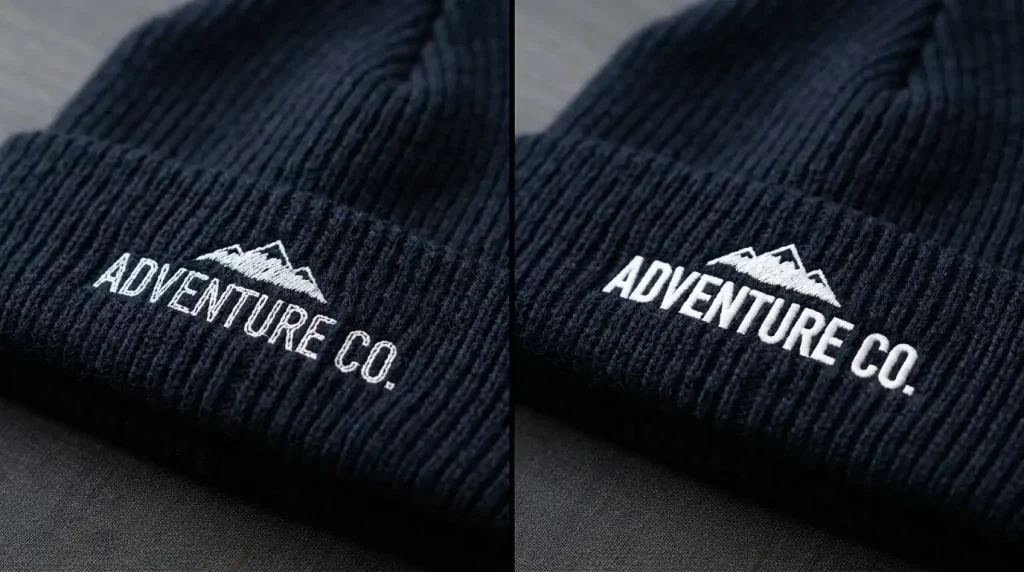
The most common reason fabric shows through white embroidery is simply that the stitch density in the digitizing file is not high enough.
On a flat woven fabric, standard density works fine. But beanies are knit and stretchy the stitches spread apart when the fabric flexes, exposing the background underneath.
What needs to happen: White areas on beanies need a higher stitch density than standard fills typically 0.35mm to 0.40mm spacing instead of the default 0.45mm. This tighter spacing ensures full coverage even when the fabric stretches.
Cause 2: Missing or Weak Underlay
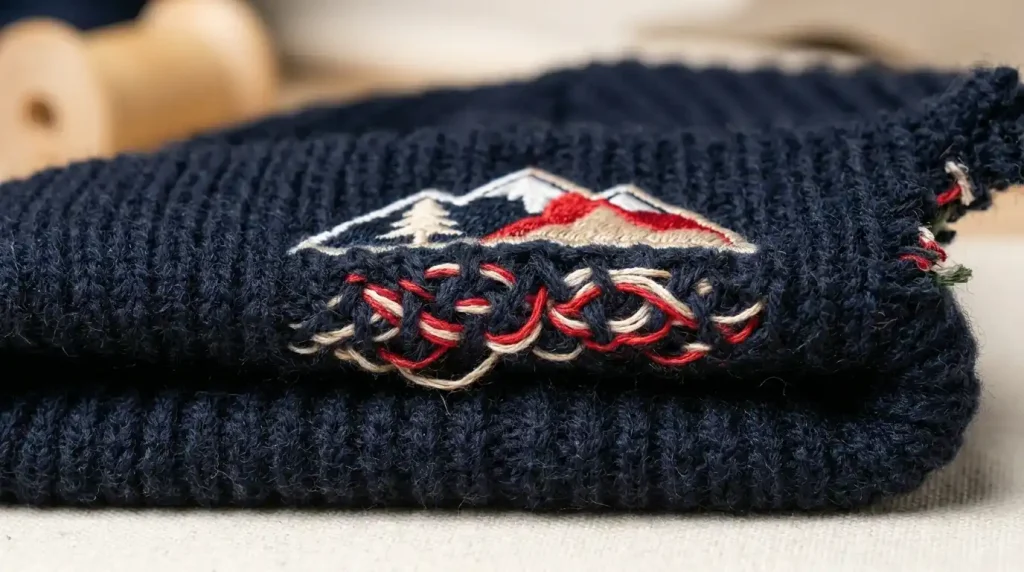
Underlay is the foundation layer of stitches that goes down before the top fill stitches. On a beanie, without proper underlay, the top stitches sink into the knit loops of the fabric and disappear.
For white embroidery on beanies, you need two underlay layers:
- Edge-run underlay outlines the shape and locks the fabric down
- Cross-hatch underlay creates a grid base that lifts the top stitches above the fabric surface
A weak single-layer underlay is the number one reason white embroidery looks thin and transparent on dark beanies.
Cause 3: Wrong Fabric Stabilizer
Even a perfectly digitized file will show fabric through if the beanie is not stabilized correctly during production. Beanies stretch during hooping if the fabric moves while stitching, density and coverage break down.
The fix: Always use a cut-away stabilizer for beanies, not a tear-away. Cut-away holds its structure through the entire run and prevents the knit fabric from shifting under the needle.
How to Fix It: Step by Step
Step 1: Check the Digitizing File First
Before touching the machine, open the file in your embroidery software. Look at the fill density on white areas if it’s set to default (0.45mm or higher), that is your problem. Reduce it to 0.38mm for beanie work.
If you don’t have the source file or software, send the design to Sassy Digitizing for a professional re-digitize.
Step 2: Add Proper Underlay

Rebuild the underlay for all white fill areas using this combination:
- Edge-run at the border of every white shape
- Cross-hatch at 45 degrees across the full fill area
This two-layer approach lifts the satin and fill stitches above the beanie surface, creating solid opaque coverage.
Step 3: Use the Right Stabilizer and Hoop Correctly
Use a firm cut-away stabilizer behind the beanie. Hoop it firmly without distorting the shape. Any stretch in the fabric during stitching will spread your density and break coverage.
Step 4: Test on the Same Fabric First
Always run a test stitch on the same beanie blank before the full production run. White on dark fabric is unforgiving test and adjust density before committing to the full order.
DIY Fix vs. Professional Re-Digitizing
If the show-through happens on every beanie regardless of stabilizer or machine settings, the file needs to be rebuilt not just adjusted.
Sassy Digitizing specializes in beanie and headwear digitizing with proper density, underlay, and pull compensation settings built in. Check our portfolio for headwear samples, or get a quote today.
Summary
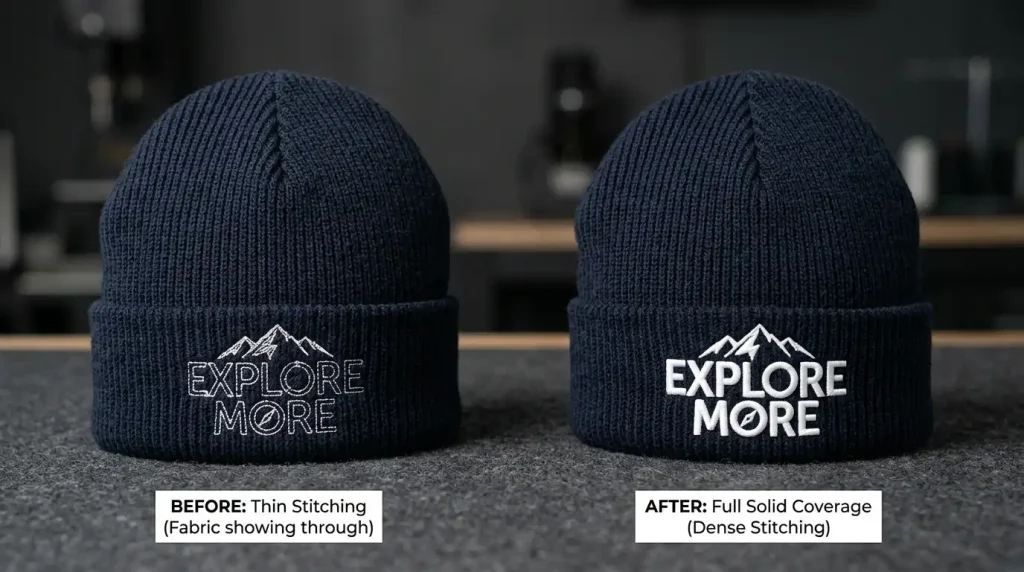
Fabric showing through white embroidery on beanies always comes down to three things: stitch density too low, underlay missing or weak, or incorrect stabilizer. Fix all three starting with the digitizing file and your white areas will be solid, bright, and professional on every run.
Need a beanie-ready digitizing file built the right way? Contact Sassy Digitizing we’ll handle it.
About the Author
Keith Blair | Senior Quality Control (HOD) Keith Blair is the Head of Quality Control at Sassy Digitizing with 12 years of commercial embroidery experience. He specializes in stitch density optimization, underlay settings, and headwear digitizing to ensure every file runs cleanly on the first attempt.