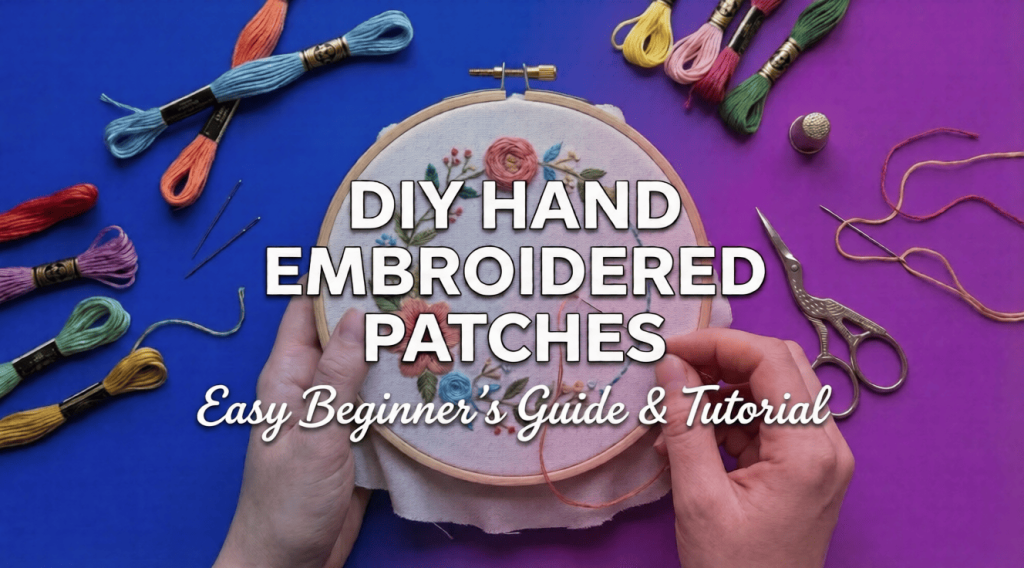
How To Make A Hand Embroidered Patch Easy DIY Guide for Beginners
Hand embroidered patches are the perfect way to add a personal touch to denim jackets, backpacks, and jeans. Whether you want to fix a hole in your favorite clothes or just show off your creative style, making a patch from scratch is an incredibly rewarding project.
That said, let’s be real: it requires a bit of patience, precise stitching, and the right technique to ensure the edges don’t fray after one wash. While professional custom patches are definitely the best route for durability and bulk orders, learning the DIY method is a fantastic skill for those special one off projects.
In this step by step guide, we’ll teach you how to make a sturdy, beautiful hand embroidered patch right from your living room.
Why Make Your Own Patches?
Making a patch yourself gives you total creative freedom. You aren’t limited by the stock designs found in retail stores. You get to choose your own colors, exact size, and stitch style. It is also a fantastic way to upcycle old fabric scraps that would otherwise go to waste.
However, keep in mind that hand embroidery takes time. If you need 50 patches for a sports team or a business launch, manual stitching just isn’t practical. That is where professional manufacturing steps in.
Supplies You Will Need

Before you start, gather quality materials to ensure your patch lasts longer than a week.
- Fabric: Cotton canvas, denim, or felt. Pro Tip: Felt is easiest for beginners because the edges don’t fray as you work.
- Embroidery Floss: High quality cotton thread (DMC or Anchor are great standards).
- Needles: Sharp embroidery needles with an eye size that fits your thread.
- Embroidery Hoop: Essential to keep your fabric drum tight while stitching.
- Stabilizer: Optional, but highly recommended to keep the fabric firm.
- Iron on Adhesive (Heat n Bond): To turn your embroidery into an iron on patch.
- Fabric Glue: Useful for sealing knots and stubborn edges.
Step 1: Create or Trace Your Design
Every great patch starts with a clean design. You can draw your own sketch on paper or print an image from the internet.
Keep it simple: If you are a beginner, try to avoid complex details. Achieving photorealism by hand on a 3 inch patch is very difficult.
Note: If you have a logo but it’s pixelated or blurry, you might need Vector Art Services to clean it up before you start tracing. A clear, crisp outline makes the stitching process much easier.
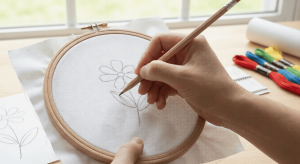
Step 2: Transfer the Design to Fabric
Place your fabric inside the embroidery hoop and pull it taut.
- For light fabrics: You can trace the design by placing it over a light source (like a bright window or a tablet screen).
- For dark fabrics or felt: Use a water soluble pen or chalk paper to transfer the outline.
Crucial Step: Ensure the design is centered so you have at least 2 inches of space around the edges for cutting later.
Step 3: Stitching Your Patch

Now for the fun part. Start by outlining your design with a simple Back Stitch or Split Stitch. This creates a barrier for your filling stitches and makes the design pop.
Once the outline is done, fill in the shapes using:
- Satin Stitch: For smooth, shiny coverage on small areas.
- Long and Short Stitch: For shading and covering larger surface areas.
Keep Your Stitches Tight Loose stitches will snag on things and ruin the patch quickly. Pull your thread firmly (but not so tight that the fabric puckers) to ensure the design lies flat. If you notice gaps showing the fabric underneath, go back and fill them. The density of your stitching determines the quality of the final patch.
Step 4: Sealing the Edges (The Make or Break Step)
The edge of a patch is exactly what separates a professional look from a messy DIY project. Once your main design is stitched, cut the fabric around the design, leaving about 3 to 5mm of border.
The Whip Stitch or Buttonhole Stitch To prevent fraying, you must stitch over this raw edge. A Buttonhole Stitch is the best choice here. It wraps tightly around the edge of the fabric, creating a knotted, durable border that mimics the “merrowed border” seen on commercial patches. Take your time here. This step defines the final shape of your patch.
Step 5: Applying the Backing
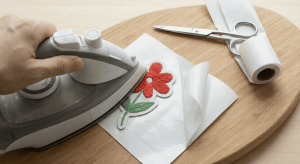
You can sew your patch directly onto clothes, but adding a backing makes it stiffer and easier to use.
- Cut a piece of iron on adhesive (like Heat n Bond) to match the shape of your patch.
- Place it on the back of your embroidery.
- Iron it according to the package instructions.
- Peel off the paper backing.
Your DIY patch is now ready to be ironed onto your favorite jacket!
DIY vs. Professional Custom Patches
Hand embroidery is an art form, but it has limitations compared to professional manufacturing. Here is a quick breakdown:
DIY Hand Embroidery
- Time Required: Hours or days for one patch
- Detail Level: Good for organic, artistic looks
- Durability: Can be fragile if not stitched tightly
- Cost: Low (Materials only)
Professional Custom Patches
- Time Required: Fast production for hundreds
- Detail Level: Precise details for logos and text
- Durability: Industrial strength, machine washable
- Cost: Affordable for bulk orders
If you need high quality patches for a business, sports team, or clothing brand, doing it by hand usually isn’t feasible. Sassy Digitizing offers premium Custom Patches including embroidered, woven, and PVC options that save you time and guarantee uniformity across every single piece.
Summary
Making a hand embroidered patch is a fun skill that allows you to express your creativity. By following these steps designing, stitching, edging, and backing you can create a unique accessory for your wardrobe.
However, for intricate logos or large quantities, professional manufacturing is the smarter choice. Whether you need digitizing services for machine embroidery or ready made patches, Sassy Digitizing is here to help you bring your vision to life with professional quality.
About the Author
Keith Blair | Senior Quality Control (HOD)
Keith Blair serves as the Head of Department for Quality Control at Sassy Digitizing, bringing 12 years of commercial embroidery experience to the team. His role focuses on the technical mechanics of digitizing, specifically adjusting stitch densities and lengths to suit different fabric types.
A specialist in advanced production methods, Keith oversees the digitizing standards for complex 3D puff, appliqué, and small lettering projects. He ensures that every file is tested for efficiency and run ability before it reaches the customer, bridging the gap between digital design and physical production.


