Too Many Tiny Stitches Causing Machine Thread Issues
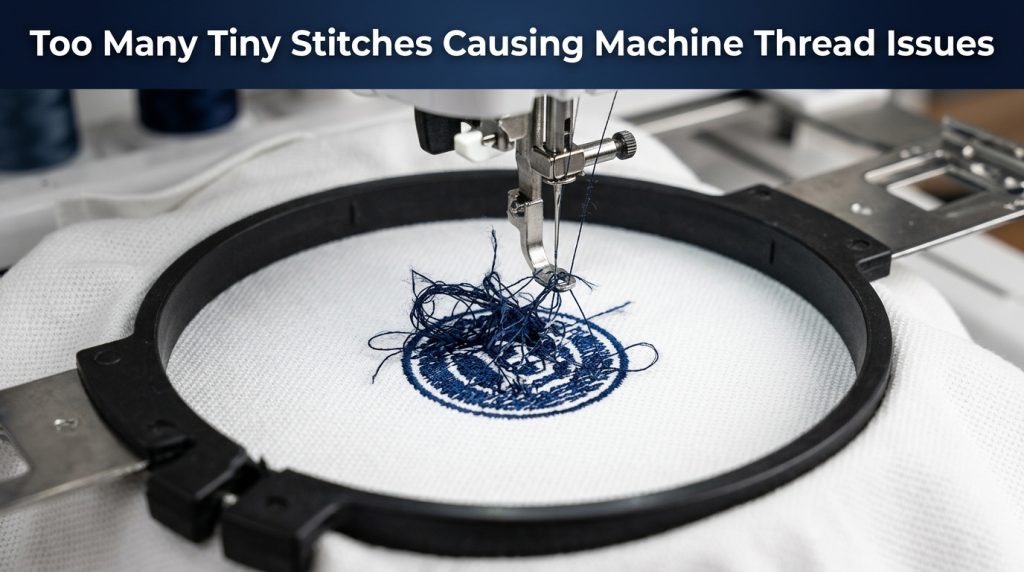
If you have ever noticed tiny stitches causing thread issues on your embroidery machine, you are not alone. Your machine is running fine, then the thread snaps your re-thread, hit start, and it breaks again in the exact same spot.
In most cases the problem is not your tension, your thread brand, or your needle. The real cause is hiding inside the digitized file itself: too many micro stitches packed into a small area. Let’s break down exactly why this happens and how to fix it.
Why Tiny Stitches Cause Thread Issues in Embroidery Machines
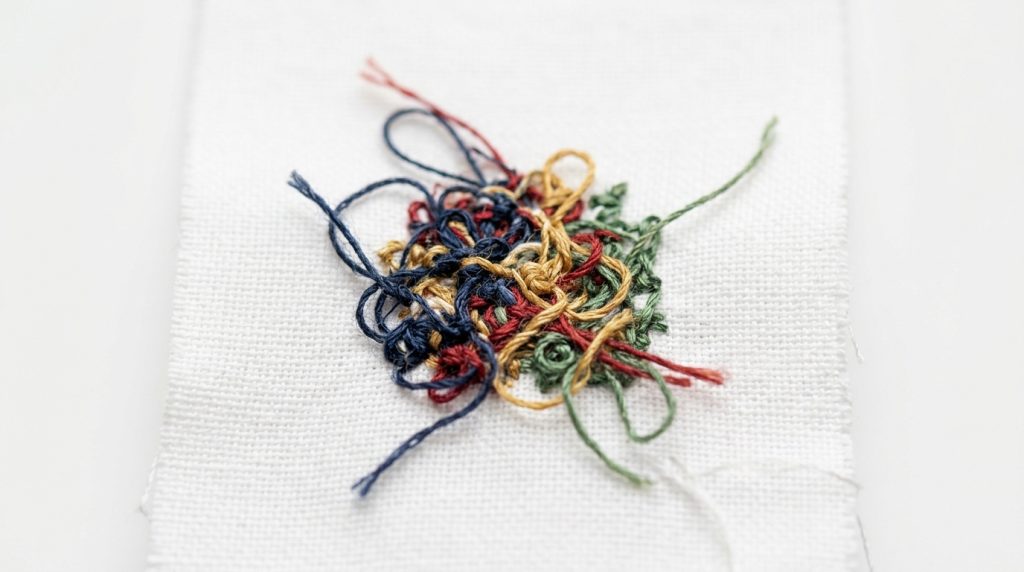
When a stitch is shorter than 1mm, the needle punches through nearly the same point in the fabric twice without moving forward. This creates a dense knot of thread underneath the material that the machine struggles to pull through cleanly.
The result is tension spikes, needle drag, and eventually a thread break or a bent needle.
Tiny stitches create dense knots underneath the fabric that jam the machine mid-run.
This problem gets worse on tight fabrics like caps or thick materials like towels, where the needle has very little room to move through a dense stitch cluster.
Three Common Causes of This Problem
Cause 1: Digitizing Very Small Text or Fine Details
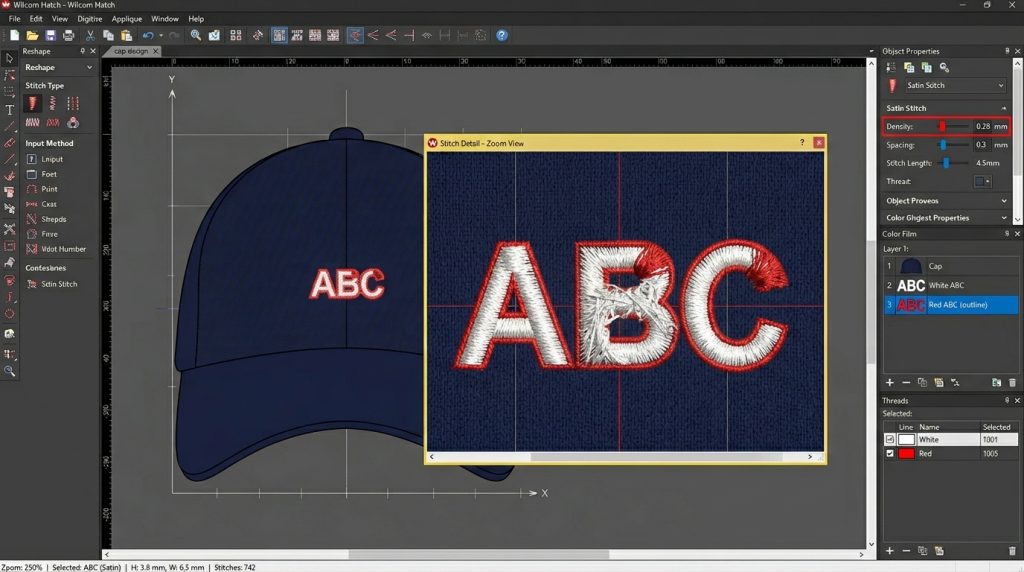
Letters under 4mm filled with satin stitches are the most common source of micro-stitch problems.
Small lettering under 4mm tall is the most common source of micro-stitches. When a digitizer fills tiny letters with satin stitches, the software often creates dozens of stitches only fractions of a millimeter long.
The fix: For text under 4mm, switch to a single-run stitch outline instead of satin fill. This cuts stitch count significantly and removes the micro-stitch problem completely.
Cause 2: Too Many Underlay Layers on Small Fill Areas
Stacking multiple underlay layers under a small fill area adds hundreds of tiny stitches before the visible top layer even begins. This is one of the most overlooked causes of tiny stitches causing thread issues during production runs.
The fix: Use a single zigzag or center-run underlay for small areas. Reserve multi-layer underlays for large, open fill zones only.
Cause 3: Auto-Converted Embroidery Files
Auto-conversion tools generate chaotic micro-stitches manual digitizing keeps every path clean and controlled.
Auto-conversion tools that turn a PNG or JPG directly into an embroidery file do not understand fabric behavior. They trace every pixel including noise and gradients into stitches, often producing thousands of micro-stitches no human digitizer would ever place.
Note: Sassy Digitizing’s embroidery digitizing services use manual Wilcom-based digitizing not auto-conversion ensuring your file is clean and production-ready. If your artwork needs cleaning first, our vector art services can prepare a sharp file before digitizing begins.
How to Identify Tiny Stitch Problems in Your File
Open your embroidery file in Wilcom, Hatch, or SewArt and follow these steps:
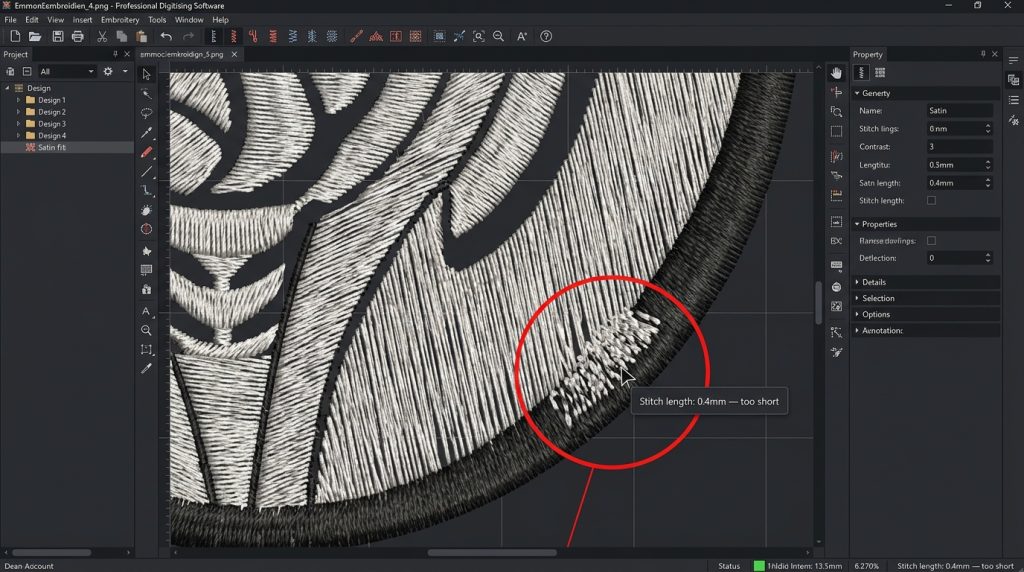
Zoom into the design at 100% view using the stitch simulator
Look for areas where stitches overlap without moving forward
Check that your minimum stitch length is never below 0.8mm to 1.0mm
Look for text or detail areas smaller than 4mm these are your highest-risk zones
Zoom into your file and look for overlapping stitches under 1mm these are your thread-break hotspots.
According to Wilcom’s official digitizing guidelines, maintaining proper minimum stitch lengths is one of the most critical factors for machine-ready embroidery files.
Anything shorter than these values in your file is a direct cause of thread problems at the machine.
Quick Fix Checklist for Tiny Stitches Causing Thread Issues
Correct stitch lengths and clean underlay settings produce smooth, break-free embroidery every time.
Work through this list before assuming it is a machine problem:
✅ Check minimum stitch length settings in your digitizing software
✅ Zoom in and remove any stitch clusters under 1mm
✅ Reduce underlay layers in small or dense fill sections
✅ Convert small text to single-run outline stitching
✅ Re-test on matching fabric before running full production
Summary
Tiny stitches causing thread issues are one of the most common and most preventable problems in machine embroidery. The issue lives inside the file not the machine. Once you know where to look, the fix is straightforward.
If your files are consistently breaking thread, Sassy Digitizing manually digitizes every design using Wilcom software, with every stitch length and density set by an experienced human digitizer. Visit our digitizing services page or contact us to get your file fixed today.
About the Author
Keith Blair | Senior Quality Control (HOD) Keith Blair is Head of Department for Quality Control at Sassy Digitizing, with 12 years of commercial embroidery experience specializing in stitch density, underlay optimization, and production-level digitizing troubleshooting.