In the rapidly evolving world of textile decoration, understanding the technical side of your craft is essential. If you are an embroiderer, you know that your machine is only as good as the file you feed it. Whether you are using a home-based Brother machine or an industrial Tajima multi-head, the file format determines the final quality of your stitch-out.
In this comprehensive 2026 guide, we will explore every major embroidery file format. We will also discuss why professional digitizing is the foundation of a successful business. At Sassy Digitizing, we believe that education is the first step toward flawless production.
1. Understanding the Basics: What is an Embroidery File?
Before we dive into specific formats, we must understand what these files actually do. Unlike a standard image file like a JPG or PNG, an embroidery file is a set of instructions. It tells the machine where to move the needle, when to change the thread, and when to cut.
Raster vs. Vector vs. Stitch Files
Most clients provide artwork in raster (PNG/JPG) or vector (SVG/AI) formats. However, an embroidery machine cannot read pixels or paths. It requires a “stitch file” that contains X and Y coordinates. This transition from art to instructions is what we call digitizing.
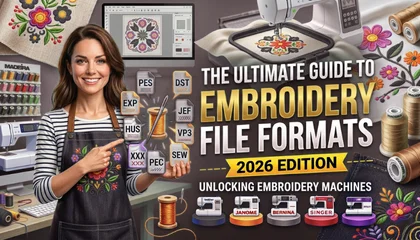
2. Common Home Embroidery File Formats
If you are running a small business or a hobby shop, you likely use one of these common home formats. Each machine brand has its own “language.”
PES (Brother, Babylock, Bernina)
The PES format is perhaps the most popular in the world. It is designed specifically for Brother and Babylock machines. A PES file is rich in data. It includes stitch information and color palettes that display correctly on your machine’s screen.
JEF (Janome)
Janome machines primarily use the JEF format. These files are optimized for the Janome memory craft series. If you try to run a PES file on a Janome machine without conversion, it simply will not show up.
HUS and VIP (Husqvarna/Viking)
These formats are used by Husqvarna Viking machines. While HUS is an older format, VIP and the newer VP3 formats allow for more complex designs and larger hoop sizes.
3. Industrial Embroidery File Formats
For commercial shops running high-speed production, industrial formats are the standard. These files are built for efficiency and speed.
DST (Tajima and Global Standard)
The DST format, created by Tajima, is the universal language of the embroidery world. Almost every commercial machine can read a DST file. However, DST files have one major limitation: they do not store color information. This is why your machine screen might show random colors even if the design is correct. You must manually assign colors on your machine’s control panel.
EXP (Melco and Bernina)
The EXP format was originally developed by Melco. It is very similar to DST because it only contains stitch data without specific thread colors. Many commercial embroiderers prefer EXP for its reliability on high-speed industrial heads.
4. Why Manual Digitizing is Better than AI?
In 2026, many people are tempted by AI auto-digitizing tools. They promise instant results. However, Why AI Auto-Digitizing is Ruining Your Embroidery Business is a serious concern for professionals.
The AI Failure
AI tools cannot feel the fabric. They do not understand that a knit polo stretches differently than a canvas tote bag. AI often creates “bird-nesting” because it places too many stitches in one spot. It also lacks proper pathing, leading to unnecessary jumps and thread trims.
The Manual Advantage
Manual digitizing is an art form. A professional digitizer at Sassy Digitizing hand-punches every element. We account for “Push and Pull Compensation,” ensuring your design stays perfectly aligned. This human touch prevents puckering and thread breaks, saving you time and money on the production floor.
5. How to Prepare Artwork for Embroidery Digitizing
To get the best results, you must start with clean art. Knowing How to Prepare Artwork for Embroidery Digitizing will make your digitizer’s job easier and your final product better.
Use High Resolution: Always provide 300 DPI images if using PNG.
Vector is King: Providing an AI or SVG file allows for the sharpest possible digitization.
Simplify Small Details: Remember that a needle has physical limits. Tiny text or thin lines may need to be thickened to stitch clearly.
6. Technical Troubleshooting: Fixing Common Issues
Even with the right file format, problems can happen. Here is how to handle the most common issues:
How to Fix Embroidery Puckering
Puckering happens when the fabric bunches up around the stitches. This is often caused by incorrect tension or poor digitizing. To fix this, ensure your digitizer uses proper underlay stitches. Underlay acts as a foundation, stabilizing the fabric before the top stitches are applied.
How to Fix Slow Embroidery
If your machine is running slowly, the file might have a high stitch count or too many trims. How to Fix Slow Embroidery starts with optimizing the file pathing. A professional digitizer will organize the design so the machine moves logically from one section to another with minimal jumps.
7. Specialty Digitizing: Caps and 3D Puff
Not all files are created equal. Some items require specific technical settings.
Cap Embroidery Digitizing
Hats are curved and difficult to stitch. Cap embroidery digitizing requires a “Center-Out” and “Bottom-Up” approach. This pushes the fabric away from the center, preventing wrinkles and registration shifts.
3D Puff Embroidery
To get that raised, athletic look, you need a specific file. We digitize 3D puff with “capping” stitches that hold the foam in place and prevent it from peeking through the thread.
8. Sassy Digitizing: A Global Leader
When you choose a digitizing partner, you deserve the best. Sassy Digitizing is proud to be ranked among the Top 10 Best Embroidery Digitizing Companies in the World. Our reputation is built on years of experience and thousands of successful projects.
We provide the Best Embroidery Digitizing Service 2026 | Sassy Digitizing by focusing on:
Manual Precision: We never use auto-tools.
Fast Turnaround: Most files are delivered in 2-4 hours.
Quality Assurance: Every file is checked for machine readiness.
Free Trial: We offer your first logo (under 5 inches) for free so you can test our quality.
9. Frequently Asked Questions (FAQs)
What is the best embroidery file format?
For home machines, PES is usually the best. For commercial work, DST is the industry standard.
Can I convert a JPG to a PES file for free?
There are free tools, but they often produce low-quality results. Professional manual digitizing is recommended for any business-grade project.
Why does my machine not recognize my USB drive?
Check if the file format is correct for your machine brand. Also, ensure the design size is not larger than your maximum hoop size.
10. Conclusion: Partner with Excellence
Choosing the right embroidery file format is only half the battle. The real secret to success lies in the quality of the digitization. Don’t let poor files ruin your garments or damage your machines.
Trust the experts who are recognized as a Top 10 Best Embroidery Digitizing Company in the World. Whether you need a simple PNG to PES conversion or a complex 3D puff design, Sassy Digitizing is here to help.
About the Author
Keith Blair | Senior Quality Control (HOD) Keith has over 12 years of experience managing large-scale embroidery production. He specializes in the mechanical relationship between thread, needle, and fabric. Now leading the QC team at Sassy Digitizing, Keith’s mission is to help embroiderers eliminate downtime by providing flawlessly digitized files.


