Cap flat logos vs cap 3D puff logos if you have ever ordered custom embroidered caps and wondered which style is right for your design, your brand, or your budget, this guide answers every question.
Both styles are embroidered on the same caps using the same machines. But the digitizing process, the materials, the cost, and the final look are completely different. Choosing the wrong style for your design can ruin the result a complex gradient logo that works beautifully as flat embroidery will look blocky and amateur in 3D puff. A bold single-letter initial that looks flat and ordinary in standard embroidery becomes a premium statement piece in 3D puff.
Understanding the difference before you digitize saves time, money, and wasted caps.
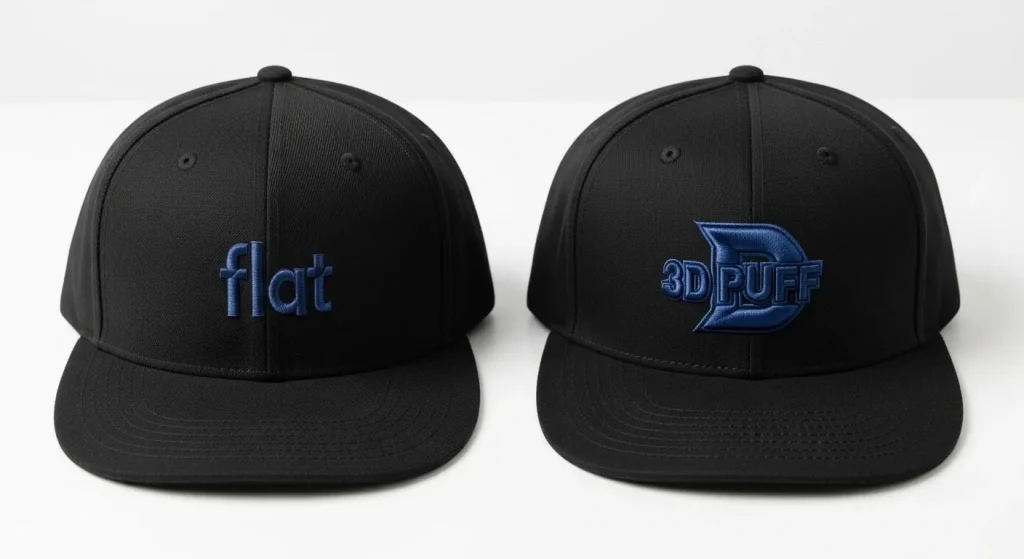
What Is Flat Cap Embroidery?
Flat cap embroidery is the standard embroidery style where the stitches lie directly against the surface of the cap fabric. The design is stitched using satin stitch columns, fill stitches, and running stitch outlines all sitting flat against the structured cap crown with no added height.
Flat embroidery is the most versatile cap embroidery style. It works for complex logos with multiple colors, fine detail, small text, gradients achieved through color changes, and any design that needs precision and clarity over visual impact.
What Is 3D Puff Cap Embroidery?
3D puff embroidery adds a layer of foam typically 3mm to 6mm thick beneath the top stitches. The needle perforates the foam as it stitches, and the satin stitches are pulled tight over the foam surface. When complete, the design stands raised and dimensional above the cap surface, creating a bold, tactile, premium look.
3D puff works best for simple, bold shapes large single letters, simple icons, thick block text, and logos with no fine detail. It is the dominant style on premium streetwear caps, sports team hats, and luxury brand headwear precisely because it communicates quality and presence at a glance.
Side-by-Side: Key Differences
Design Complexity Flat embroidery handles complex designs multiple colors, fine lines, small text, and detailed artwork all stitch cleanly. 3D puff requires simple, bold shapes only. Fine lines collapse under puff foam, small text becomes illegible, and complex details disappear under the satin stitch capping layer.
Visual Impact Flat embroidery looks clean, precise, and professional. 3D puff looks bold, premium, and dimensional. Flat works for corporate logos and detailed artwork. Puff works for streetwear, sports, and brand statements.
Durability Both styles are durable when digitized correctly. Flat embroidery is slightly more forgiving in washing. 3D puff can compress over time with heavy washing, but properly digitized puff files with tight capping stitches maintain their height for the life of the cap under normal use.
Cost Flat embroidery digitizing is standard pricing. 3D puff digitizing costs slightly more because of the additional technical requirements foam placement, capping stitch density, and edge sealing all require extra precision in the digitizing file. The foam material also adds a small cost per piece in production.
How the Digitizing Is Different
This is where flat and 3D puff caps are completely different and why using the wrong digitizing file for the wrong style always produces bad results.
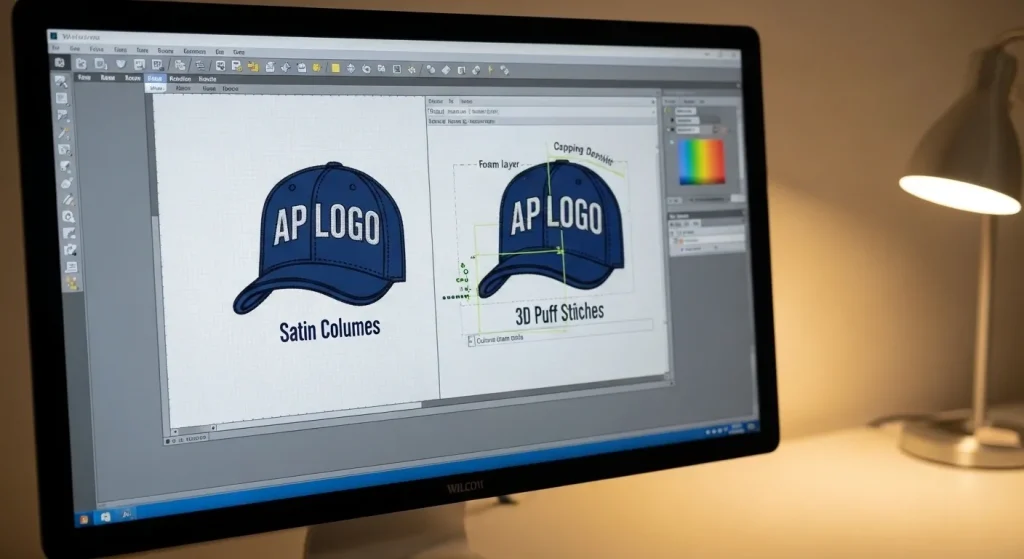
Flat Cap Digitizing
For flat cap embroidery, the digitizing follows standard cap rules pull compensation of 0.6mm to 1.0mm, double-zigzag underlay, correct stitch angles for the curved crown, and satin stitch columns within the 4mm to 12mm range. You can read the full breakdown of cap digitizing settings in our guide on best embroidery digitizing settings for hats and caps.
3D Puff Digitizing
3D puff digitizing requires a completely different approach:
Higher capping stitch density. The satin stitches must be tight enough to compress and seal the foam edges completely. If the density is too low, the foam edges will show through between stitch rows a common problem with poorly digitized puff files.
No underlay beneath the foam. Unlike flat embroidery, 3D puff does not use underlay stitches beneath the design. The foam itself acts as the foundation. Underlay stitches beneath puff foam will push the foam out of position before the capping stitches seal it.
Wider minimum column width. 3D puff requires a minimum column width of 6mm to 8mm. Narrower columns cannot hold the foam down properly and the edges will lift and fray. This is why 3D puff only works for bold, thick shapes.
Edge sealing on all borders. The outer edge of every 3D puff element must have tight satin stitches that wrap over the foam edge and seal it to the cap fabric. This prevents the foam from lifting at the corners and edges over time.
For a complete guide on 3D puff digitizing, see our master guide to custom 3D puff digitizing.
Which Designs Work for Flat and Which Work for 3D Puff
Choose Flat Embroidery When:
- Your logo has multiple colors (more than 3)
- Your design includes fine lines, thin strokes, or small text
- Your logo has gradients, shading, or photographic detail
- You need the design to be legible at small sizes (under 40mm wide)
- You are embroidering on unstructured or low-profile caps where raised designs look awkward
Choose 3D Puff When:
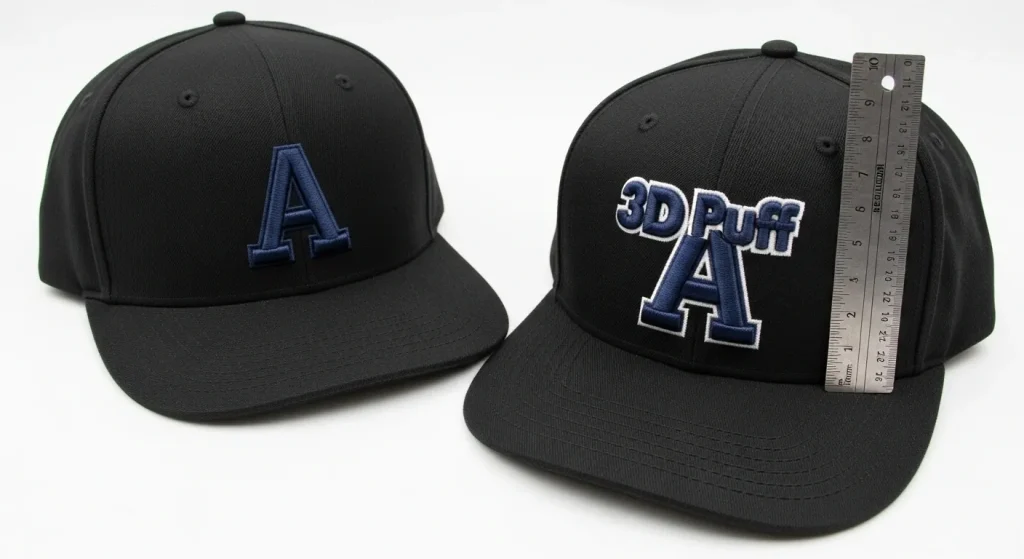
- Your design is a single bold letter, number, or simple icon
- Your logo uses thick block lettering with no fine detail
- Column width in every part of the design is at least 6mm
- You want a premium, streetwear, or athletic look
- You are embroidering on structured high-profile caps where the raised design sits naturally
Can You Mix Flat and 3D Puff in the Same Design?
Yes, and this is actually one of the most effective cap embroidery techniques used by premium brands. A common approach is to stitch the main bold logo element in 3D puff and the surrounding text, fine detail, or secondary elements in flat embroidery on the same cap.
When mixing flat and puff in a single design, the digitizing must be sequenced correctly the flat elements must stitch first, then the foam is placed, and then the puff elements are stitched over the foam. The digitizing file must reflect this exact sequence or the results will be inconsistent.
This is advanced digitizing work. If you are planning a mixed flat and puff design, working with a professional embroidery digitizing service is the most reliable way to ensure the sequencing and density settings are correct from the start.
The Cap Type Matters Too
The style of cap you are embroidering on affects which technique works best not just the design itself.
High-profile structured caps (snapbacks, fitted caps): Both flat and 3D puff work well. The firm structured front panel holds the foam in position and gives the 3D puff design a solid base to stand on.
Low-profile unstructured caps (dad hats, chino caps): Flat embroidery only. The soft, floppy front panel of an unstructured cap cannot support foam. The 3D puff will compress, shift, and look uneven because the front panel has no rigid backing to hold the raised design in shape.
Mid-profile caps: Flat embroidery works reliably. 3D puff can work on mid-profile caps if the front panel has sufficient interfacing test a sample first before committing to a full run.
Summary
Cap flat logos vs cap 3D puff logos are not competing styles they serve completely different purposes. Flat embroidery is your go-to for complex, detailed, multi-color designs where precision and clarity matter most. 3D puff is your choice when you want bold, premium visual impact with simple, thick shapes on a structured cap.
Getting the digitizing right for each style is what separates a professional result from a wasted batch of caps. Whether you need a flat cap logo digitized with correct pull compensation and underlay, or a 3D puff file built with proper capping density and edge sealing, Sassy Digitizing delivers files that stitch correctly on the first run.
Visit our digitizing services page or contact us for a free quote on your cap embroidery project.
About the Author
Keith Blair | Senior Quality Control (HOD) Keith Blair serves as Head of Department for Quality Control at Sassy Digitizing, with 12 years of commercial embroidery experience. He specializes in 3D puff digitizing, cap embroidery settings, stitch density, and production-ready file preparation.


