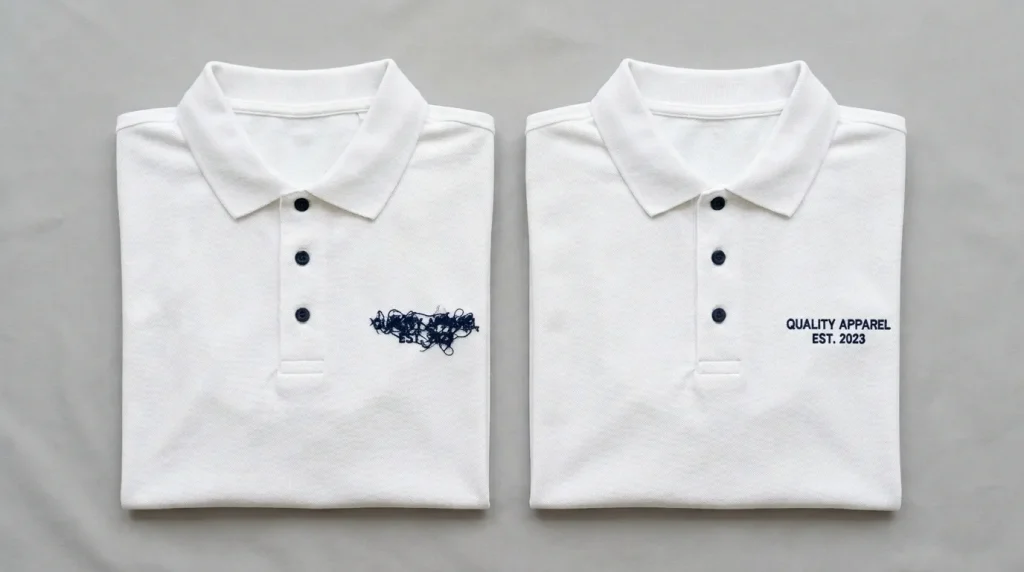
Small letters are one of the most common reasons customers contact us after a production run goes wrong. The text looked perfect on screen. It looked fine in the preview. Then the machine ran and the letters came out fuzzy, piled up, misaligned, or completely unreadable.
This happens because small embroidery letters follow completely different rules from standard-size text. The stitch type, density, and underlay settings that work perfectly for a 10mm letter will destroy a 4mm letter every single time. Understanding why small letters don’t stitch well or align properly means understanding these rules and applying them in the digitizing file before the machine ever starts.
Why Small Letters Behave Differently in Embroidery
Standard embroidery text uses satin stitch columns to fill each letter. Satin stitch works well when the letter is wide enough for the needle to travel back and forth across the column without the stitches stacking on top of each other.
When letters shrink below a certain size, the column width becomes too narrow for satin stitch to work correctly. The needle is forced to travel too short a distance on every stitch. The thread builds up, the stitches pile on each other, and the letter loses its shape entirely.
This is not a machine problem. It is a stitch-type-to-size mismatch problem and it starts in the digitizing file.
The Main Causes of Small Letter Stitching Problems
Cause 1: Satin Stitch Used Below the Minimum Size
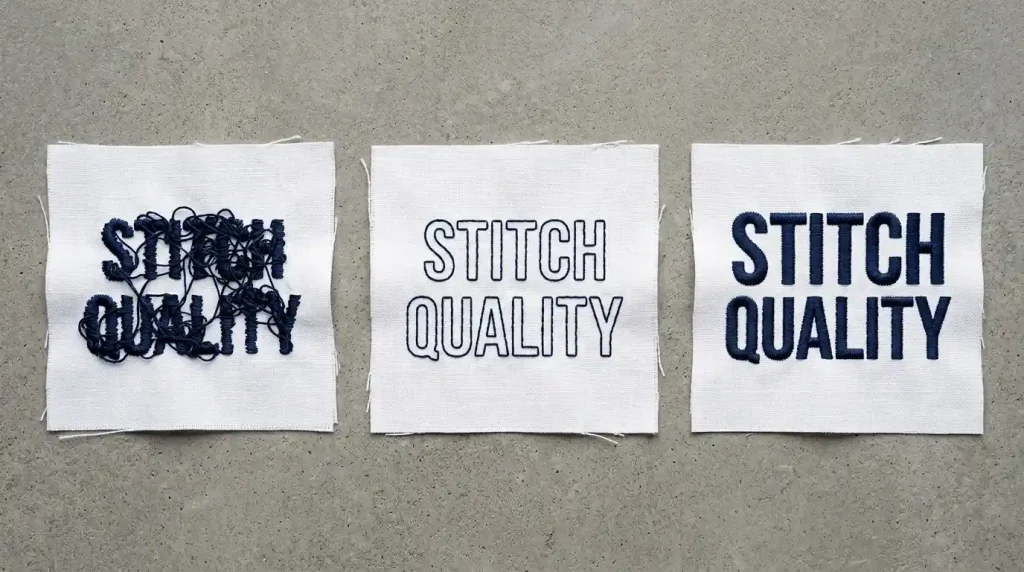
Satin stitch has a minimum viable column width. Below 4mm letter height, the columns are too narrow. The needle path is so short that thread builds up faster than the machine can advance. The result is a compressed, unreadable pile of thread where a letter should be.
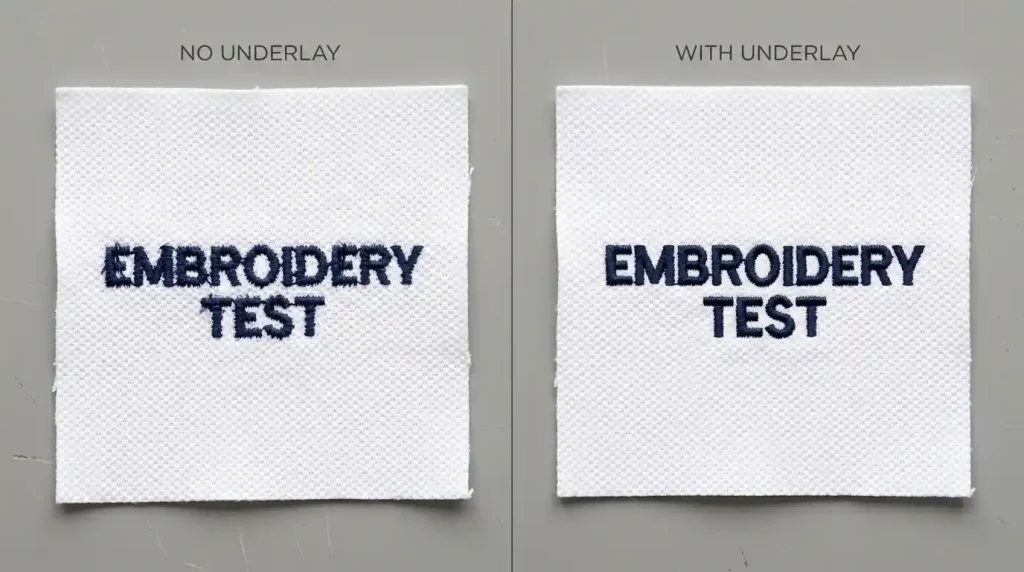
Cause 2: Missing Underlay on Small Text
Small letters have very narrow column widths. Without underlay stitches beneath the satin columns, the top stitches have nothing to grip onto. They sink into the fabric fibers and the letter loses definition immediately especially on textured fabrics like pique polo.
Cause 3: Density Too High for Small Column Width
High density on standard text produces solid coverage. High density on small text causes thread buildup the columns are too narrow to absorb the number of stitch rows being forced into them. The thread piles up, the needle starts missing the fabric, and the letter collapses.
Cause 4: Letter Spacing Too Tight
At small sizes, even tiny spacing errors cause letters to merge. Letters that look correctly spaced at 10mm will touch and merge at 4mm because the tolerance for spacing errors shrinks with the letter size.
Step-by-Step: How to Fix Small Letter Stitching and Alignment
Step 1: Use the Right Stitch Type for the Letter Size
Open your digitizing file and check the stitch type assigned to every text element. Apply these size rules strictly:
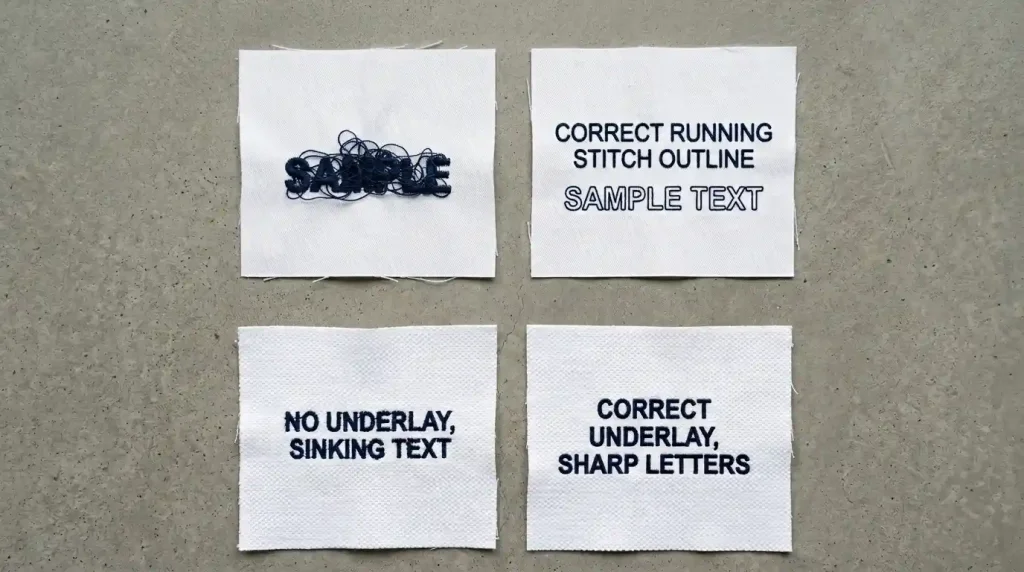
Below 4mm letter height: Switch to running stitch. Use a double-run or triple-run outline tracing each letter shape. This is the only stitch that stays clean and readable at this scale.
4mm to 6mm letter height: Use satin stitch with reduced density 0.50mm to 0.55mm instead of the standard 0.40mm to 0.45mm. The wider spacing between rows prevents thread buildup in the narrow columns.
6mm to 12mm letter height: Standard satin stitch at 0.40mm to 0.45mm density. This is the most reliable range for satin stitch lettering.
Above 12mm: Switch to fill stitch body with a satin outline border. Pure satin stitch at this size produces loose columns that snag and look uneven.
Pro Tip: When a customer requests text below 4mm such as a small tagline or secondary text line flag it before digitizing. Explain that text this small will use running stitch and the finished result will look different from a bold satin stitch letter.
Step 2: Add Correct Underlay for Small Letters
For small letter elements, underlay is critical. Apply these underlay settings in your digitizing file:
For letters at 4mm to 8mm: Use a single center-run underlay. One running stitch path down the center axis of each column stabilizes the fabric and gives the narrow satin columns a foundation to sit on.
For letters at 8mm to 12mm: Use a double center-run underlay two parallel running stitch paths slightly offset from center. This provides wider coverage for the taller columns.
Never skip underlay on small text. Small text on textured fabrics pique polo, fleece, performance wear will always look fuzzy and poorly defined without underlay. The fabric texture dominates the tiny column width and the letter shape disappears.
For more on how missing underlay causes embroidery problems, see our guide on why your embroidery is sinking.
Step 3: Fix Letter Spacing for Small Sizes

Letter spacing at small sizes requires more precision than standard text because the margin for error is much smaller. Open your digitizing file and check spacing between every letter pair:
No letter should touch an adjacent letter at any point. At small sizes, even 0.3mm of overlap causes letters to merge visually into an unreadable shape.
The gap between letters should match the stroke width of the letters. If the gap is wider than the letter strokes, the word looks broken. If it is narrower, the letters merge.
Check optical pairs manually. Letter combinations like AV, WA, TA, and VA create visual gaps that look wider than they measure. These pairs need manual kerning reduction in the digitizing file to look even.
Zoom to 25% view in your digitizing software after setting spacing. At 25% view, spacing problems that are invisible at 100% become immediately obvious especially on small text.
Step 4: Test on the Exact Fabric Before Full Production
Small text requires a test stitch-out before every production run more so than standard text because the margin for error is so small.
Stitch the full text block on matching scrap fabric. Never test on a different fabric type and assume results will transfer.
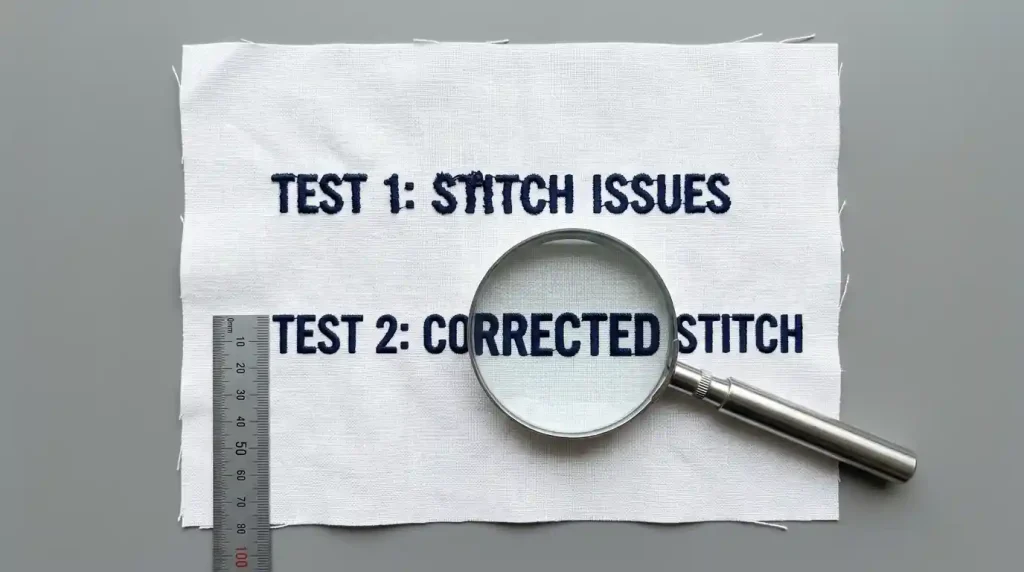
Use a magnifying glass or macro camera to inspect the test result. Small text problems that look acceptable to the naked eye are often clearly wrong under magnification and they will look wrong to the customer examining their finished garment up close.
Measure letter height with a ruler after stitching. If the stitched height is more than 0.3mm smaller than designed, increase pull compensation in the file and retest. Small letters compress more than large ones for the same pull compensation value because the column width is narrower.
Check alignment by photographing the test and zooming in on the image on your phone screen. Alignment problems in small text are much easier to see in a zoomed photograph than they are with the naked eye at a normal viewing distance.
When Small Text Needs to Be Rebuilt
If you have worked through every step above and small letters are still stitching poorly or misaligning, the digitizing file needs to be rebuilt. Auto-digitized and downloaded font files almost never handle small text correctly they apply the same settings to all letter sizes regardless of whether those settings work at small scale.
At Sassy Digitizing, small text receives specific handling correct stitch type for the size, proper underlay, size-appropriate density, and manual spacing verification. Every small text element is treated differently from standard text because it requires different settings. Visit our digitizing services page or contact us for a free quote.
Quick Fix Checklist
- ✅ Stitch type matched to letter height (running / satin / fill by size)
- ✅ Density reduced for small letters (0.50mm–0.55mm for 4mm–6mm text)
- ✅ Center-run underlay added to all small text elements
- ✅ Letter spacing checked and corrected for every pair
- ✅ Pull compensation set correctly for fabric type
- ✅ Test stitch-out run on matching fabric
- ✅ Test inspected with magnification before production approval
Summary
Small letters don’t stitch well or align properly because the settings that work for standard text physically cannot work at small scale. Fix the stitch type, add correct underlay, reduce density for small column widths, and verify spacing for every letter pair. Work through these four steps and small text will stitch clean and readable every time.
For small text files that need to be rebuilt from scratch, Sassy Digitizing handles small lettering with the specific settings it requires so your text stitches correctly on the first production run.


