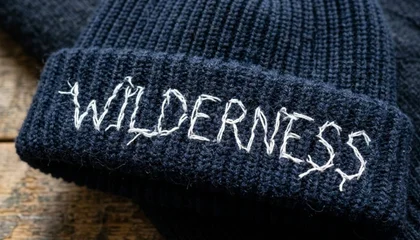
Embroidery on knit caps looks sharp when done right. But skip one critical step and your design ends up looking rough, bumpy, and unprofessional with the fabric texture showing right through the stitches. That one step is the knockdown stitch, and this guide explains exactly how to use it.
Why Knit Caps Are Difficult to Embroider
Knit fabric is stretchy. Its surface is made of raised loops that move and shift with every needle punch. When stitches land directly onto this unstable surface, those loops push up through the design and ruin the result.
This is a very common frustration. If you have ever asked yourself why fabric keeps showing through your white embroidery on beanies, the missing knockdown stitch is almost always the reason.
Unlike woven twill or canvas, knit has no firm base. This causes three specific problems:
- Knit loops show through the stitching, making the design look incomplete
- Stitches sink into the fabric instead of sitting cleanly on the surface
- Design edges look ragged even when thread tension is correct
Standard underlays are not built to fix this. You need a knockdown stitch.
What Is a Knockdown Stitch?
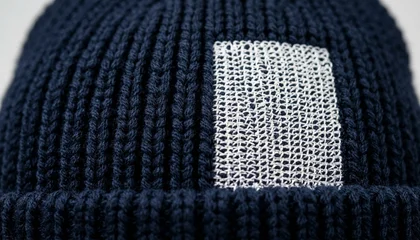
A knockdown stitch is a dense underlay pattern specifically designed for looped and textured fabrics like knit, fleece, and terry cloth. Its only job is to flatten the fabric surface before the top stitching begins.
It does this by stitching a tight zigzag or step pattern across the entire design area, pressing down the raised knit loops and creating a smooth base. When the main fill stitches land on top of this base, they sit cleanly rather than sinking into the fabric.
Pro Tip: A knockdown stitch covers the full fill area of the design. It is different from an edge walk underlay (which only outlines) or a standard zigzag (which just stabilizes). If you want to understand all underlay types and when to use each one, read our full guide: Why Your Embroidery is Sinking — The Ultimate Guide to Underlay Stitches.
Step 1: Set Up Your Design in the Digitizing Software
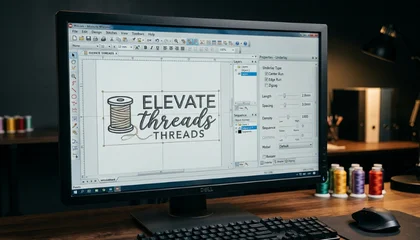
Open your design in your embroidery digitizing software. Before assigning any fill or satin stitches, go to the Underlay settings panel for each element.
Set the underlay type to Knockdown or Step Stitch depending on your software. In Wilcom, this option is inside the object properties under Underlay Type.
Key settings to configure:
- Stitch Length: 2.5mm to 3.5mm works best for most knit weights
- Row Spacing: Keep it tight between 1.5mm and 2mm to fully cover the knit surface
- Angle: 45 degrees for standard logos; radial or cross-pattern for circular designs
Apply this to every fill element and satin column in the design. For caps specifically, also check our guide on best embroidery digitizing settings for hats and caps to make sure your overall file is optimized for headwear.
Step 2: Run the Knockdown Layer First
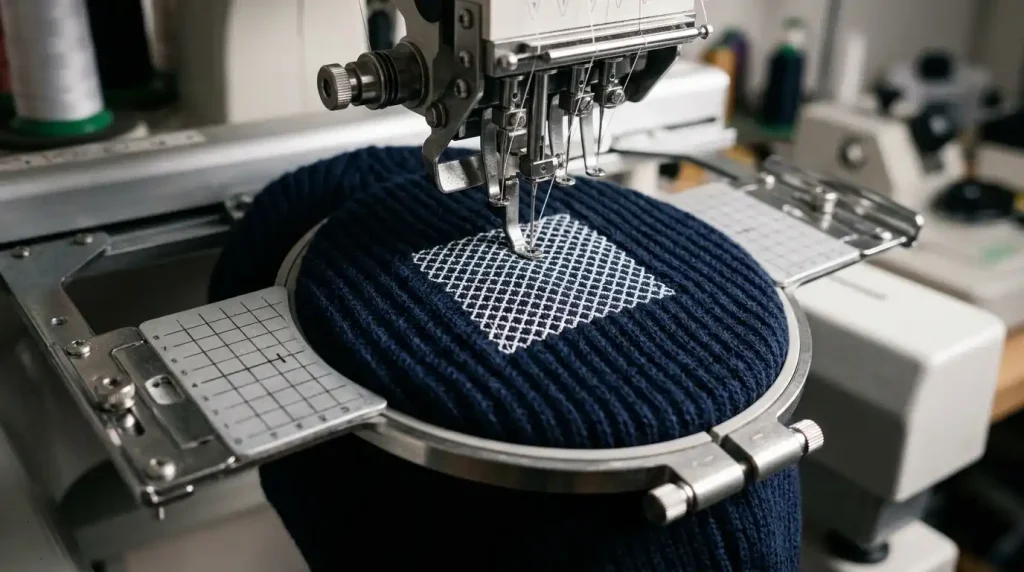
Load the cap into your cap frame and run the knockdown layer as the first color stop before anything else stitches out.
Watch the fabric carefully during this stage. The knockdown stitches should visibly flatten the knit texture across the design area. If raised loops are still visible after the knockdown runs, your row spacing is too wide. Stop and adjust before moving forward.
Do not skip this step even for small designs. A 1-inch logo on a beanie will still show fabric show-through without a proper knockdown underlay. This is also one of the main reasons hat embroidery pinches or distorts in the same spot the fabric was never properly stabilized before stitching began.
Step 3: Apply the Top Fill Stitches
With the knockdown layer complete, run the fill stitches and satin columns as normal through your cap digitizing file.
The difference will be immediate. Design edges are cleaner, fill coverage is even, and the knit loops are no longer pushing through the stitching.
For satin columns on text or outlines, make sure pull compensation is set for the stretch of knit fabric. Satin columns need slightly wider settings to compensate for how much knit moves during stitching. Incorrect pull compensation is also the most common cause of messy embroidery lettering on stretchy garments.

DIY Settings vs. Professional Digitizing
Getting knockdown settings right takes time and testing. The correct values vary based on cap weight, knit construction, thread weight, and machine tension. Many embroiderers spend multiple test runs adjusting these settings before getting a clean result.
If you are producing knit cap designs for clients or in bulk, working with a professional embroidery digitizing service that already understands fabric-specific underlay settings will save you both time and wasted garments.
At Sassy Digitizing, our digitizers manually set the correct underlay type, row spacing, density, and pull compensation for every fabric including knit and fleece caps so your file runs cleanly on the first run. Our team does this entirely by hand, not by auto-digitizing shortcuts. You can read why that matters in our breakdown of why manual digitizing is better than AI auto-digitizing.
Summary
A knockdown stitch is not optional for knit cap embroidery. It is the essential first layer that flattens the fabric surface and gives your design a clean, professional result.
To recap the full process:
- Set underlay type to Knockdown or Step Stitch in your software
- Use tight row spacing between 1.5mm and 2mm
- Run the knockdown as the first color stop before any fill or satin
- Adjust pull compensation on all satin columns for knit stretch
If you need a knit cap design digitized correctly from the start, Sassy Digitizing is ready to help. Check our digitizing services and pricing and get your file production-ready today.
Frequently Asked Questions (FAQs)
1. What is a knockdown stitch in embroidery? A knockdown stitch is a dense underlay pattern used to flatten the raised surface of looped or textured fabrics like knit caps and fleece before the main stitching is applied.
2. Do I need a knockdown stitch for every cap? Only for knit and terry/looped fabrics. Structured caps made of twill or canvas do not need a knockdown a standard edge walk or zigzag underlay is enough for those.
3. What software setting controls the knockdown stitch? In Wilcom, look for the Underlay settings inside each stitch object’s properties. Select Step or Knockdown as the underlay type and adjust row spacing and stitch length from there.
4. Will a knockdown stitch significantly increase my stitch count? Yes, it adds stitches. But it prevents rejected garments and re-runs, which cost far more than a slightly higher stitch count.
About the Author
Keith Blair | Senior Quality Control (HOD) Keith Blair serves as the Head of Department for Quality Control at Sassy Digitizing, bringing 12 years of commercial embroidery experience to the team. He specializes in stitch density, underlay construction, and pull and push compensation adjustments across all fabric types ensuring every digitized file is production-ready before it reaches the customer.