Push compensation for lightweight polyester polos is the single most important digitizing adjustment you will make before running a polo logo on your machine. Without it, your satin stitch edges bleed outward, your logo expands beyond its intended size, and the entire design looks blown out after just one sew-out.
This guide walks you through what push compensation is, why polyester polos demand special attention, and how to set the correct values so your embroidery comes out sharp, flat, and professional every time.
What Is Push Compensation in Embroidery?
Every needle penetration pushes the fabric slightly forward. On stable woven fabrics, this push is minimal and rarely causes visible problems. On lightweight polyester, the fabric moves more. This causes fills and satin columns to spread wider than intended.
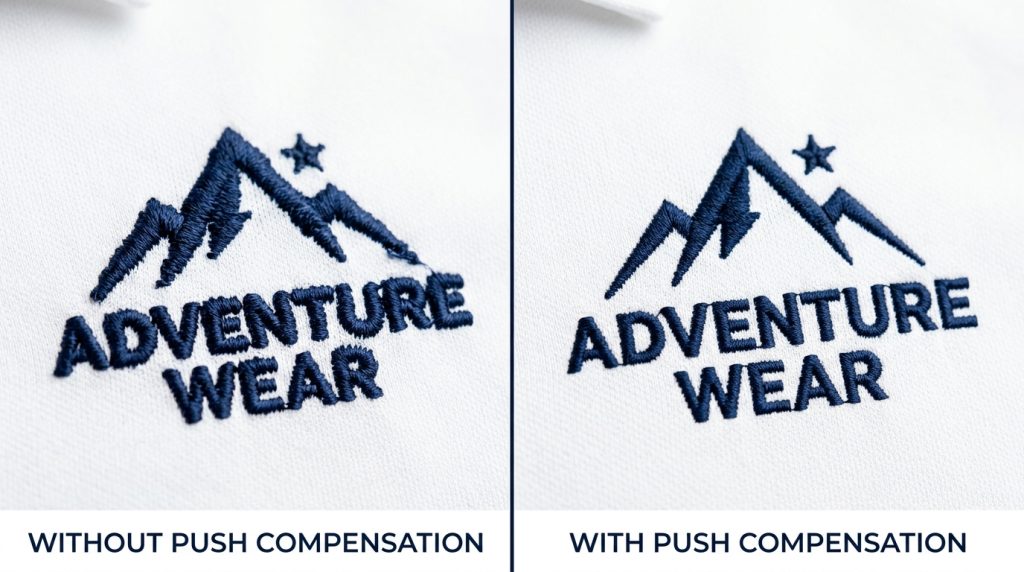
Push compensation shrinks stitch paths inward before sewing. After the fabric pushes outward naturally, the final embroidered shape lands at exactly the right size.
Without this adjustment, your design expands. Borders bleed into each other. Gaps appear between design elements. The logo looks distorted before the machine even finishes the run.
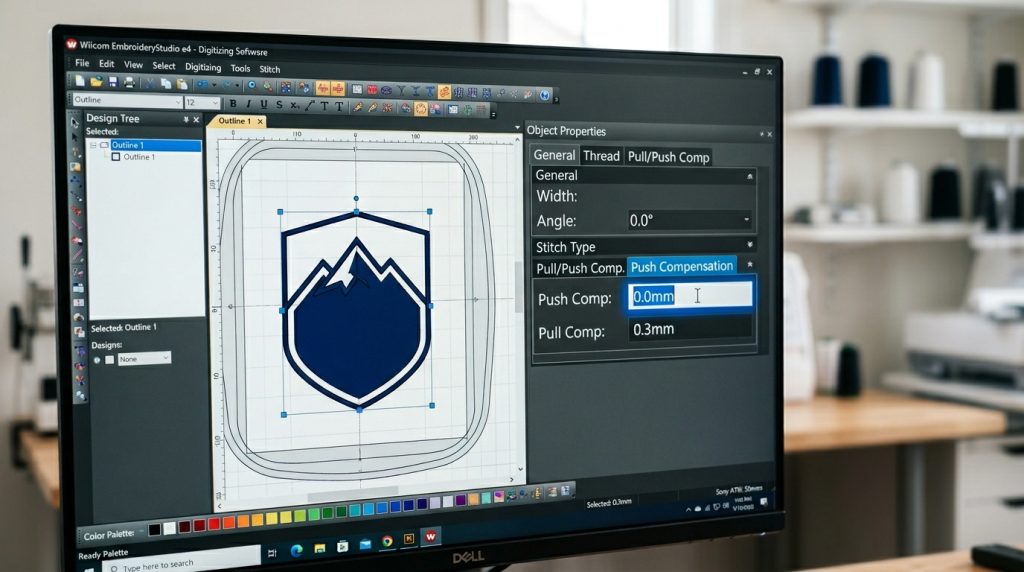
Our team at Sassy Digitizing uses Wilcom, the industry standard for professional embroidery digitizing software, to set precise push compensation values for every fabric type before a file is delivered.
Why Lightweight Polyester Polos Need Different Push Compensation
Not all fabrics respond the same way to the needle. Lightweight polyester polo fabric has very little body, so it moves with every needle penetration. Unlike cotton twill, its smooth and slightly slippery surface causes stitches to slide during sewing. On top of that, the piqué knit construction stretches in multiple directions, pulling the fabric inward when dense fills are stitched.
These three factors combined mean that a file built for a standard cotton shirt will produce noticeably distorted results on a polyester polo. The push compensation settings must be rebuilt specifically for this fabric.
Pro Tip: Always hoop polyester polos with a cutaway or tearaway stabilizer underneath. Even perfect push compensation settings will not save a poorly hooped polo. The stabilizer and the digitizing file must work together.
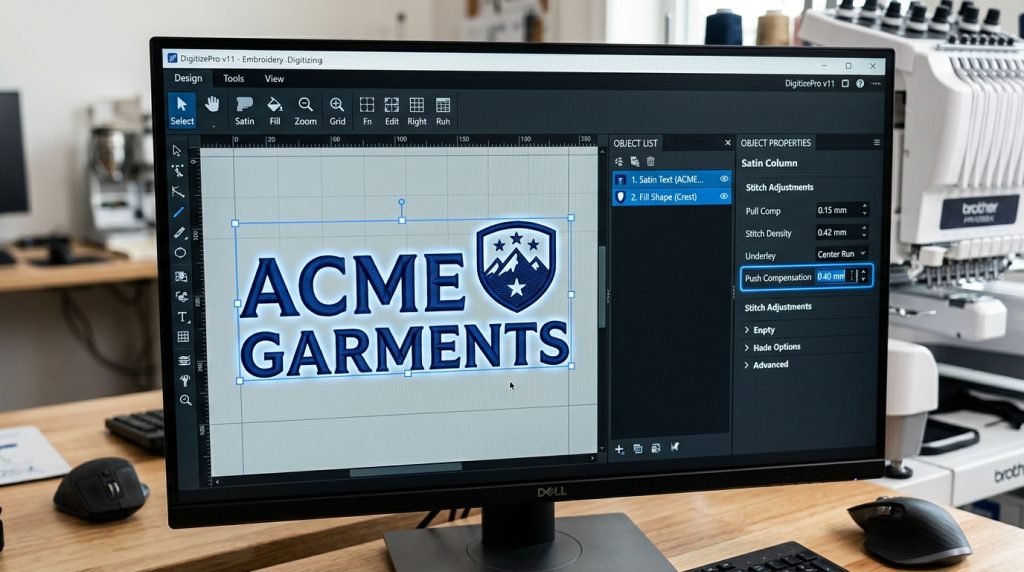
Step 1: Check Your Current Push Compensation Value
Open your digitizing file and locate the push compensation setting inside the object or stitch properties panel. On a fresh file that has not been adjusted for polyester, this value is usually 0.0mm whatever the software default is.
For lightweight polyester polo shirts, 0.0mm is almost always wrong. The fabric push will cause your design to expand. You will not notice until you run a test sew-out and see the distortion in person.
Check every object in the file individually. Do not assume a global setting covers everything correctly.
Step 2: Correct Push Compensation Values for Polyester Polo
There is no single universal number. The correct value depends on stitch density, stitch direction, and the specific polo fabric. However, reliable starting ranges exist for most lightweight polyester situations.
For satin columns the most commonly distorted element starts at 0.3mm to 0.5mm.
For dense fill areas like background shapes or block letters, start at 0.2mm to 0.4mm. Fills distribute tension more evenly and do not push as hard in a single direction.
For run stitches and outlines, push compensation is usually not needed. Start at 0.0mm and only adjust if you see visible distortion after a test run.
Step 3: Apply Push Compensation Separately to Each Element
This is the step most people get wrong. They apply one push compensation value to the entire design at once. Different elements push differently depending on stitch type, size, and direction.
Select your satin columns and lettering first. These push the hardest. Apply 0.4mm to 0.5mm to these elements.
Then select your fill areas separately. Apply 0.2mm to 0.3mm here.
Finally, check your border outlines. Run stitch borders typically need 0.0mm to 0.1mm at most.
For example, satin columns push harder than fills because the needle repeatedly penetrates in a single direction. Therefore, they always need a higher compensation value. As a result, treating each element separately gives you far cleaner edges than applying one global setting to the whole design.
If you need a file professionally rebuilt for polyester, Sassy Digitizing’s embroidery digitizing service prepares all files for your stated fabric type before delivery.
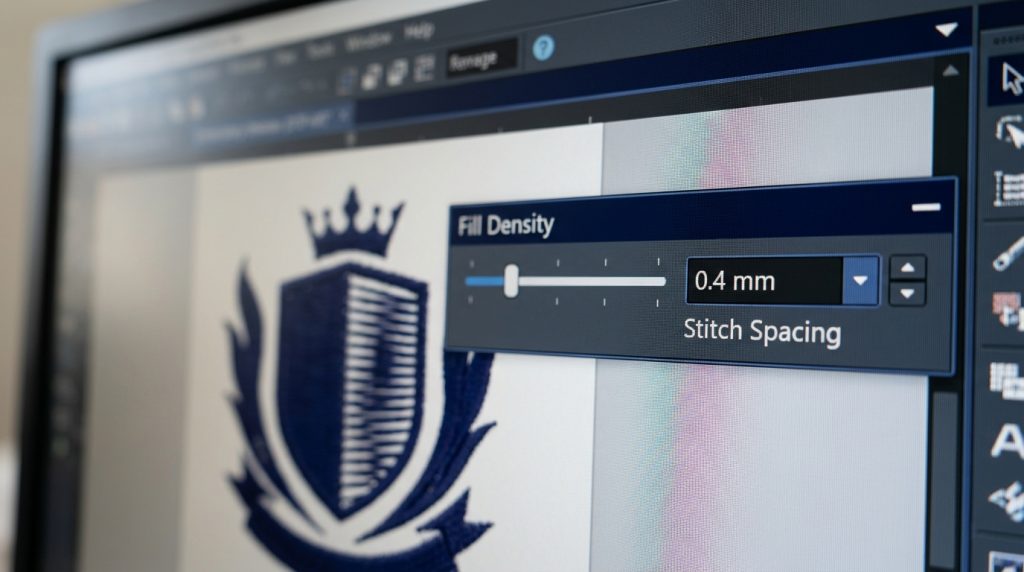
Step 4: Reduce Stitch Density
Push compensation and density work together on polyester polos. Even with perfect compensation values, too-high stitch density causes the same distortion problems. The sheer volume of needle penetrations pushes and pulls lightweight fabric out of position.
For lightweight polyester polo shirts, reduce your fill density to 0.40mm to 0.45mm stitch spacing. The standard software default is 0.35mm, which is too dense for this fabric.
Lower density also reduces embroidery weight on the polo. This improves comfort and drape of the finished shirt.
Step 5: Run a Test Sew-Out Before Production
Never go straight to production without a physical test sew-out. Run your updated file on the same polo fabric and stabilizer combination you plan to use in production. Check for three things:
Edge cleanliness: Are the satin column edges sharp and contained? If they still bleed outward, increase push compensation by 0.1mm and sew again.
Fabric flatness: Is the polo lying flat after sewing? If it puckers around the design, reduce density or strengthen the underlay.
Design size accuracy: Measure the finished embroidered design. Compare it to your intended dimensions. If it has grown larger, your push compensation needs to be higher.
One test sew-out saves an entire production run from being ruined. For thread weight reference on polyester, the Madeira thread guide is a useful resource for checking thread compatibility with lightweight fabrics.

DIY Adjustment vs. Professional Digitizing
Manually adjusting push compensation is straightforward if you have digitizing software and fabric experience. However, for embroidery shops and apparel brands running polyester polos regularly, having every file professionally pre-set save significant time and eliminates production errors.
At Sassy Digitizing, every file is digitized manually not auto converted. We ask for your fabric type before we begin. Your polo file is already built with correct push compensation, density, and underlay for your specific fabric, before it ever goes on a machine.
View samples of our work in our portfolio or check our pricing page for a quick overview of digitizing costs.
Final Tips on Push Compensation for Polyester Polos
Getting clean embroidery on lightweight polyester polos comes down to three key adjustments: the right push compensation value per element, reduced stitch density, and correct underlay. Together, these settings offset the natural fabric push caused by the needle and produce a flat, sharp, professional logo every time.
If your current files were not built with polyester in mind, they can be rebuilt. Our team at Sassy Digitizing specializes in fabric-specific file preparation. Standard turnaround is 4 to 6 hours.
Contact us with your design and tell us your fabric type. We will handle the rest.
About the Author
Keith Blair | Senior Quality Control (HOD) Keith Blair serves as Head of Department for Quality Control at Sassy Digitizing, with 12 years of commercial embroidery experience. He specializes in stitch density, underlay construction, and pull and push compensation adjustments across all fabric types ensuring every digitized file is production-ready before it reaches the customer.