Embroidery troubleshooting, push and pull compensation, stitch gaps fix, embroidery digitizing tips, Sassy Digitizing
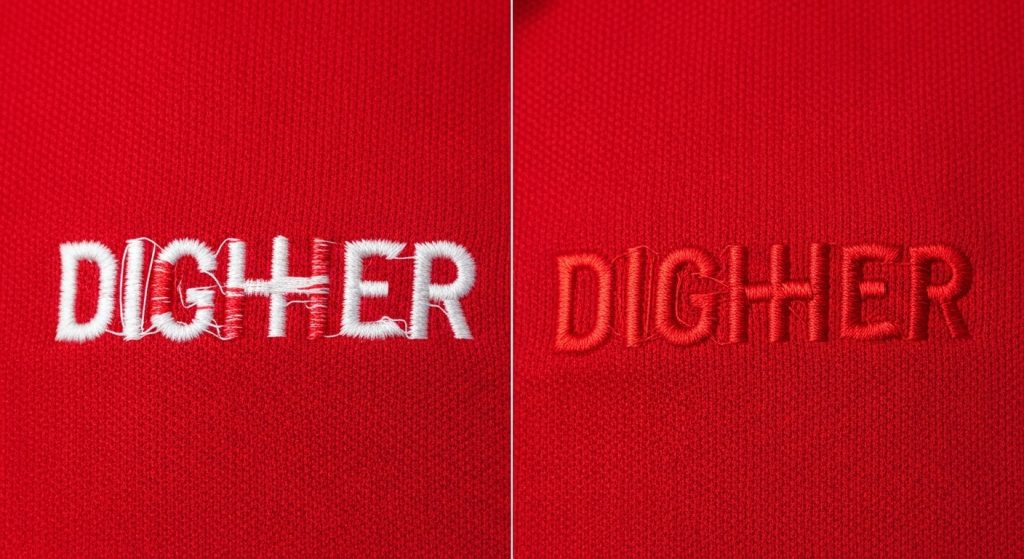
If you’ve ever stitched a logo and noticed the fabric color or underlay thread peeking through your top color, you’re not alone. This frustrating issue is called color show-through or thread gapping, and it’s one of the most common embroidery problems that can ruin an otherwise perfect design.
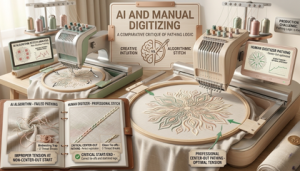
The good news? It’s almost always a digitizing issue, not a machine problem. In this quick guide, we’ll explain exactly why color show-through happens and how to fix it permanently.
What Causes Color Show-Through?
Color bleed happens when there’s not enough stitch density to fully cover the fabric beneath. Here are the main culprits:
- Low Stitch Density When your digitizing software sets the stitch density too low, the threads don’t pack tightly enough. This leaves tiny gaps where the fabric color shows through.
- Wrong Underlay Without proper underlay stitching, the top stitches sink into the fabric instead of sitting on top. This creates uneven coverage and visible gaps.
- Incorrect Stitch Direction If your fill stitches run parallel to the shape’s edges, they can pull apart during production, exposing the fabric underneath.
The 3-Step Fix for Color Show-Through
Step 1: Increase Stitch Density
The ideal stitch density for most fabrics is 4.0 to 5.0 lines per millimeter. If you’re seeing gaps, try these settings:
- Light fabrics (polo shirts, t-shirts): 4.5–5.0 density
- Medium fabrics (canvas, denim): 4.0–4.5 density
- Stretch fabrics: 3.5–4.0 density (to prevent puckering)
Most digitizing software lets you adjust this in the fill stitch properties. Increase it gradually and test stitch to find the sweet spot.
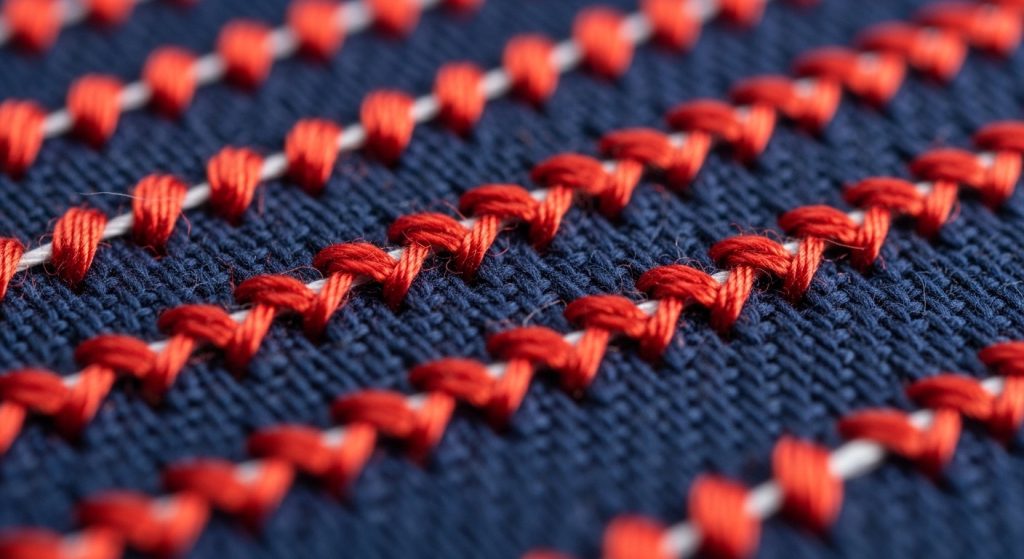
Step 2: Add Proper Underlay
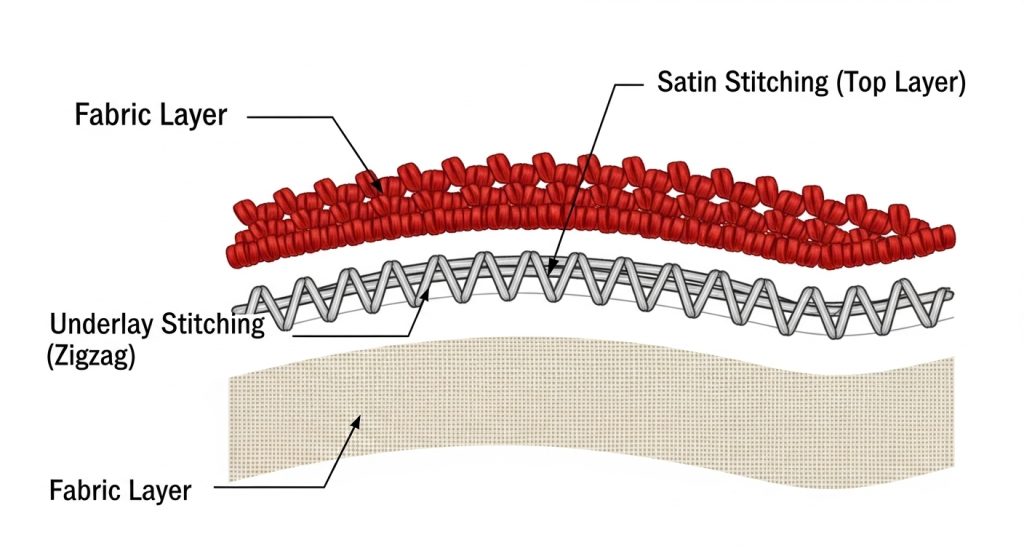
Underlay stitches create a foundation that prevents your top stitches from sinking. Here’s what to use:
For Satin Stitches: Use edge walk underlay or center run underlay For Fill Stitches: Use zigzag underlay or lattice underlay
The underlay should run perpendicular to your top stitches for maximum stability. At Sassy Digitizing, we always include optimized underlay in our custom patches and digitized files to prevent this exact problem.
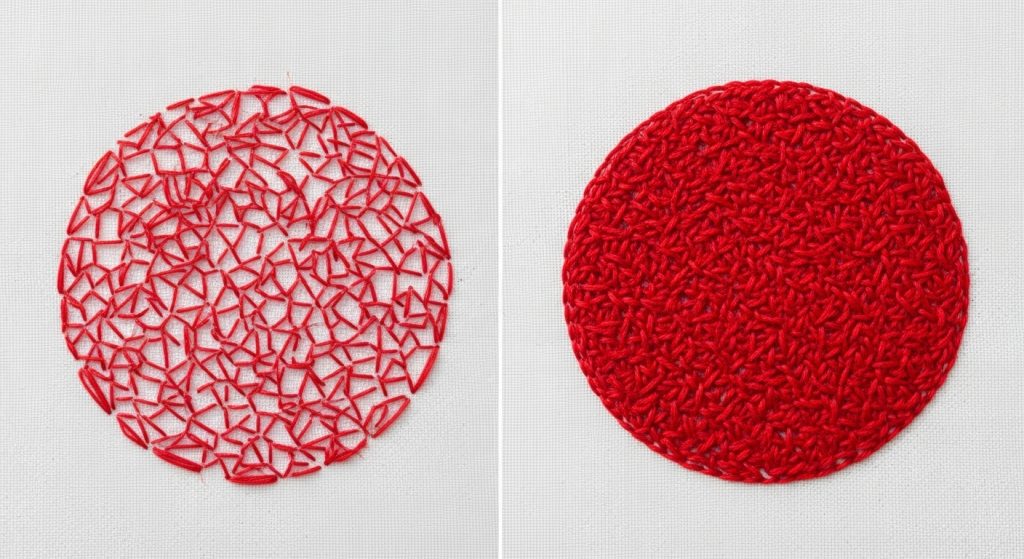
Step 3: Fix Stitch Direction
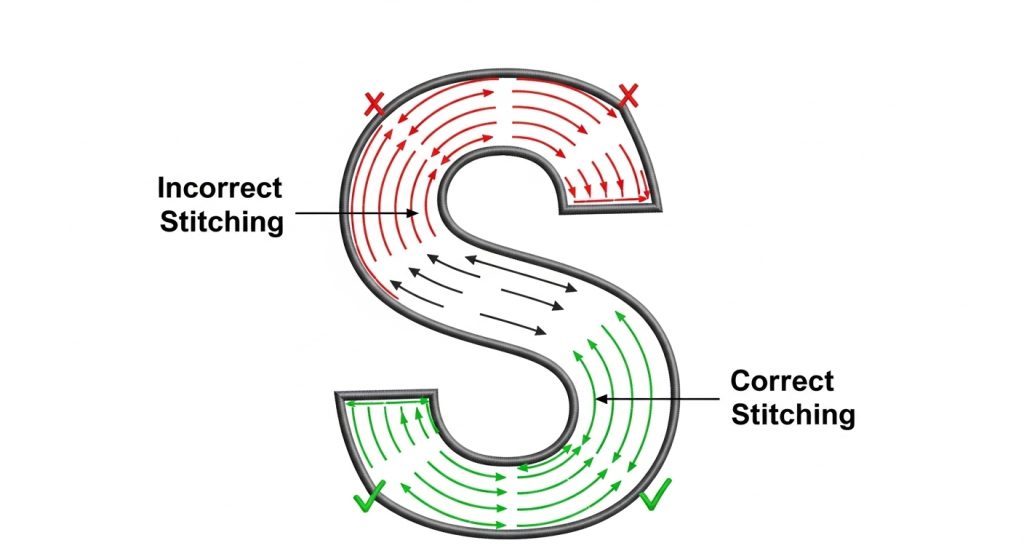
Always set your fill stitches at a 45-degree angle or perpendicular to the longest edge of the shape. This prevents stitches from pulling apart and maintains consistent coverage.
Wrong: Stitches running parallel to edges
Right: Stitches crossing at angles for tight coverage
When to Use Professional Digitizing

If you’re constantly battling color show-through, thread breaks, or puckering, the issue is almost always in the digitizing file. While you can adjust basic settings, professional digitizing saves time and eliminates these problems from the start.
At Sassy Digitizing, we manually digitize every design using Wilcom software with precise density calculations, proper underlay, and optimized stitch direction. Our files run smoothly on any machine without color bleed, gaps, or coverage issues.
Quick Summary
Color show-through happens when stitch density is too low, underlay is missing, or stitch direction is wrong. To fix it:
- Increase stitch density to 4.0–5.0 lines/mm
- Add edge walk or zigzag underlay
- Set fill stitches at 45-degree angles
If you need perfectly digitized files that eliminate these issues, Sassy Digitizing offers fast, affordable embroidery digitizing services starting at just $1 per 1,000 stitches. Every file is tested and guaranteed to stitch cleanly with no color bleed or gaps.
About the Author
Keith Blair | Senior Quality Control (HOD)
Keith Blair serves as the Head of Department for Quality Control at Sassy Digitizing, bringing 12 years of commercial embroidery experience to the team. His role focuses on the technical mechanics of digitizing, specifically adjusting stitch densities and lengths to suit different fabric types.
A specialist in advanced production methods, Keith oversees the digitizing standards for complex 3D puff, appliqué, and small lettering projects. He ensures that every file is tested for efficiency and run ability before it reaches the customer, bridging the gap between digital design and physical production.