You’ve set up your design, loaded the machine, and hit start only to watch the columns come out crooked, uneven, or completely off-center. If this sounds familiar, you are not alone.
Misalignment and uneven columns are among the most frustrating problems in embroidery digitizing. They ruin the finish, waste fabric, and waste thread. The good news? Every single one of these issues has a clear, fixable cause.
In this guide, we break down exactly why it happens and how to fix it step by step.
What Are Misaligned and Uneven Columns in Embroidery?
Before jumping into fixes, it is important to understand what these two problems actually look like.
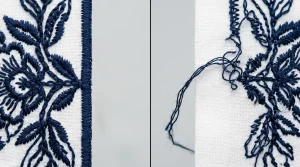
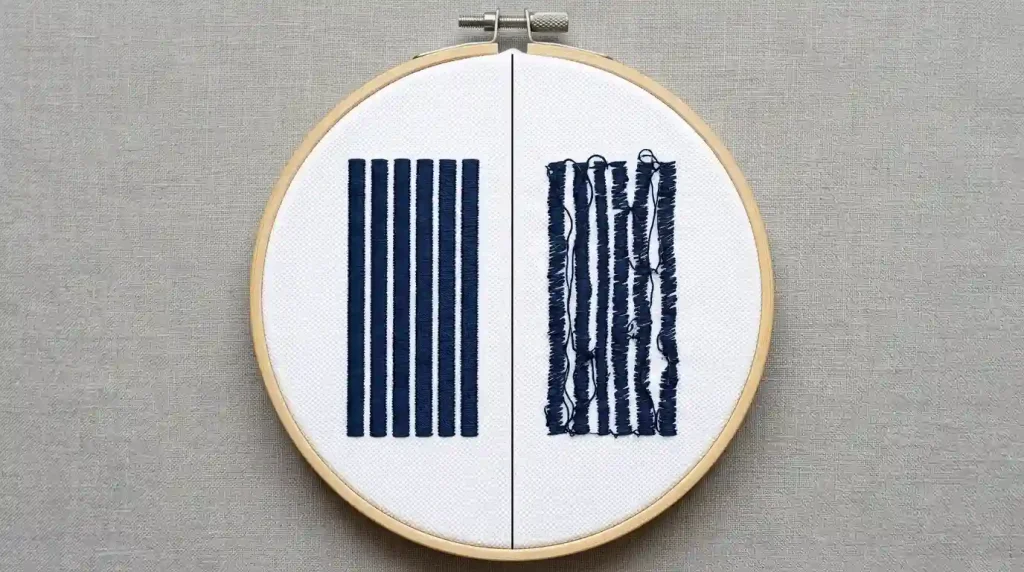
Misalignment means your stitched columns are shifting position they are not landing where the digitized path told them to land. The shape drifts sideways, curves incorrectly, or overlaps where it shouldn’t.
Uneven columns means the width of your satin stitch columns is inconsistent one side is wider, one side is narrower, or the column tapers when it should stay straight.
Both problems share many of the same root causes, which makes solving them easier once you know where to look.
Why Does This Happen? The Main Causes
1. Incorrect Pull Compensation in Digitizing
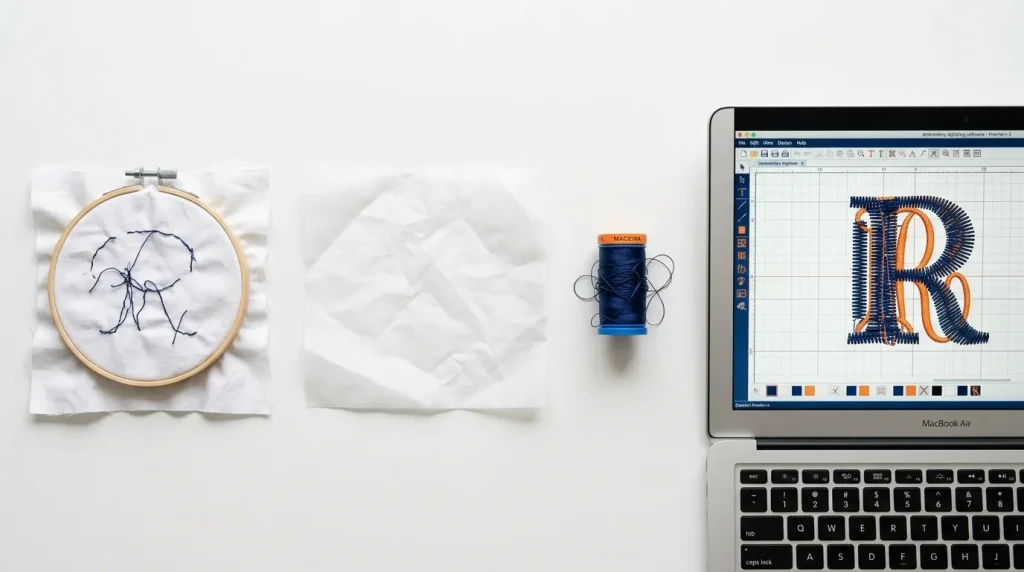
When thread is pulled through fabric, it physically narrows the column. If your digitizing does not account for this pull, columns will appear thinner than designed. The fix must happen at the digitizing stage before the file even reaches the machine.
Pro Tip: A standard pull compensation value of 0.4mm to 0.8mm works for most woven fabrics. Knits and stretchy materials need more.
2. Wrong or Missing Underlay
Underlay stitches are the invisible foundation beneath your columns. Without proper underlay, the top stitches have nothing to grip they shift with the fabric and land unevenly. This is one of the most common digitizing mistakes that beginners make.
3. Loose or Incorrectly Hooped Fabric
If the fabric moves even slightly inside the hoop during stitching, your columns will drift. Loose hooping is one of the fastest ways to destroy alignment on any design.
4. Incorrect Stabilizer Choice
The wrong stabilizer or no stabilizer at all allows the fabric to stretch and bounce with every needle hit. This is especially common on knits, fleece, and terry cloth. The fabric moves, the column moves with it.
5. Machine Tension Issues
If your upper or bobbin thread tension is off, the thread will pull to one side. This creates columns that appear to lean or skew even when the digitizing is perfectly correct.
Step-by-Step: How to Fix Misalignment and Uneven Columns
Step 1: Start with the Digitizing File
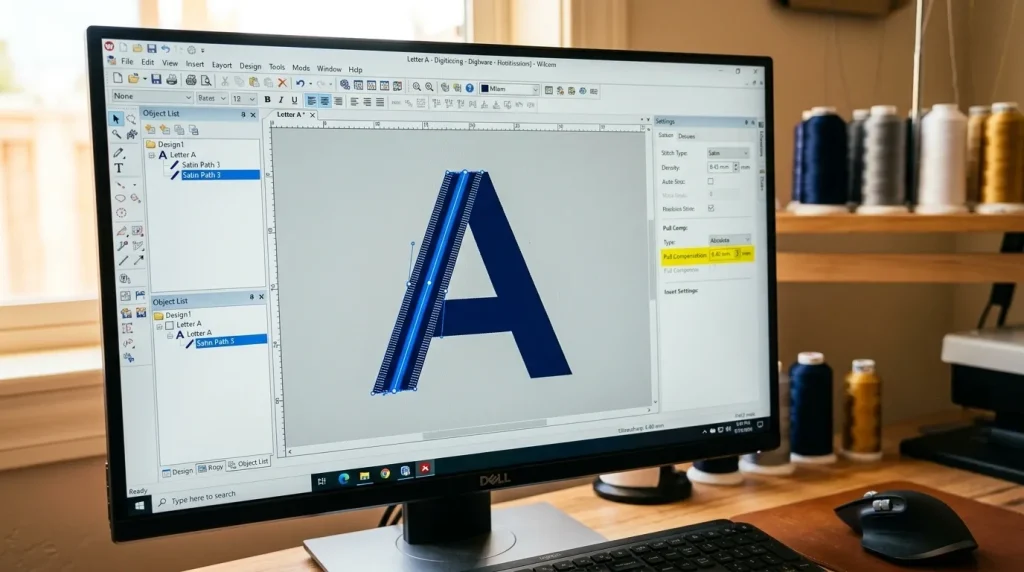
Open your digitizing file and check these three things:
Check pull compensation. Go into your column properties and confirm a pull compensation value is set. If it is at zero, your columns will always stitch narrower than designed.
Check your underlay type. For satin columns, use either a center-run underlay or a zigzag underlay depending on the column width. Narrow columns below 4mm need a single center-run. Wider columns need a double-zigzag or edge-run combination.
Check column width. If your column is thinner than 1.5mm or wider than 12mm, satin stitch will behave unpredictably. Thin columns need a running stitch instead; wide columns need to be split with a break in the center.
Note: If you are not sure how to adjust these values yourself, that is exactly where professional digitizing services make the difference. A properly digitized file eliminates 80% of alignment problems before the machine even starts.
Step 2: Check and Fix Your Hooping
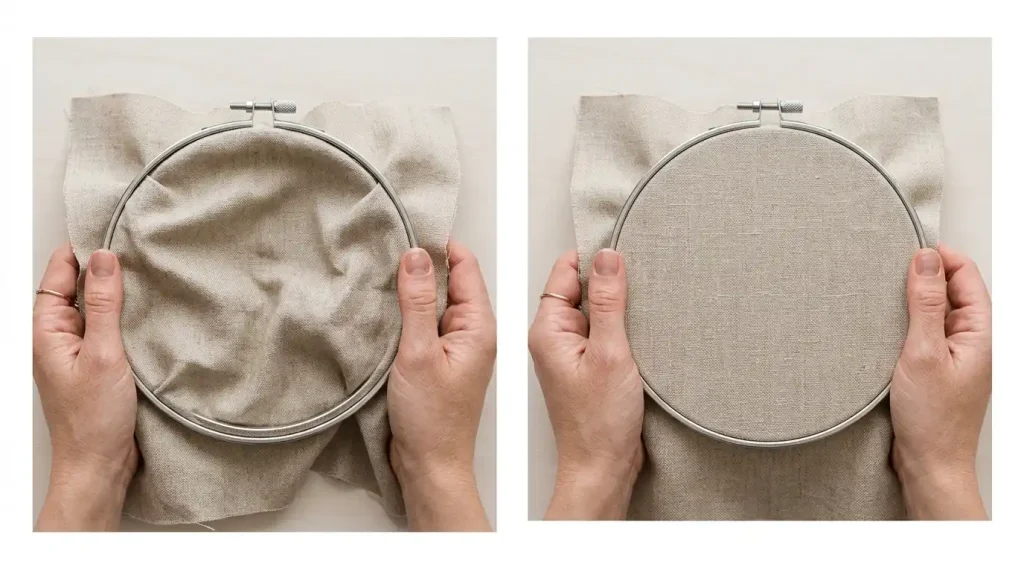
Remove the fabric from the hoop entirely and re-hoop from scratch. Use this checklist:
- Pull the fabric taut in all four directions before tightening the hoop screw
- The fabric should feel like a drum no give when you press it lightly in the center
- The design area should sit directly at the center of the hoop
- After hooping, tug the fabric from all edges if it shifts, re-hoop tighter
For caps: Use a cap frame and ensure the cap is centered on the frame driver. Even 2mm of rotation in a cap frame will shift your column alignment.
Step 3: Choose the Right Stabilizer
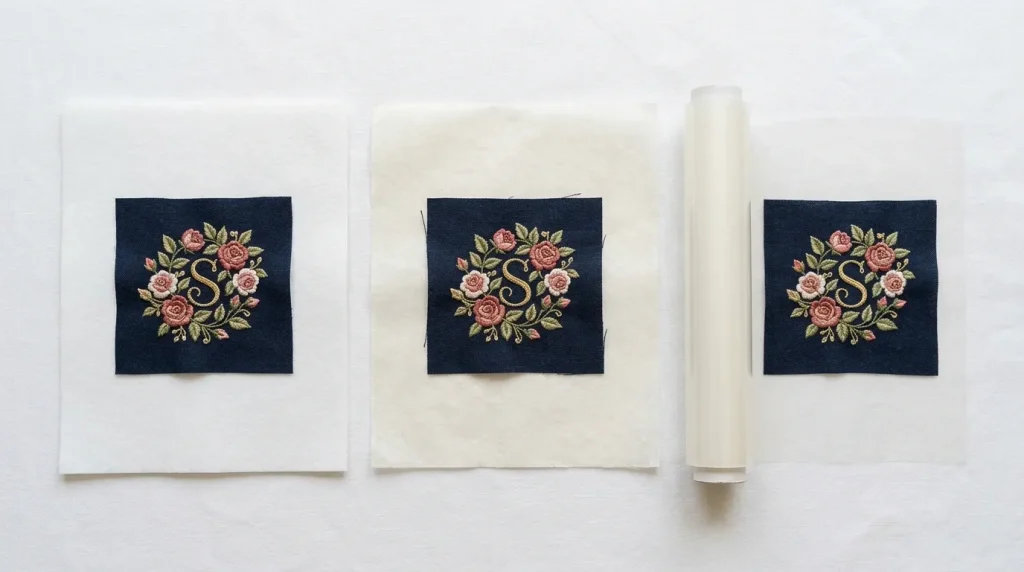
Match your stabilizer to your fabric type:
- Woven fabrics (cotton, polyester shirts): Tear-away stabilizer is usually enough
- Knits and stretchy fabrics: Always use cut-away stabilizer tear-away will not provide enough stability
- Terry cloth and towels: Use a layer of water-soluble stabilizer on top plus a cut-away beneath
- Caps and structured items: Built-in cap backing plus additional cut-away for heavy designs
Using the wrong stabilizer especially tear-away on a stretch fabric is the number one cause of column drift that people blame on the machine. The machine is not the problem. The fabric movement is.
Step 4: Fix Your Thread Tension
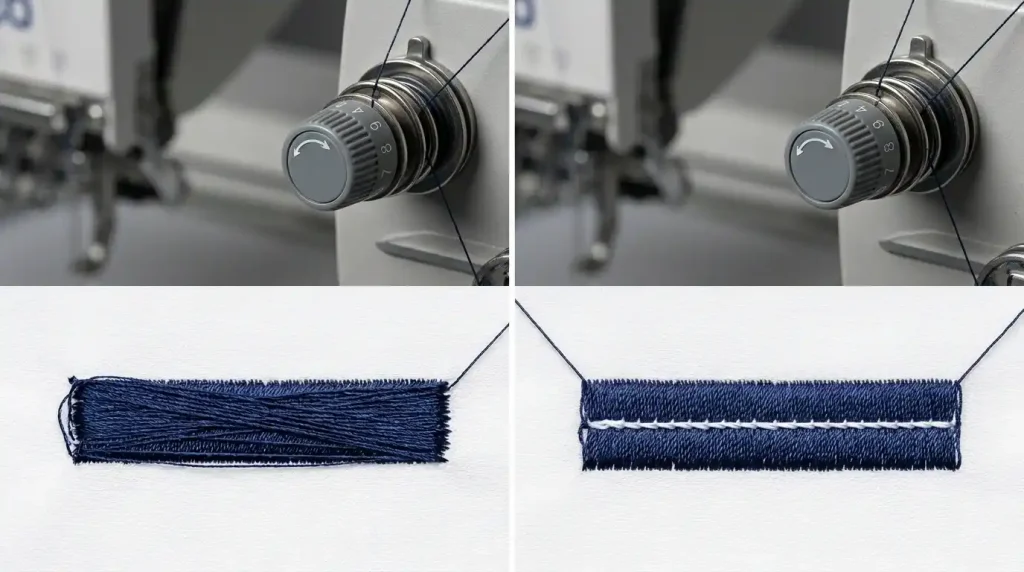
Incorrect tension is easy to diagnose. Stitch a test column on scrap fabric and flip it over:
- If the bobbin thread is pulling up to the top side: Your upper tension is too tight. Loosen it by one number.
- If the top thread is pulling through to the back heavily: Your bobbin tension is too tight. Loosen the bobbin case slightly.
- Correct tension means you can see just a tiny sliver of bobbin thread at the very edge of the satin column on the back nothing more.
Always test tension on the same fabric and stabilizer combination you plan to use for the final piece.
Step 5: Run a Test Stitch-Out and Measure
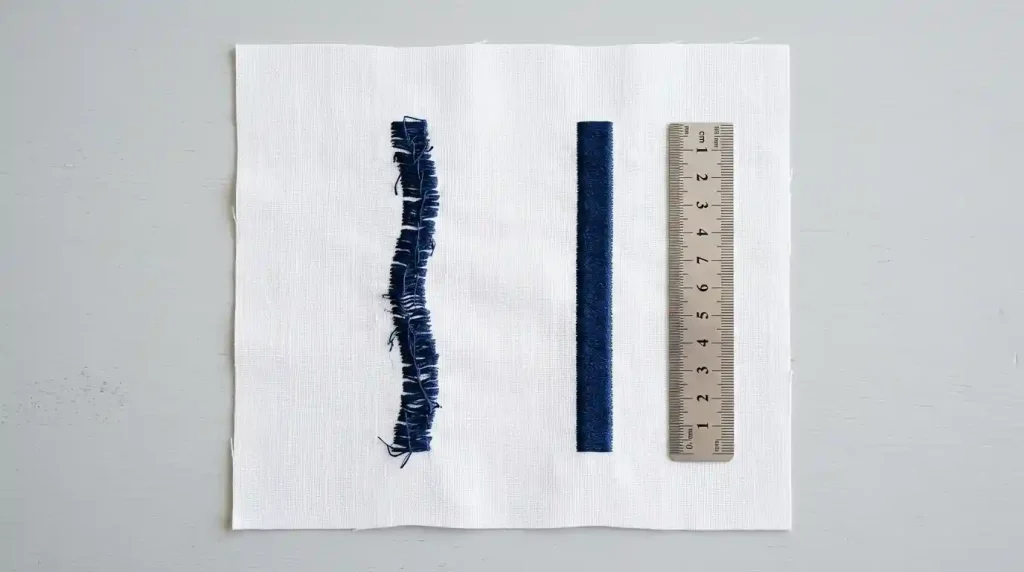
Before running your final garment, always stitch out on the exact same fabric, stabilizer, and hoop setup you will use on the real piece.
Measure your columns after stitching using a small ruler or digital calipers. Compare the stitched width to the designed width in your software. If there is a gap of more than 0.5mm, go back and adjust your pull compensation value before the final run.
This one step alone saves enormous amounts of wasted garments, thread, and time.
When the Problem Is in the Digitizing Not the Machine
Many embroiderers spend hours adjusting tension, changing stabilizers, and re-hooping when the actual problem is sitting inside the digitizing file itself. A file with bad stitch angles, wrong column routing, or zero pull compensation will never stitch correctly no matter how perfectly the machine is set up.
If you have worked through all five steps above and still have alignment issues, the digitizing file needs to be corrected. This is where working with a professional embroidery digitizing service becomes the most practical solution especially if you are running the same design across a batch of garments.
At Sassy Digitizing, every file is manually digitized using Wilcom software with the correct pull compensation, underlay structure, and stitch sequencing built in from the start. You will not waste garments chasing a problem that was already fixed before the file was delivered.
Quick Reference: Misalignment Fix Checklist
- ✅ Pull compensation value set (0.4mm–0.8mm minimum)
- ✅ Correct underlay type for column width
- ✅ Fabric hooped drum-tight with no movement
- ✅ Correct stabilizer matched to fabric type
- ✅ Thread tension balanced (test on scrap first)
- ✅ Test stitch-out run and measured before final garment
Summary
Misalignment and uneven columns in embroidery almost always come down to the same small set of problems: pull compensation not set in digitizing, missing underlay, loose hooping, wrong stabilizer, or tension imbalance. Fix these five things in order, and the problem disappears.
If your columns are still drifting after working through every step, the issue is in the file and that is exactly what professional digitizing services are built to solve. Whether you need a file corrected or a new design built from scratch, Sassy Digitizing delivers precise, machine-ready files that stitch cleanly the first time.
About the Author
Keith Blair | Senior Quality Control (HOD) Keith Blair serves as Head of Department for Quality Control at Sassy Digitizing, with 12 years of commercial embroidery experience. He specializes in stitch density, pull compensation, and digitizing standards for complex designs including 3D puff, appliqué, and small lettering.