Lock stitches embroidery problems are more common than most people realize and they’re almost always a digitizing issue, not a machine issue. If your thread keeps coming loose at the start or end of a design, or unravels after the first wash, the lock stitch is almost certainly the culprit.
This guide covers what lock stitches are, the most common problems, and exactly how to fix them in your digitizing file. For a strong foundation before we dive in, see our guide on how to prepare artwork for embroidery digitizing clean input leads to clean output.
What Is a Lock Stitch in Embroidery?
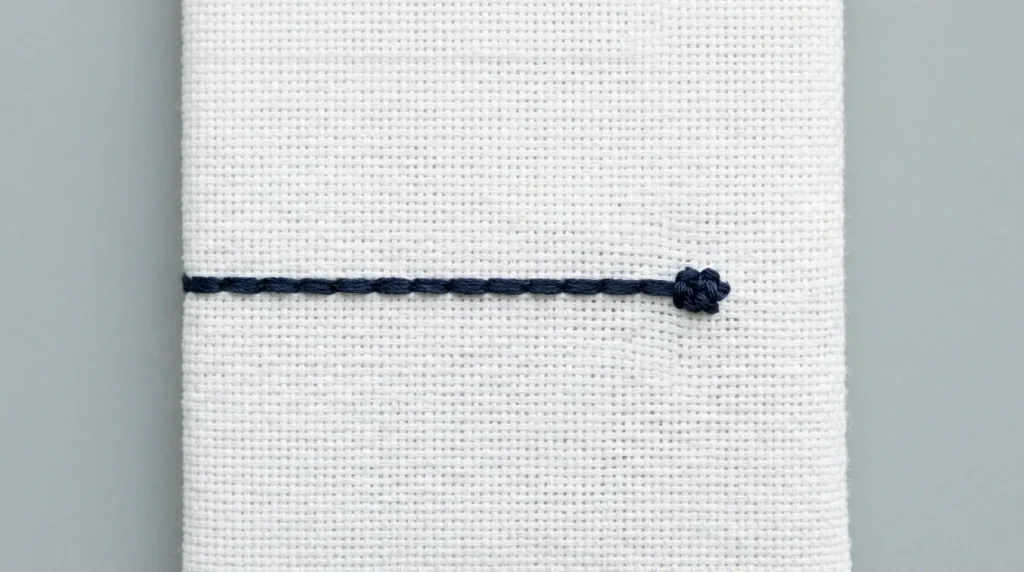
A lock stitch is a small series of 3 to 4 tiny stitches placed at the very start and end of every thread run in an embroidery design. Their job is simple: to anchor the thread so it cannot pull through the fabric or unravel when the machine trims it.
Think of it as tying a knot except it’s done automatically by the digitizing file. If the file doesn’t include proper lock stitches, the machine finishes a run and trims the thread with nothing holding it in place.
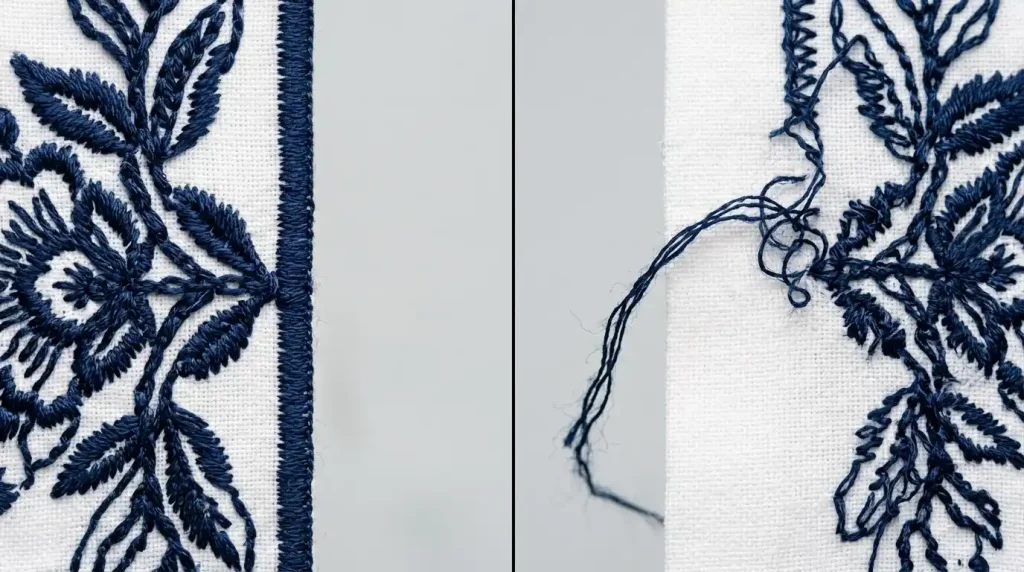
Problem 1: Missing Lock Stitches
This is the most straightforward problem. The digitizing file simply has no lock stitches programmed at the end of one or more thread runs.
Signs of missing lock stitches:
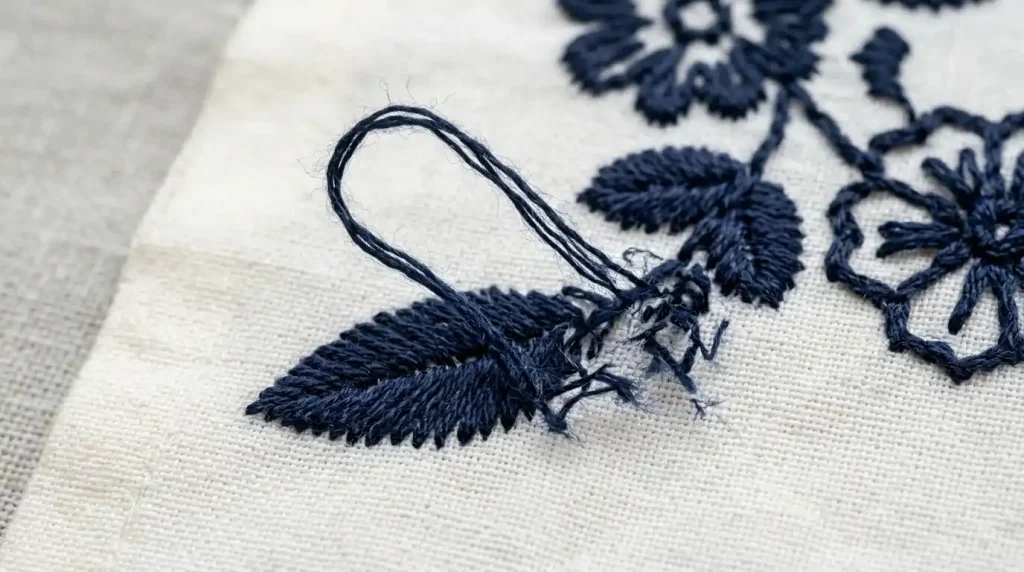
- Thread tail pulls out easily by hand after stitching
- Design starts unraveling after trimming
- Thread comes loose after the first wash
- Loose loops appearing at the start of a new color
Why it happens: Auto-digitizing software and basic digitizing tools sometimes skip lock stitches entirely, or apply them inconsistently. This is one of the biggest reasons manual digitizing outperforms AI auto-digitizing a human digitizer checks every thread termination point.
Problem 2: Lock Stitch in the Wrong Position
A lock stitch can exist in the file but still be placed incorrectly too far from the last stitch, in open fabric space, or overlapping into a visible area of the design.
What goes wrong:
- A connecting thread floats visibly across the surface between the last stitch and the lock position
- The lock stitch lands on top of another element, creating a bump
- The lock stitch is placed inside a satin fill area, causing a visible interruption in the smooth stitching
The fix: Lock stitches must be placed immediately at the end of the last stitch in each run no gap, no float. Your digitizing software should allow you to manually position each lock stitch node.
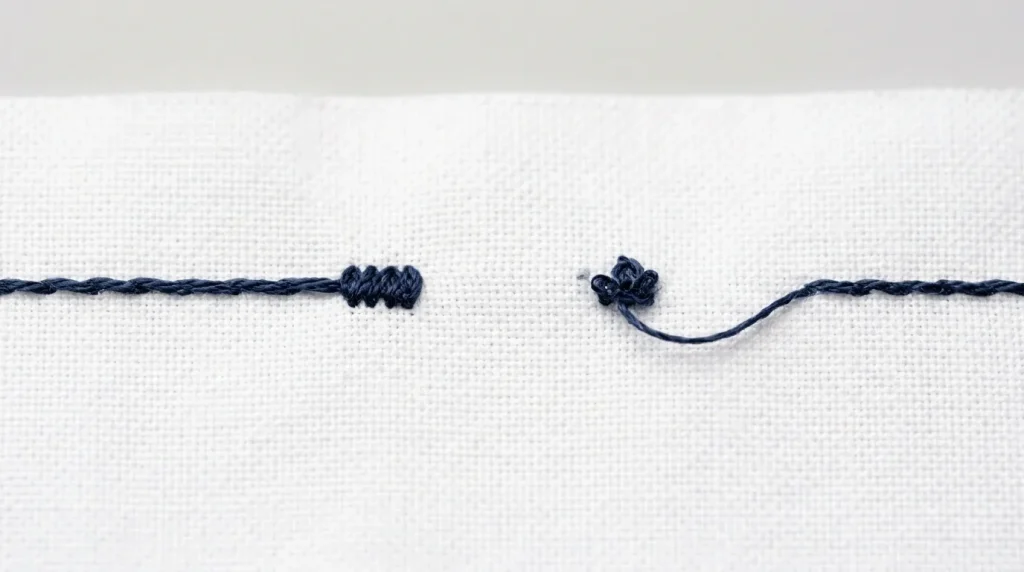
Problem 3: Lock Stitches Too Short or Too Few
Sometimes lock stitches are present and correctly placed, but they’re only 1 or 2 stitches long not enough to hold under tension or washing.
What goes wrong:
- Thread holds initially but pulls out after washing
- Lock stitch breaks under tension during production runs
- High-speed machines pull through short locks before the trim cycle completes
The fix: Set your lock stitch to a minimum of 3 stitches, ideally 4, at both the start and end of every run. In Wilcom and most professional digitizing software, this is a setting you can apply globally across the entire file.
Stitch quality problems like this are also often connected to overall density and underlay settings our underlay stitches guide explains how these elements work together.
How to Fix It in Your Digitizing File
Here’s exactly what to check and fix in your digitizing file:
Step 1: Enable Global Lock Stitches In your digitizing software, find the global thread settings and ensure lock stitches are enabled at both start and end of every run. In Wilcom, this is under Object Properties → Lock Stitch.
Step 2: Set Stitch Count to 3–4 Never leave this at the default 1 or 2. Set a minimum of 3 short stitches for light fabrics, 4 for caps and heavy materials.
Step 3: Check Every Color Change Every time the machine stops to change thread color, that is a new start and end point. Every one of those points needs its own lock stitch check each one manually.
Step 4: Check Jump Stitches If your design has jump stitches between elements, each side of the jump needs a lock stitch. Unaddressed jumps are a common source of loose threads see our full guide on what causes jump stitches in embroidery for more.
Step 5: Run a Test Stitch-Out After adjusting, always run a physical test before production. Pull the thread tails gently after trimming a proper lock stitch should not move at all.
Summary
Lock stitches are small but they carry the entire design. Missing them, misplacing them, or using too few stitches causes thread to come loose, designs to unravel, and production runs to fail.
The fix is always in the digitizing file not the machine. If your lock stitch problems keep coming back, it’s a sign your files need professional attention. Sassy Digitizing builds correct lock stitches into every file as standard no shortcuts, no skipped termination points.
Need a file fixed or digitized from scratch? Contact us today and we’ll have it back to you in 4–6 hours.


