If you are new to embroidery digitizing, understanding fill stitch, satin stitch, and running stitch is the single most important skill you need to develop first. Every embroidery design no matter how simple or complex is built entirely from these three stitch types. Choose correctly and your design looks clean and professional. However, choose wrong and the same design falls apart on the machine.
This guide is built specifically for beginners. No complicated theory just clear explanations and simple rules for when to use each one.
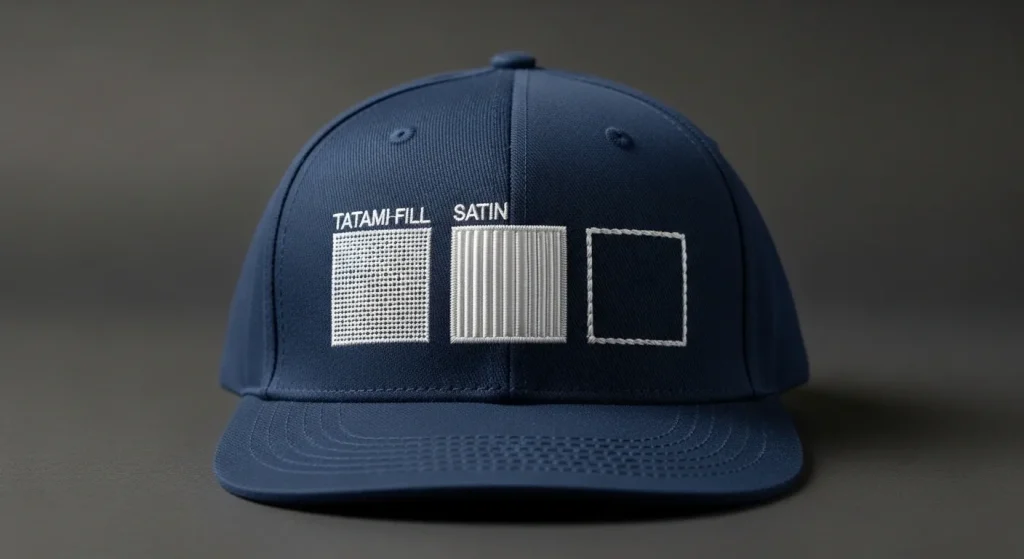
Fill Stitch What It Is and Where It Works

Fill stitch sometimes called tatami stitch or step stitch covers solid areas with short rows of flat stitching that interlock in a brick-like pattern. It is the workhorse of embroidery. Whenever a design has a large solid area that needs even coverage, fill stitch is the answer.
Use fill stitch when:
- The area or letter stroke is wider than 6mm
- You need a flat, matte, durable surface
- You are covering a large background block or bold shape
- Satin stitch would be too long to stay anchored in the center
Avoid fill stitch when:
- The area is very small or very thin, fill stitches look rough and blocky on tiny elements
- You need a shiny or reflective finish
Fill stitch is also the correct solution when shrinking embroidery designs to smaller sizes at reduced dimensions, fill stitch holds its structure far better than satin stitch does.
Beginner Rule: If the area is bigger than your thumbnail, use fill stitch.
Satin Stitch What It Is and Where It Works
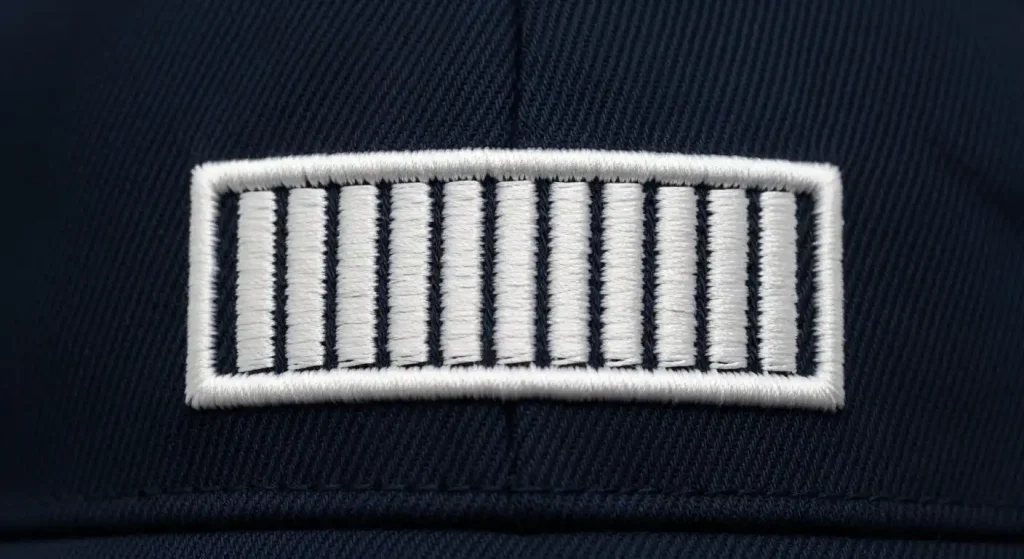
Satin stitch runs long parallel columns back and forth across a shape, creating a smooth, shiny, reflective surface. It is the stitch type that gives embroidery that premium polished look tight, neat, and clean when used correctly.
Use satin stitch when:
- The letter stroke or shape column is under 6mm wide
- You need a smooth shiny finish on a border or outline
- You are embroidering fine narrow elements like thin letters or decorative lines
- You want crisp defined edges around a shape
Avoid satin stitch when:
- The column is wider than 6mm the long unsupported threads will split down the middle
- The area is large and solid satin stitch creates too much thread tension on wide areas
- The design will be washed frequently wide satin columns loosen and sag over time
Wide satin stitch on large letters is the most common beginner mistake in embroidery digitizing. It is also the main reason behind messy embroidery lettering that refuses to look clean no matter how many machine adjustments are made. In every case like this, the fix is to switch the wide lettering elements to fill stitch instead.
Beginner Rule: If the area is narrower than your little finger, use satin stitch.
Running Stitch What It Is and Where It Works
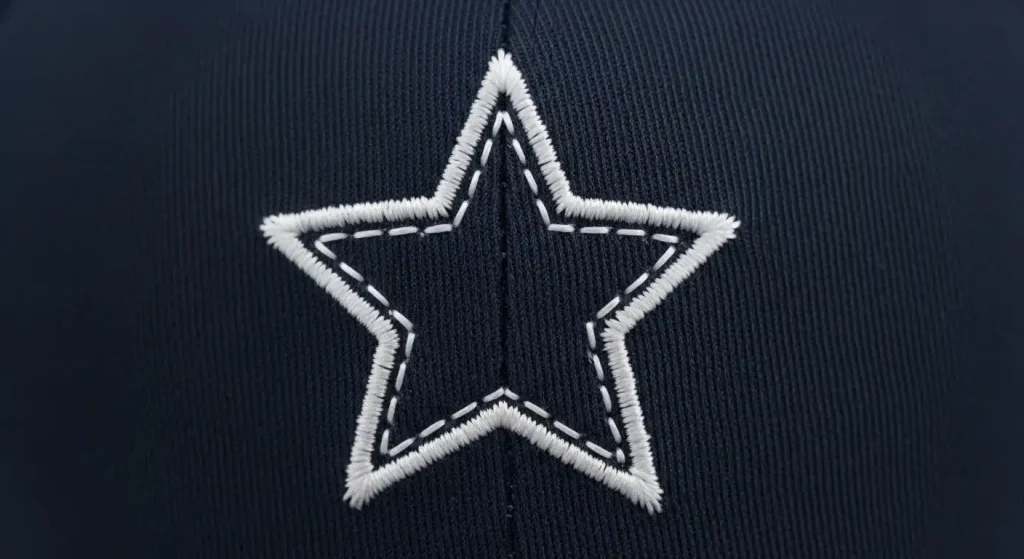
Running stitch is the simplest stitch type a series of small individual stitches that form a continuous line. It does not fill areas or create solid coverage on its own. Its job is to create paths, outlines, connections, and most importantly underlay stitches beneath all the other stitch types.
Use running stitch when:
- Creating underlay beneath fill or satin elements
- Making fine detail outlines that are meant to be thin and subtle
- Connecting one section of the design to the next without a jump stitch
- Adding structural support that the eye never actually sees
Avoid running stitch when:
- You need a bold visible outline single run stitches look too thin and weak on most fabrics
- You are trying to fill any solid area running stitch is a line, not a fill
Running stitch is the invisible backbone of every embroidery design. When it is missing or set up incorrectly, stitches sink into the fabric and designs look flat and poorly defined. Our full guide on why embroidery sinks and how underlay fixes it explains exactly how running stitch underlay works beneath every other stitch type.
Beginner Rule: Running stitch goes underneath everything else treat it as the foundation, not the finish.
How to Decide Which Stitch to Use

Here is a simple three-question decision process for any element in your design:
How wide is this element?
- Under 6mm wide → Satin stitch
- Over 6mm wide → Fill stitch
- Just an outline or path → Running stitch
Does it need to be shiny or flat?
- Shiny finish → Satin stitch
- Flat matte finish → Fill stitch
- No visible finish needed → Running stitch
Is it a solid area or just a line?
- Solid area → Fill stitch or satin stitch depending on width
- Just a line or outline → Running stitch or narrow satin stitch
Apply these three questions to every single element in your design and you will assign the correct stitch type every time. For cap embroidery specifically this process also includes checking best digitizing settings for hats and caps because curved cap surfaces add extra considerations beyond just stitch type.
What Happens When You Use the Wrong Stitch

Using the wrong stitch type for an element causes predictable, specific problems every time:
Wrong: Satin stitch on wide areas threads split down the center of the column. The design looks good on the first run but deteriorates quickly. No machine adjustment fixes this only changing the stitch type fixes it.
Wrong: Fill stitch on tiny details the short interlocking rows look rough and blocky. Fine details become unreadable blobs. The design looks low quality even though the digitizing settings are technically correct.
Wrong: No running stitch underlay fill and satin stitches sink into the fabric surface instead of sitting on top of it. The design looks flat, dull, and poorly defined. This is one of the most common reasons people think their embroidery machine is causing problems when the real issue is in the digitizing file itself.
All three of these problems are completely avoidable with correct stitch type assignment from the start.
Why Professional Digitizing Gets Stitch Assignment Right
Manually reviewing and assigning stitch types to every element in a design requires professional digitizing software and experience. Auto-digitizing tools and basic machine software assign stitch types automatically and they frequently get it wrong, especially on complex logos with a mix of wide and narrow elements.
At Sassy Digitizing, every design is hand-built in Wilcom by experienced digitizers who check stitch type, column width, density, and underlay for every single element before delivery. This is exactly why manual digitizing consistently outperforms AI auto-digitizing on real production runs the stitch assignments are made by a human who understands fabric, not an algorithm that is guessing from pixel data.
Check our digitizing services and pricing to get your design digitized correctly the first time.
Summary
The three embroidery stitch types and their rules in one place:
- Fill stitch wide areas over 6mm, large solid shapes, flat matte finish
- Satin stitch narrow elements under 6mm, shiny finish, fine details and borders
- Running stitch underlay foundation, outline paths, travel connections between elements
Every professional embroidery file uses all three together. Master these three rules and your stitch type decisions will be correct every single time.
Frequently Asked Questions (FAQs)
1. What is the most commonly used stitch type in embroidery? Fill stitch is the most commonly used stitch type because most logo designs contain large solid areas. Satin stitch is the second most common for borders and text, and running stitch appears in every design as underlay.
2. Can fill stitch and satin stitch be used in the same design? Yes, and they should be. Most professionally digitized designs use both. Fill stitch handles wide elements while satin stitch handles narrow ones. Using both in the same design produces the best overall result.
3. Is running stitch visible in the final embroidery? Usually not. Running stitch underlay sits beneath the fill or satin stitches that cover it. In some designs, a running stitch outline serves as a visible fine detail, but it is intentionally thin and subtle.
4. How do I know if my design is using the wrong stitch type? Open the file in professional digitizing software and check each element’s stitch type and column width. Any satin column over 6mm needs conversion to fill stitch. Additionally, any fill area under 3mm should be simplified or converted to satin stitch.
About the Author
Keith Blair | Senior Quality Control (HOD) Keith Blair serves as the Head of Department for Quality Control at Sassy Digitizing, bringing 12 years of commercial embroidery experience to the team. He specializes in stitch density, underlay construction, and pull and push compensation adjustments across all fabric types ensuring every digitized file is production-ready before it reaches the customer.


