Common issues customers face while stitching logos are almost always the same set of problems appearing in different combinations. The thread keeps breaking mid-design. The fabric puckers around the logo. The logo comes out smaller than designed. The lettering is fuzzy. The colors are inconsistent between garments.
These problems feel random when you are standing at the machine watching them happen. In reality, they are not random at all. Every common issue customers face while stitching logos traces back to one of two sources either the digitizing file was not prepared correctly for the specific fabric and garment, or the physical machine setup was not matched to the requirements of the design.
This guide covers every major issue and exactly how to prepare before each production run to prevent them.
Why Preparation Before Stitching Matters
Most logo stitching problems do not start at the machine. They start days or weeks earlier, when the digitizing file was created. A file built with generic settings average density, no pull compensation, wrong underlay will produce problems on every single garment it runs on, regardless of how well the machine is set up.
Preparation means checking the file, the fabric, the stabilizer, the hoop, and the tension before pressing start. Skipping any one of these steps is what turns a straightforward production run into a session of troubleshooting wasted garments.
The Most Common Issues Customers Face While Stitching Logos
Issue 1: Thread Keeps Breaking During Logo Stitching
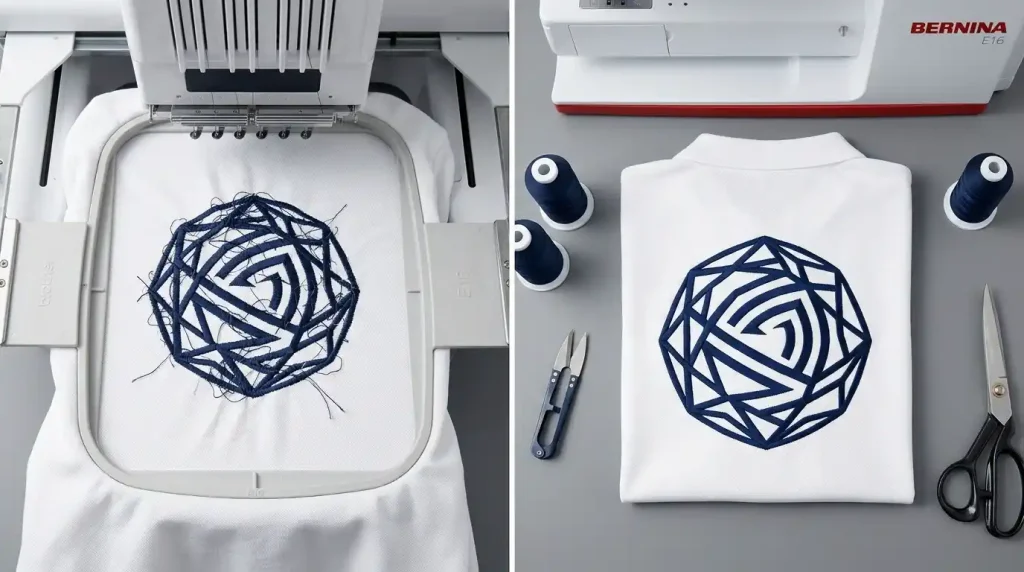
Thread breakage mid-design is the most disruptive problem in logo production. It stops the machine, requires re-threading, and often leaves a visible gap in the finished design where the machine stopped.
Common causes: Stitch density too high for the fabric, thread tension too tight, needle size wrong for the thread weight, or the digitizing file has stitch paths that create excessive thread buildup in small areas.
Issue 2: Fabric Puckering Around the Logo
Puckering means the fabric is pulling and bunching around the logo during stitching. The logo shape distorts, the surrounding fabric wrinkles, and the finished garment looks unprofessional even when the stitching itself is technically correct.
Common causes: Wrong stabilizer for the fabric type, density too high, pull compensation too high in the digitizing file, or the fabric was not hooped tightly enough before stitching.
Issue 3: Logo Comes Out Smaller Than Designed
The finished logo measures noticeably smaller than the size specified in the digitizing file. Columns are narrower than they should be and the overall design looks compressed.
Common causes: Pull compensation not set in the digitizing file. Thread pull during stitching drags the fabric inward on every stitch without pull compensation built into the file to account for this, the design always stitches smaller than designed.
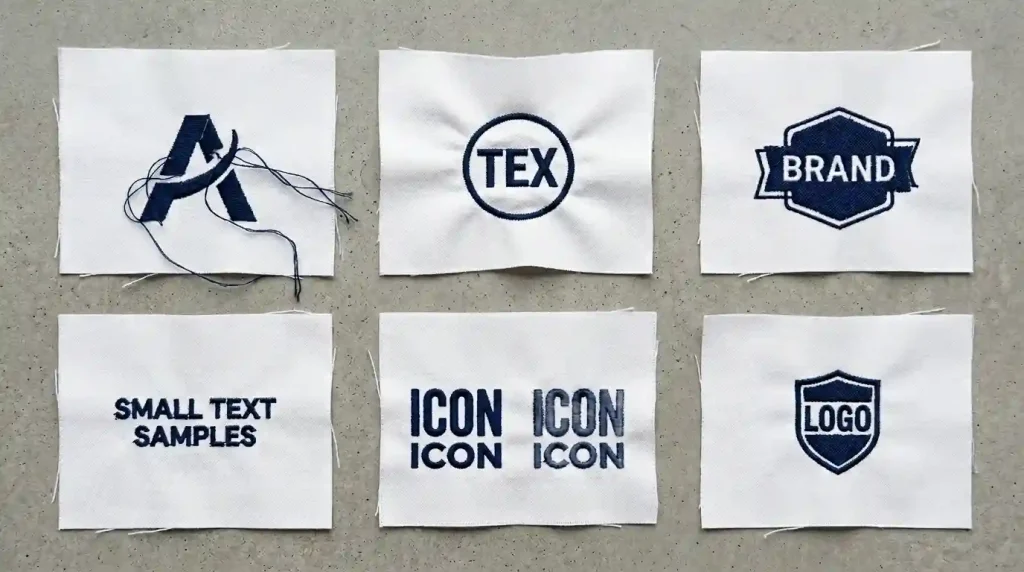
Issue 4: Lettering Is Fuzzy or Illegible
The text elements in the logo look soft, fuzzy, and unprofessional. Letter edges are not sharp and fine text is unreadable on the finished garment.
Common causes: Underlay missing from text elements, density too low for the fabric type, font size too small for the stitch type being used, or the font file was auto-digitized with generic settings.
Issue 5: Colors Look Inconsistent Between Garments
Two garments run from the same file come out with noticeably different color intensity or thread coverage. One looks bright and solid, the other looks dull and thin.
Common causes: Thread tension varying between runs, bobbin thread not changed at consistent intervals, or the digitizing file has uneven density between color sections causing some areas to stitch thinner than others.
Issue 6: Logo Misalignment Fill and Outline Are Offset
The outline stitches do not sit on the edge of the fill stitches. The two elements appear shifted relative to each other, making the logo look like a double-exposure printing error.
Common causes: No pull compensation in the digitizing file, incorrect underlay, or the fabric moved during stitching because hooping was too loose.
Step-by-Step: How to Prepare Before Every Logo Stitching Run
Step 1: Verify the Digitizing File Before Sending to Machine
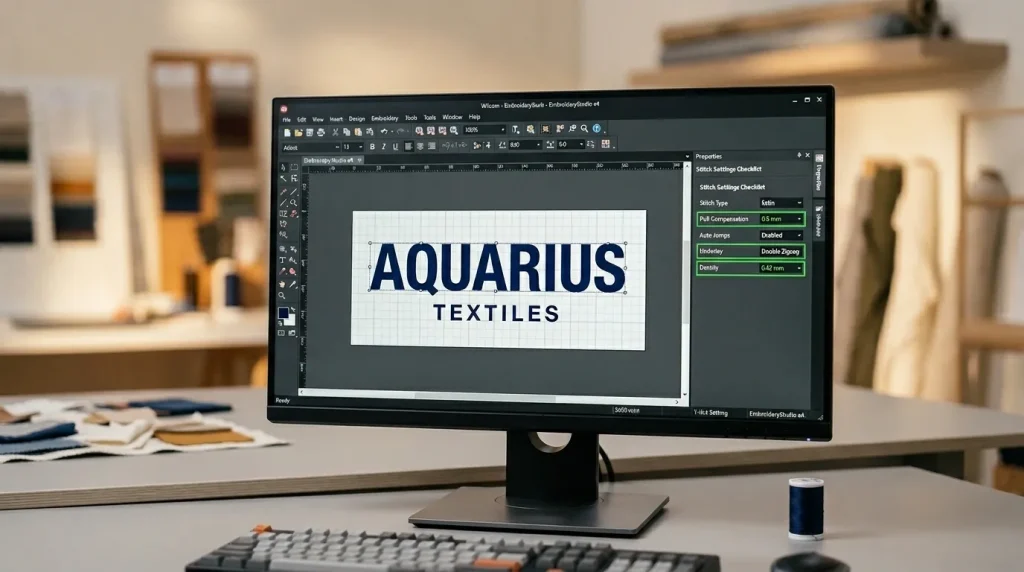
Before sending any logo file to the machine, open it in your digitizing software and verify these four settings:
Pull compensation: Every element in the file must have a pull compensation value set. For standard woven fabrics use 0.4mm to 0.6mm. For caps use 0.6mm to 1.0mm. For stretch fabrics use 0.8mm to 1.2mm. A zero value means your logo will always stitch smaller than designed.
Underlay: Every fill element and every text element must have an underlay stitch assigned. Fill elements need zigzag underlay. Text elements need center-run underlay. No underlay means fuzzy edges and poor coverage on every run.
Density: Check that density is set correctly for your specific fabric not a generic default value. Standard woven fabric needs 0.40mm to 0.45mm. Pique polo needs 0.38mm to 0.42mm. Fleece needs 0.45mm to 0.50mm.
Trim commands: Check that trim commands exist between every color change and every separate element in the logo. Missing trim commands create jump stitches across the finished design. For a full guide on jump stitch causes, read our article on what causes jump stitches in embroidery.
Note: If you received a digitizing file from an online converter or free software, these settings are almost certainly wrong. Auto-digitized files use generic values that do not match your specific fabric. This is the most common reason customers face consistent logo stitching problems across multiple garments. A professionally digitized file from Sassy Digitizing sets every value correctly for your fabric and garment type before the file is delivered.
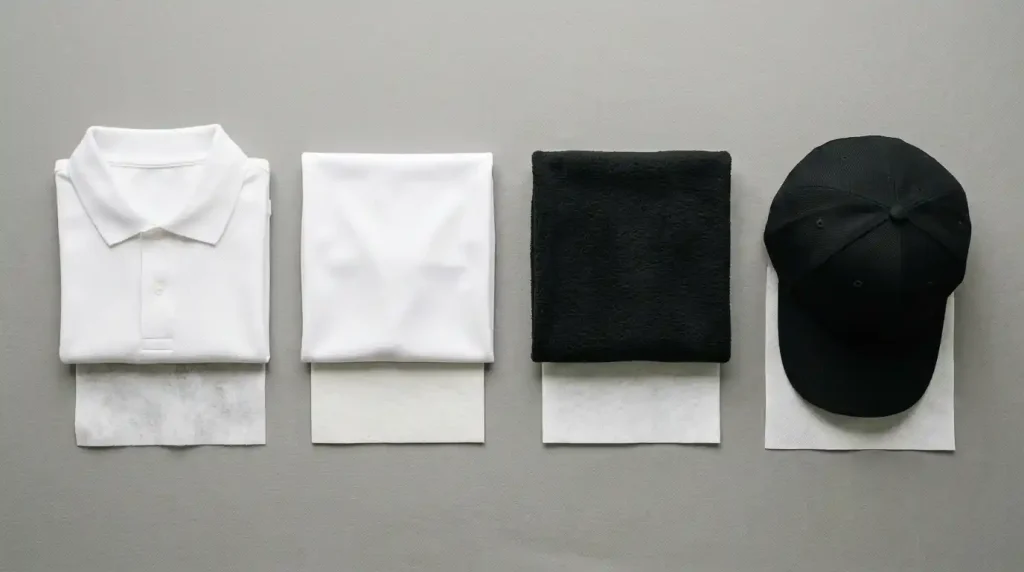
Step 2: Match the Stabilizer to Your Fabric
Stabilizer choice directly controls whether your fabric stays still during stitching. A fabric that moves even slightly causes puckering, misalignment, and uneven fill on every garment in the run.
Match your stabilizer to your fabric using these rules:
Standard woven cotton and polyester shirts: Tear-away stabilizer at medium weight. The woven structure holds itself stable enough that tear-away provides sufficient support.
Stretch fabrics, performance wear, and knits: Cut-away stabilizer only. Tear-away on stretch fabric allows the fabric to bounce with each needle hit causing puckering and misalignment on every garment. Cut-away holds the fabric completely stable throughout the entire stitch sequence.
Fleece and heavy fabrics: Cut-away stabilizer plus a layer of water-soluble stabilizer on top. The water-soluble layer prevents the needle from pushing stitches down into the fleece pile preserving logo sharpness. For more on this, see our guide on why your embroidery is sinking.
Structured caps: Use the cap-specific backing that came with your cap frame system. Never use standard tear-away or cut-away for caps the curved surface requires backing designed specifically for cap embroidery.
Towels and terry cloth: Cut-away beneath plus water-soluble on top. The same principle as fleece the pile surface will swallow stitches without the water-soluble layer on top holding them above the pile during stitching.
Step 3: Hoop the Fabric Correctly
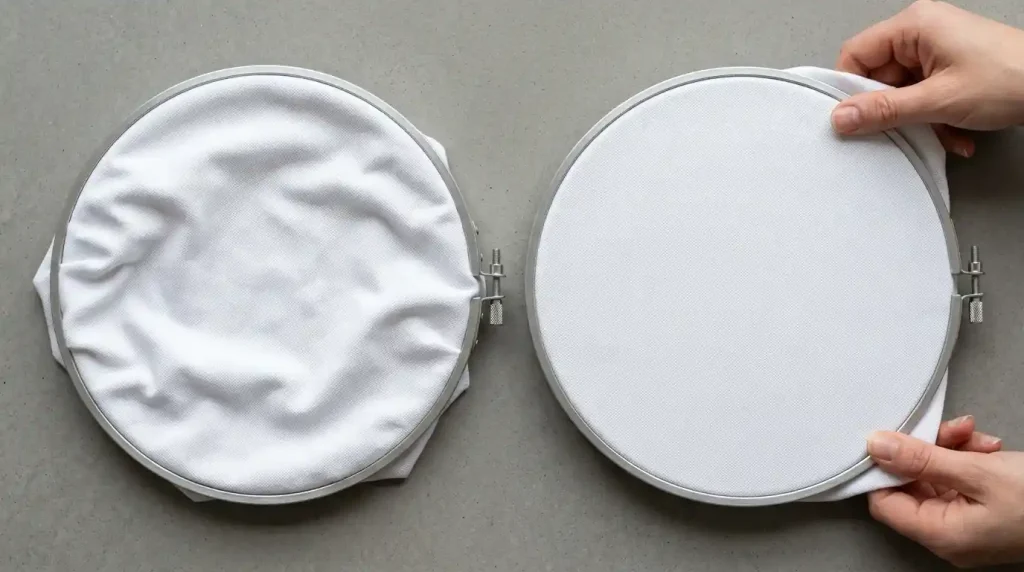
Correct hooping eliminates three of the six common issues in one step puckering, misalignment, and size compression all improve dramatically when the fabric is hooped correctly.
Follow this hooping process before every production run:
Pull the fabric taut in all four directions before tightening the hoop screw. The fabric surface inside the hoop should feel like a drum when you press it lightly in the center firm with no give.
Center the logo placement area directly at the center of the hoop. The design area should have at least 20mm of fabric clearance around it inside the hoop boundary.
Check for puckering before stitching. After hooping, hold the hoop at eye level and look across the fabric surface. Any visible ripple or wave means the fabric is not taut enough remove and re-hoop.
After hooping, tug the fabric from all four edges. If the fabric shifts position inside the hoop at all, the hooping is too loose. Remove, re-hoop tighter, and test again before running.
For cap hooping specifically, center the cap precisely on the cap frame driver with equal measurement from the center seam to both sides of the frame. For a full cap alignment guide, see our article on fixing outline and alignment issues on hat embroidery.
Step 4: Set Thread Tension Correctly for Your Fabric
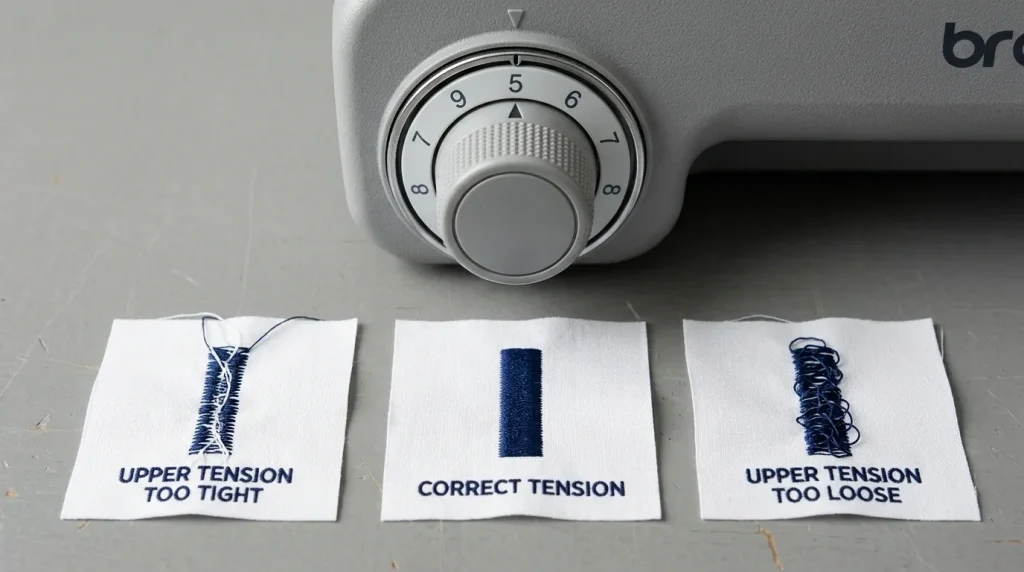
Thread tension affects thread breakage, color consistency, column width, and fill coverage all at once. Setting it correctly before the run starts prevents the majority of thread-related problems customers face during logo stitching.
Test tension on matching scrap fabric before running any production garments. Never assume tension from the previous run is correct thread brand, needle size, fabric type, and ambient humidity all affect tension behavior.
Correct tension check: Stitch a test column on scrap fabric and check the back. The bobbin thread should be just barely visible as a thin line at the very edge of the column on the back side nothing more. If the bobbin thread is pulling heavily to the top, upper tension is too tight. If the top thread is looping on the back, upper tension is too loose.
For logo stitching on standard garments: Upper tension between 3.5 and 4.5 on most machines covers most standard woven fabrics. Adjust one step at a time and retest after each adjustment.
For caps: Reduce upper tension by one step from your flat-garment setting. Cap frame resistance increases the effective tension on the thread compared to flat hooping.
Change the needle before every production run. A dull or slightly bent needle is a leading cause of thread breakage that customers often mistake for a tension problem. A fresh needle costs almost nothing a wasted production run costs significantly more.
Step 5: Run a Test Stitch-Out Before the Full Production Run
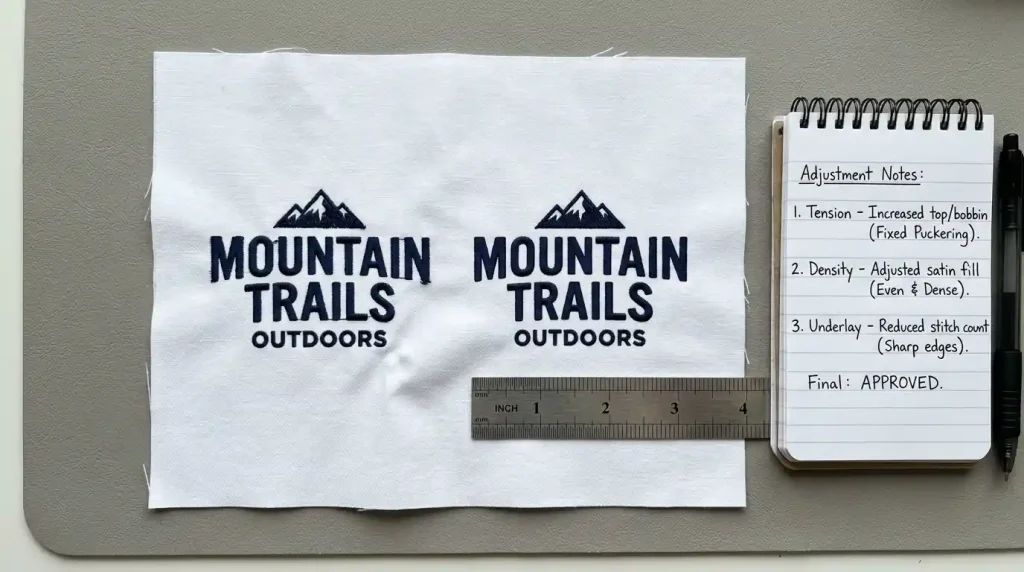
A test stitch-out is the single most effective preparation step for preventing common logo stitching issues across a production run. It costs one piece of scrap fabric and five minutes. Skipping it risks every garment in the batch.
Use identical fabric and stabilizer for the test as you will use for the production run. A test on a different fabric will not accurately predict how the logo will stitch on the production garments.
Stitch the complete logo not just one element or one color. Problems between color changes, trim sequence issues, and tension inconsistencies only appear when the full logo runs from start to finish.
After stitching the test, inspect these points:
Check fill coverage by holding the test piece up to a light source. No light should show through any logo element. If light passes through, increase density and retest.
Check letter sharpness by running your fingernail along the edge of each text element. Sharp edges feel defined and slightly raised. Fuzzy edges feel soft and blend into the fabric.
Check logo dimensions with a ruler. Measure the stitched logo width and height and compare to the designed dimensions. If the stitched logo is more than 0.5mm smaller than designed, increase pull compensation in the file and retest. For more detail on this problem, see our guide on fixing misalignment and uneven columns in embroidery.
Check the back of the test piece for jump stitches, loose threads, and tension balance before approving the file for production.
How a Professional Digitizing File Prevents These Issues From the Start
Working through every step above takes time and the honest truth is that most of these steps exist to compensate for digitizing files that were not built correctly in the first place.
A professionally digitized logo file from Sassy Digitizing arrives with pull compensation already set for your specific fabric, underlay correctly assigned to every element, density matched to your garment type, and trim commands placed at every transition. The file is tested before delivery. You still run a test stitch-out that is always good practice but the file gives you a clean result on the first test rather than requiring multiple rounds of adjustment.
This is the difference between a file built to look good on screen and a file built to stitch correctly on fabric. For customers who run consistent logo production, the difference in wasted garments and production time between these two types of files is significant.
Visit our digitizing services page or contact us for a free quote.
Quick Preparation Checklist
- ✅ Pull compensation verified in file (0.4mm–1.2mm depending on fabric)
- ✅ Underlay assigned to every fill and text element
- ✅ Density matched to specific fabric type
- ✅ Trim commands present between all elements and color changes
- ✅ Correct stabilizer matched to fabric type
- ✅ Fabric hooped drum-tight with no slack or wrinkles
- ✅ Tension tested on scrap fabric before production run
- ✅ Fresh needle installed before production run
- ✅ Full test stitch-out completed on matching fabric
- ✅ Test measured, inspected front and back, approved before full run
Summary
Common issues customers face while stitching logos thread breaks, puckering, size compression, fuzzy lettering, color inconsistency, and misalignment all share the same prevention strategy. Verify the digitizing file settings, match the stabilizer to the fabric, hoop drum-tight, set tension correctly, and run a full test stitch-out before every production run.
Most of these issues trace back to a digitizing file that was not built for the specific fabric and garment. Sassy Digitizing builds every logo file with the correct settings from the start so your preparation checklist produces a clean result on the first test rather than the fifth.
About the Author
Keith Blair | Senior Quality Control (HOD) Keith Blair serves as Head of Department for Quality Control at Sassy Digitizing, with 12 years of commercial embroidery experience. He specializes in production preparation, stitch density, pull compensation, and file testing across all fabric types and garment applications.


