Scaling an embroidery design down sounds simple. You just make it smaller, right? Unfortunately that is not how embroidery works. When you reduce the size of a design, the stitches get closer together, fine details collapse, and small text turns into an unreadable mess.
The fix is not just resizing it is re-digitizing for the new size. This guide walks you through exactly how to do that correctly.
Why Embroidery Loses Detail at Small Sizes

Embroidery files are not like image files. When you scale down a JPEG, the pixels simply get smaller. But when you scale down an embroidery file, the stitches do not automatically adjust. Stitch length, density, column width, and spacing all stay the same they just get physically compressed into a smaller area.
This causes three specific problems:
- Stitch density becomes too high, making the design stiff and raised
- Thin columns collapse and satin stitches start overlapping each other
- Small text becomes unreadable because the letterforms lose their shape
This is also one of the main reasons fabric pushes and puckers on lighter garments too many stitches in too small a space creates tension that distorts the fabric.
Step 1: Simplify the Design Before You Resize
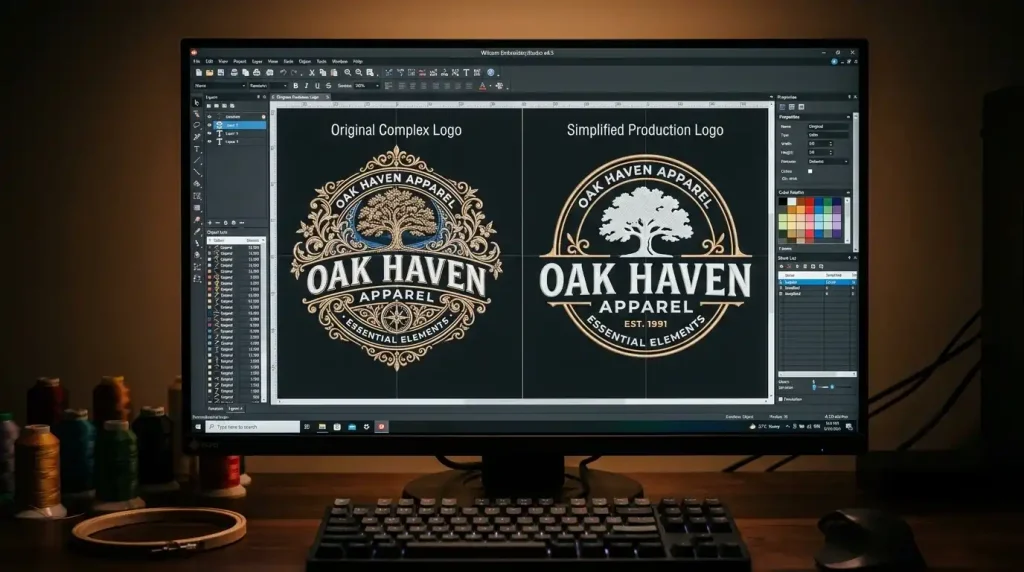
Before touching the size settings, open the design in your embroidery digitizing software and audit every element.
Ask yourself: at the new smaller size, will this element still be visible and clean? If the answer is no, remove it or simplify it. Specifically:
- Remove thin outline strokes under 1mm column width they will collapse at small sizes
- Delete fine gradient details that require high stitch counts to render
- Eliminate very small design elements like small stars, thin lines, or tiny icons
- Merge nearby color areas if they are too close together at the reduced scale
Think of this step as creating a simplified version of the design purpose-built for small size, not just a shrunken copy of the original. The same principle applies when preparing artwork for embroidery digitizing the artwork must match the production method, not fight against it.
Step 2: Adjust Stitch Density for the New Size
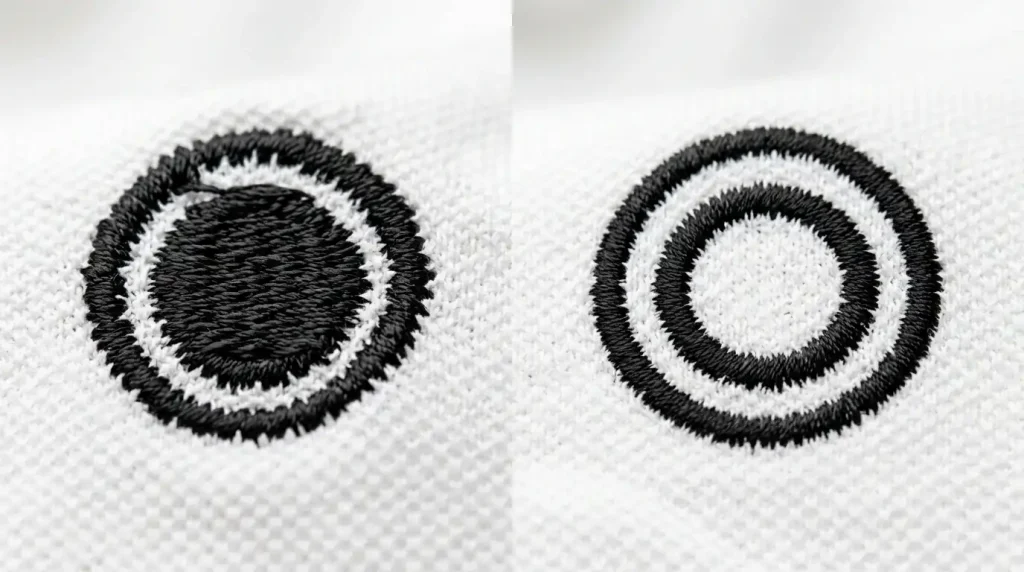
Density is the most critical setting to change when reducing embroidery size. At smaller dimensions, the same density value that worked at 3 inches will be far too high at 1 inch.
As a general guide for reducing size:
- Large design (3+ inches): Standard density 0.4mm to 0.45mm row spacing
- Medium design (2 inches): Reduce to 0.45mm to 0.5mm row spacing
- Small design (1 inch or under): Reduce to 0.5mm to 0.55mm row spacing
Looser row spacing at small sizes keeps stitches from piling up, prevents the design from feeling stiff, and reduces the risk of slow machine performance caused by excessive stitch counts.
Pro Tip: After adjusting density, always check the total stitch count. A well-reduced small design should have significantly fewer stitches than the original not the same count in a smaller space.
Step 3: Fix Small Text The Most Common Failure Point
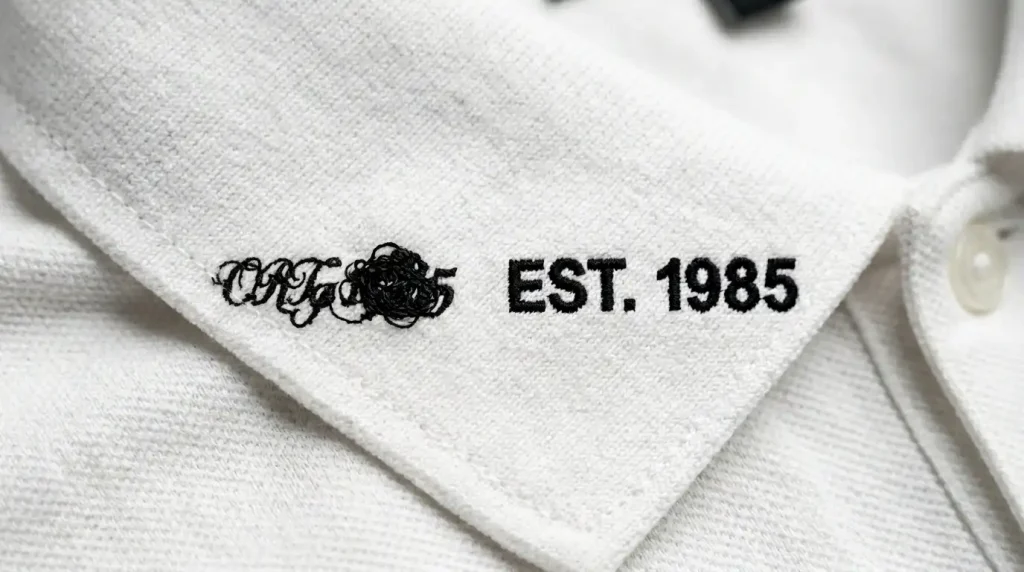
Small text is where most size reductions fail. Letters that look elegant at large sizes become blurry blobs at small sizes because the column widths used to form each letter become too narrow for the needle to execute cleanly.
Two rules for small embroidery text:
Switch to a bold, simple font. Thin serif fonts and decorative scripts fall apart below 6mm letter height. Use a clean sans-serif or block font instead. This is the same principle behind fixing messy embroidery lettering on any garment font choice and column width control the outcome.
Set minimum column width to 1mm. Any satin column narrower than 1mm at the final size should be either widened or removed. Columns under 1mm create jump stitches, thread breaks, and unreadable letter shapes.
Step 4: Re-Test on the Target Fabric
The same small design may stitch differently on a structured cap versus a soft knit beanie versus a polo shirt. After making your density and font adjustments, always run a test on the actual garment the design will be produced on.
For cap embroidery specifically, small designs also need the correct underlay for the fabric. A knit beanie needs a knockdown underlay even for small logos, while a structured cap needs an edge walk underlay as a minimum. Check our guide on best embroidery digitizing settings for hats and caps for the full settings breakdown by cap type.
DIY Resizing vs. Professional Re-Digitizing
Adjusting density, simplifying artwork, and correcting column widths all require manual work inside the digitizing software. Simply dragging a design smaller in your machine’s software does not do any of this it just compresses the file and creates all the problems described above.
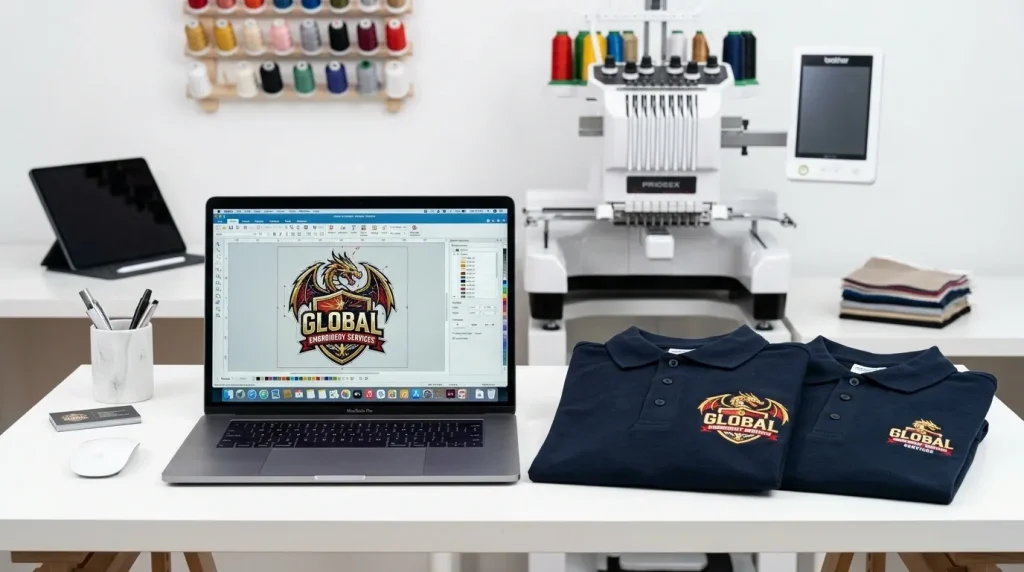
If you need a design reduced for production and want it done correctly the first time, Sassy Digitizing re-digitizes your design at the new size from scratch adjusting every element manually so the output is clean, flat, and production-ready. Our embroidery digitizing service handles small logos, cap designs, chest embroidery, and complex resizing requests with full manual precision using Wilcom software.

Summary
Reducing embroidery size correctly means re-digitizing, not just resizing. Here is the full process:
- Simplify the design and remove elements that will not survive the size reduction
- Reduce stitch density increase row spacing as the design gets smaller
- Replace thin or decorative fonts with bold, simple letterforms at minimum 1mm column width
- Test on the actual target fabric before production
For professional size reductions done right, check our digitizing services and pricing or contact Sassy Digitizing directly and our team will handle it for you.
Frequently Asked Questions (FAQs)
1. Can I just resize an embroidery file in my machine’s software? No. Resizing in machine software only compresses the stitch data it does not adjust density, column width, or underlay. Always re-digitize for a new size.
2. What is the smallest size embroidery can be stitched cleanly? Most designs can be cleanly stitched down to about 1 inch with proper re-digitizing. Text should not go below 4mm to 6mm letter height for readability.
3. Does reducing embroidery size reduce the stitch count? It should, if done correctly. A properly re-digitized small design will have a lower stitch count than the original large version.
4. Why does my small embroidery design feel stiff and raised? The density is too high for the size. Increase row spacing in your underlay and fill settings to bring the density down for the smaller dimensions.
About the Author
Keith Blair | Senior Quality Control (HOD) Keith Blair serves as the Head of Department for Quality Control at Sassy Digitizing, bringing 12 years of commercial embroidery experience to the team. He specializes in stitch density, underlay construction, and pull and push compensation adjustments across all fabric types ensuring every digitized file is production-ready before it reaches the customer.