When a customer says the embroidery is not sewing the way they expected, it almost always means one of two things. Either the fill looks thin and lacks coverage, or the design has no clear border between its elements and the background fabric. Both of these problems have a clear fix and yes, you can absolutely add more stitches or an outline to an existing embroidery design.
This is one of the most common revision requests in embroidery production. The good news is that adding density, fill coverage, or an outline to a design is a straightforward edit in any digitizing software. The key is knowing exactly what to change and how to change it without creating new problems in the process.
This guide walks through every option, step by step.
Why Does an Embroidery Design Look Thin or Flat?
Before making any changes, it helps to understand what caused the problem. A design looks thin or undefined for specific reasons and knowing the cause helps you choose the right fix.
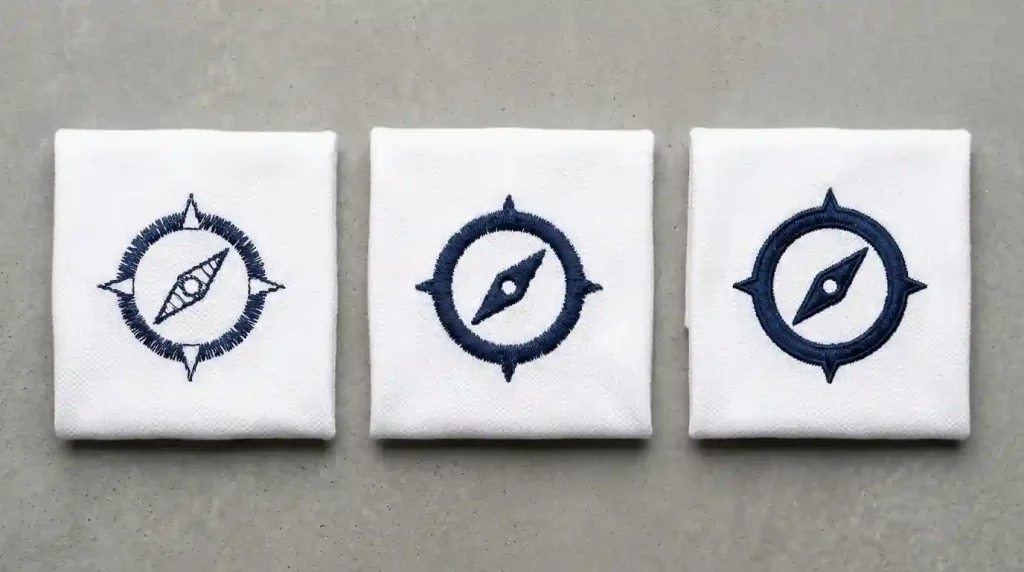
Fill density is too low. The stitch rows are spaced too far apart. The fabric shows through between rows, making the fill look washed out and lacking coverage.
No outline stitch exists. Without a border stitch separating design elements from each other or from the background, shapes blur together and the design loses definition.
Stitch type is wrong for the design style. A design with bold shapes stitched in a light fill pattern will always look underwhelming. The stitch type needs to match the visual weight of the design.
The design was auto-digitized. Auto-digitizing software uses average settings that often produce thin, flat-looking results on physical fabric even when the preview looks bold on screen.
Option 1: Add More Stitches by Increasing Fill Density
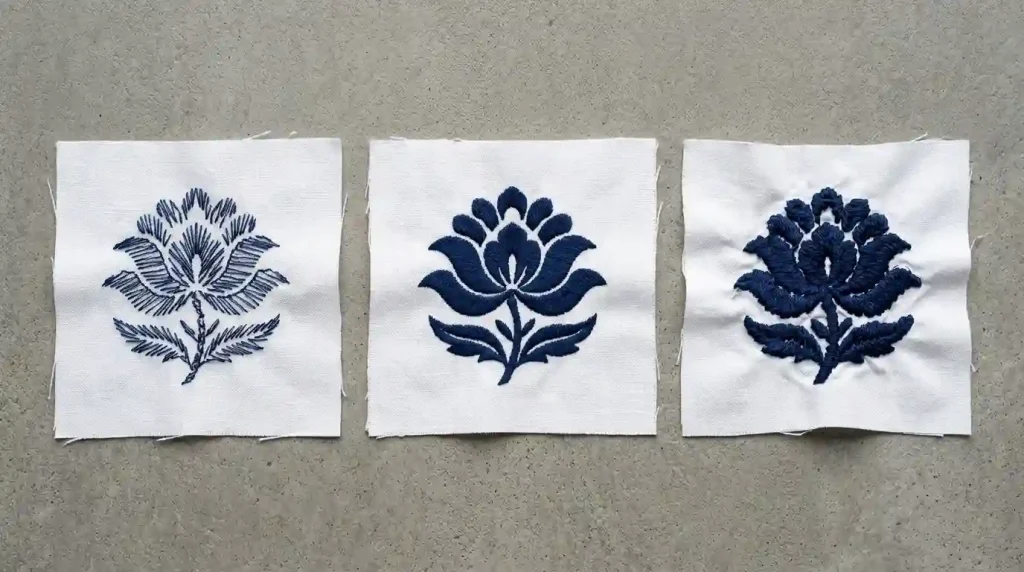
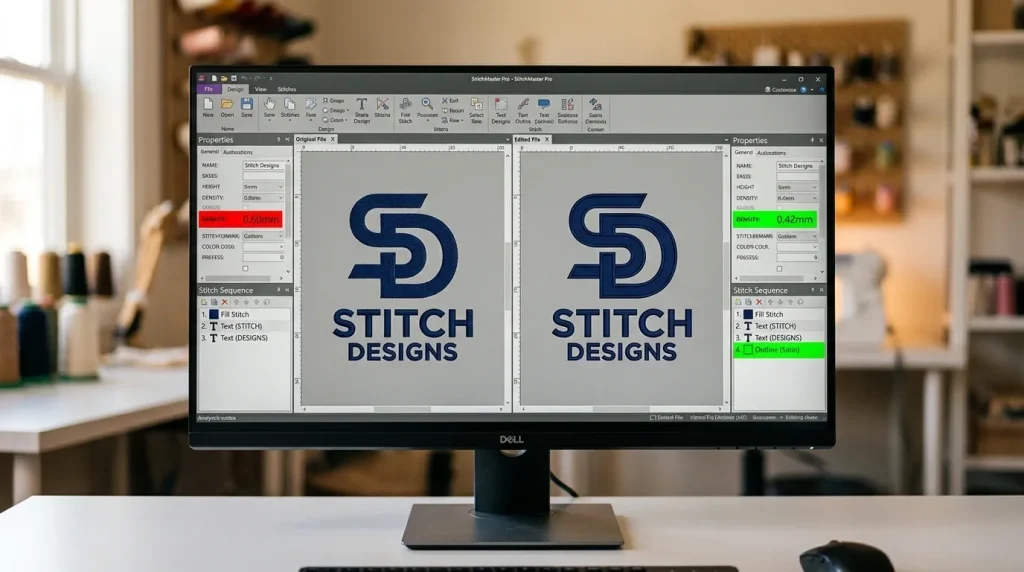
Increasing fill density is the fastest way to make a thin embroidery design look bolder and more professional. Open the digitizing file and find the density setting for each fill element.
For standard woven fabric: Increase density from any value above 0.50mm to the correct range of 0.40mm to 0.45mm. Lower numbers mean more stitch rows per millimeter which means more coverage.
For pique polo: Target 0.38mm to 0.42mm. The textured surface needs tighter density to cover the weave pattern beneath the stitches.
For fleece: Target 0.45mm to 0.50mm. Fleece absorbs stitch rows so more density is needed for solid coverage.
Do not go below 0.35mm on standard fabrics. Density that is too high causes puckering and thread buildup which creates a new problem while fixing the original one.
After adjusting density, run a test stitch-out on matching scrap fabric. Compare the test result to the original. The fill should now look solid and rich with no fabric showing through between stitch rows.
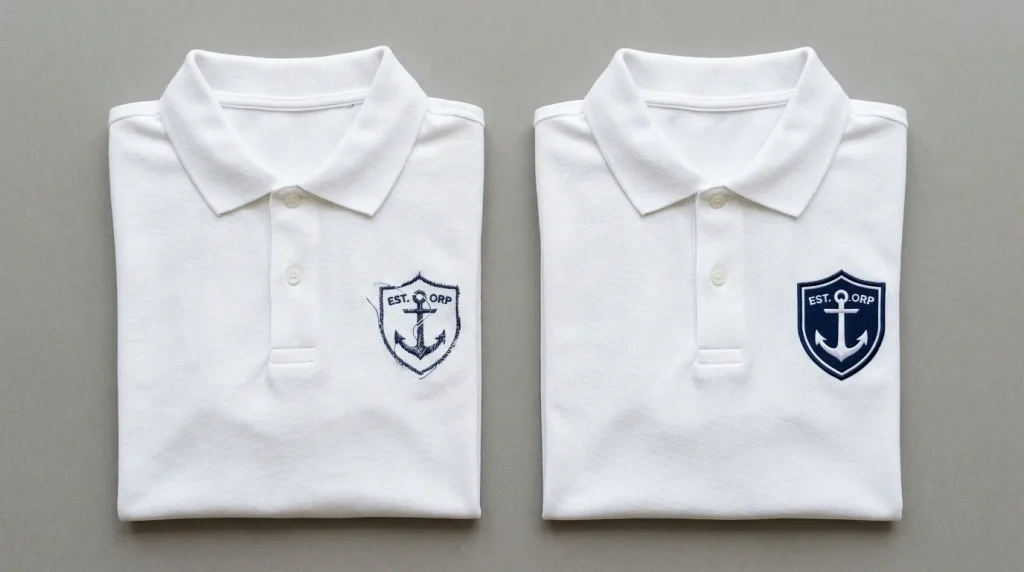
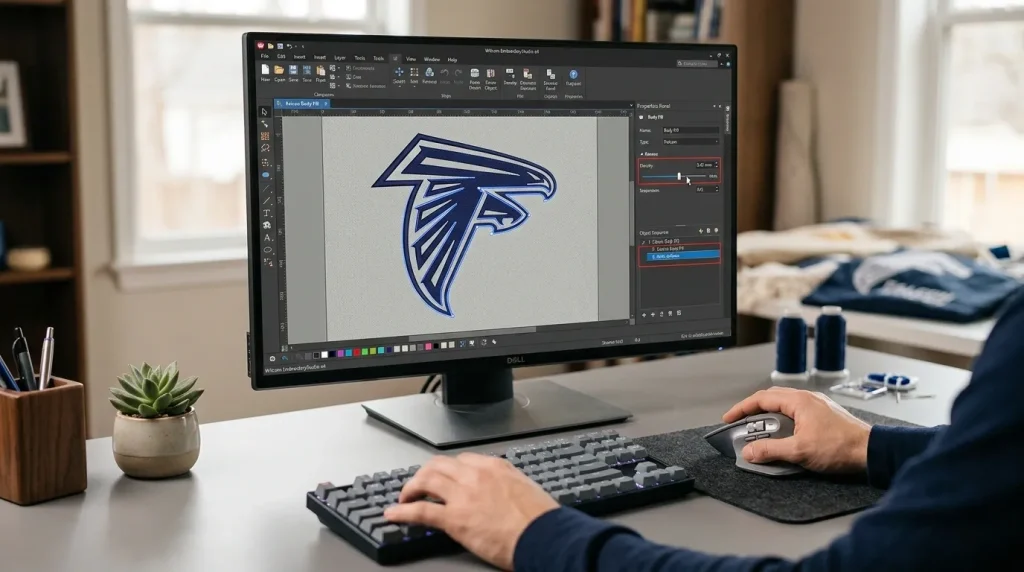
Option 2: Add an Outline to Define the Design
Adding an outline to an embroidery design is one of the most effective improvements you can make to any flat-looking logo. Here is how to do it correctly in your digitizing software.
Choose the right outline stitch type:
A satin stitch outline (1.5mm to 2.5mm wide) gives the most professional result. It creates a clean, slightly raised border that defines every element sharply. This is the standard outline used on commercial embroidery logos worldwide.
A running stitch outline is thinner and more subtle. Use it when the design has fine details or small elements where a satin border would look too heavy.
Apply the outline after the fill, not before. The outline stitch must run after the fill element in the stitch sequence. If the outline runs before the fill, the fill stitches will overlap and partially cover the outline reducing its definition. Always sequence: fill first, then outline.
Match the outline color intentionally. An outline in the same color as the fill adds definition without creating visual contrast. An outline in a darker shade or contrasting color makes each element stand out more strongly. Choose based on the look the customer wants.
Check outline width against element size. A 2.5mm satin outline on a 5mm letter element looks clunky and out of proportion. Scale the outline width to match the visual weight of the element smaller elements need thinner outlines.
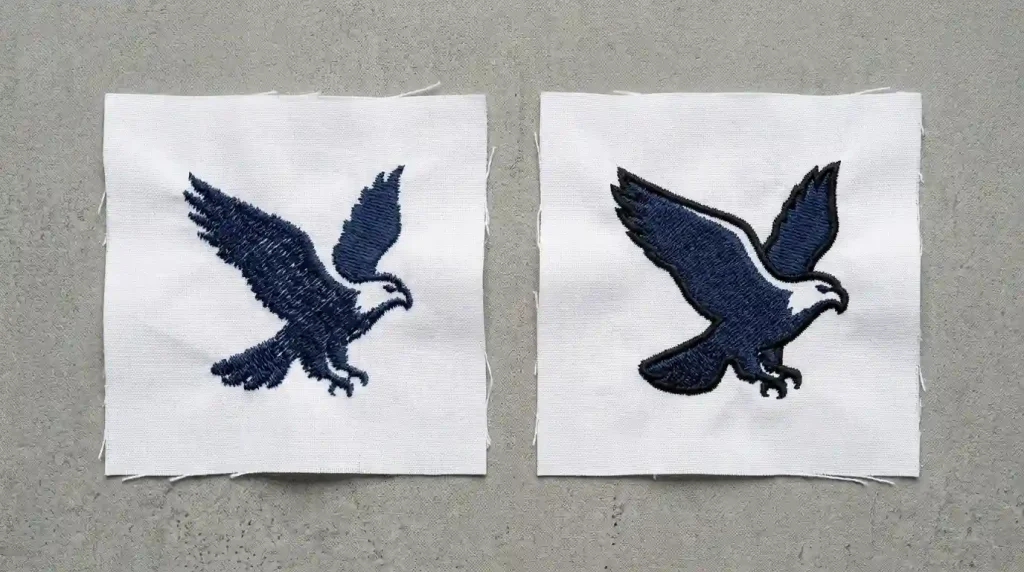
Option 3: Add Both Increase Density and Add an Outline Together
In most cases where a customer is unhappy with how the design is sewing, the best result comes from combining both fixes increasing the fill density and adding a satin outline at the same time.
Step 1: Open the digitizing file and increase density on every fill element to the correct value for your fabric type.
Step 2: Add a satin stitch outline element after each fill element in the stitch sequence. Set the outline width between 1.5mm and 2.5mm depending on element size.
Step 3: Run a test stitch-out on matching scrap fabric. Compare the result to the original. The design should now look visibly bolder, better defined, and more professional.
Step 4: Check the overall stitch count. Adding density and an outline increases the total stitch count of the design. Higher stitch counts increase production time and may affect pricing for large quantity runs. Factor this into the revised quote before sending the updated file.
For more on how density affects embroidery quality across different fabrics, see our guide on fixing poorly stitching letters in embroidery.
Step-by-Step: How to Edit the File and Test the Result
Step 1: Identify Exactly What Needs Changing
Open the digitizing file in your software and identify the specific problems before making any changes:
Check density first. Select each fill element and look at the density value in the properties panel. Any value above 0.50mm on a standard fabric means the fill is too light. Note which elements need adjustment.
Check the stitch sequence. Look at the list of stitch elements in order. If there is no outline element after any fill element, that element has no border stitch. Note which elements are missing outlines.
Check underlay. While the file is open, also confirm that every fill element has correct underlay assigned. Missing underlay often contributes to the thin, flat appearance that customers notice. For more on underlay, see our guide on why your embroidery is sinking.
Step 2: Make the Edits in Order
Work through the file in stitch sequence order do not jump between elements randomly. This prevents sequencing errors that cause the outline to stitch in the wrong order relative to the fill.
For each fill element: First, select the element. Then change the density value to the correct setting for your fabric. Next, confirm underlay is assigned. Finally, add a new satin outline element immediately after this fill element in the sequence.
Set the outline properties: Width: 1.5mm to 2.5mm depending on element size. Color: same as fill or slightly darker depending on customer preference. Density: 0.40mm to 0.45mm for the outline satin columns. Pull compensation: match the same value used on the fill element.
Save the edited file with a new filename so the original version is preserved. Always keep the original file if the customer wants to revert or compare, the original must be available.
Step 3: Run a Test Stitch-Out and Compare
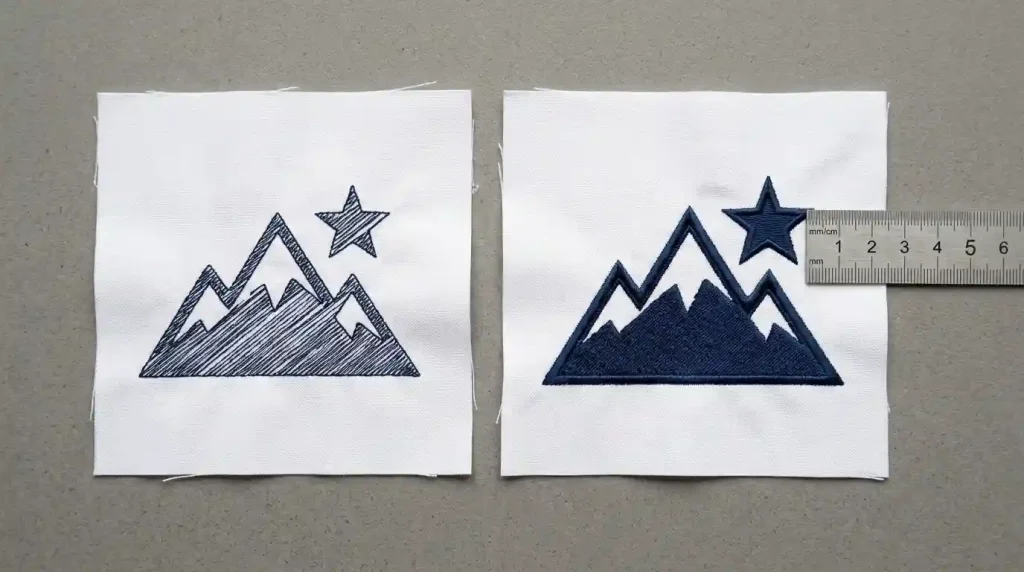
Stitch the edited file on the same fabric and stabilizer as the original. Place both stitch-outs side by side for direct comparison.
Check fill coverage. Hold both pieces up to a light source. No light should pass through the fill on the improved version. If light still passes through, increase density slightly and retest.
Check outline definition. Run your fingernail along the border of each design element on the improved version. The outline should feel raised and defined. The edge should be sharp and clean with no soft blending into the background.
Show both versions to the customer before running the full production batch. Let them confirm the improved version matches their expectation. This step prevents revision requests after the full run is complete.
When the Design Needs More Than Edits
Sometimes a design looks thin and flat not because of density or missing outlines but because the entire file was built incorrectly from the start. Auto-digitized files often have structural problems that simple edits cannot fully resolve. In these cases, rebuilding the file from scratch produces a better result than patching the existing file.
At Sassy Digitizing, we handle both edits to existing files and full rebuilds. Every file we deliver is built with correct density, proper underlay, and clean outline stitching from the start — so the first stitch-out looks the way the customer expected. Visit our digitizing services page or contact us for a free quote.
Quick Fix Checklist
- ✅ Fill density identified and corrected for fabric type
- ✅ Underlay confirmed on every fill element
- ✅ Satin outline added after every fill in stitch sequence
- ✅ Outline width matched to element size
- ✅ Outline pull compensation matched to fill
- ✅ File saved with new filename original preserved
- ✅ Test stitch-out run on matching fabric
- ✅ Both original and improved versions compared
- ✅ Customer approved improved version before full production
Summary
When a design is not sewing the way you or your customer expected, the fix is almost always one of two things increasing fill density or adding a satin outline, or both together. These are straightforward edits in any digitizing software and they transform a thin, flat-looking design into a bold, professional result.
For designs that need more than simple edits, Sassy Digitizing rebuilds files correctly from the start. Every file we deliver stitches boldly and cleanly on the first run — no guesswork, no wasted garments.
About the Author
Keith Blair | Senior Quality Control (HOD) Keith Blair serves as Head of Department for Quality Control at Sassy Digitizing, with 12 years of commercial embroidery experience. He specializes in stitch density, outline digitizing, fill quality, and file revision for all garment types and fabric applications.