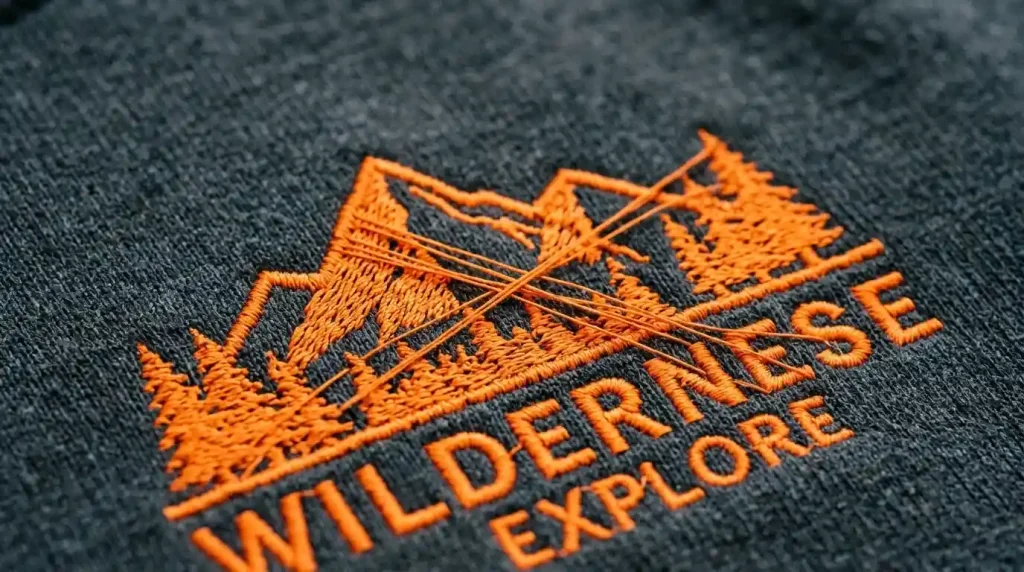
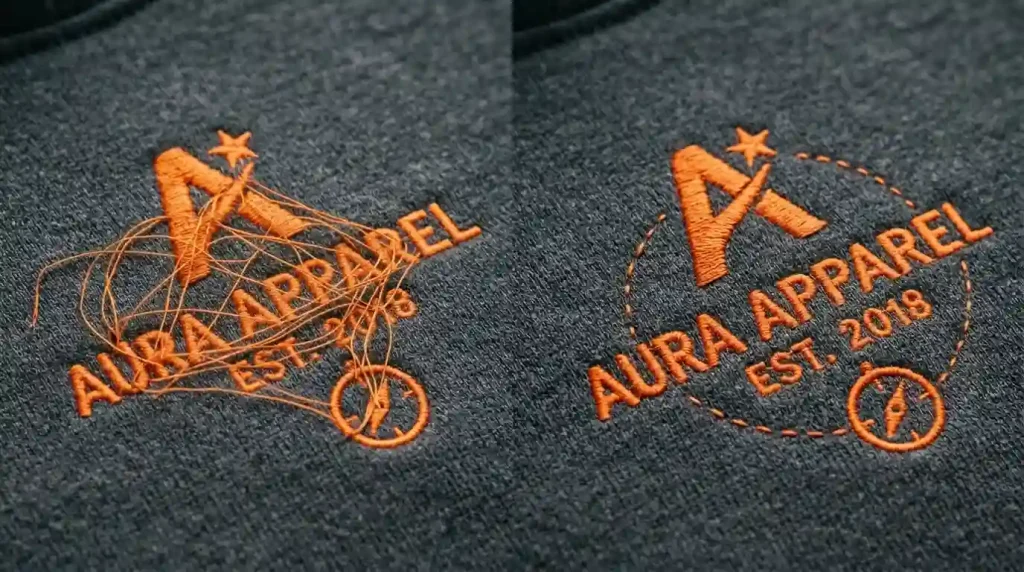
If your embroidery machine stops constantly to trim thread between elements, your digitizing file has too many jump stitches. Every trim corresponds to one jump stitch. A jump stitch happens when the needle lifts, travels across the design without stitching, and then resumes leaving a loose thread tail that must be cut. Too many jump stitches slow production, create loose thread tails, and signal a file that was never properly optimized.
This guide explains exactly what causes excessive trims and how to eliminate them through correct pathing in your digitizing file.
What Causes Too Many Trims in an Embroidery Design?
Every trim in an embroidery design corresponds to one jump stitch in the file. A jump stitch happens when the digitizing software cannot find a path from one design element to the next without crossing open fabric so it lifts the needle, jumps across, and starts again.
Three situations create excessive jump stitches:
Poor Stitch Pathing the most common cause. The digitizer did not plan a logical route through the design elements. Instead of traveling from one element to the next using a running stitch connection, the file jumps repeatedly between disconnected elements. Auto-digitized files are especially prone to this problem because the software places elements in artwork detection order rather than production logic order.
Too Many Color Changes every color change forces a trim. The machine must cut the current thread before loading the next color. Unnecessary color separations where two adjacent elements share a color but the digitizer separated them create trim points that merging would eliminate entirely.
Disconnected Small Elements designs with many small isolated elements like dots, stars, or scattered text each require their own entry and exit point. Without running stitch travel paths connecting them in sequence, every small element becomes its own trim event.
These same pathing problems are closely connected to what causes jump stitches in embroidery visible on the finished garment the trim and the jump stitch are two sides of the same digitizing problem.
Step 1: Count and Locate Your Jump Stitches
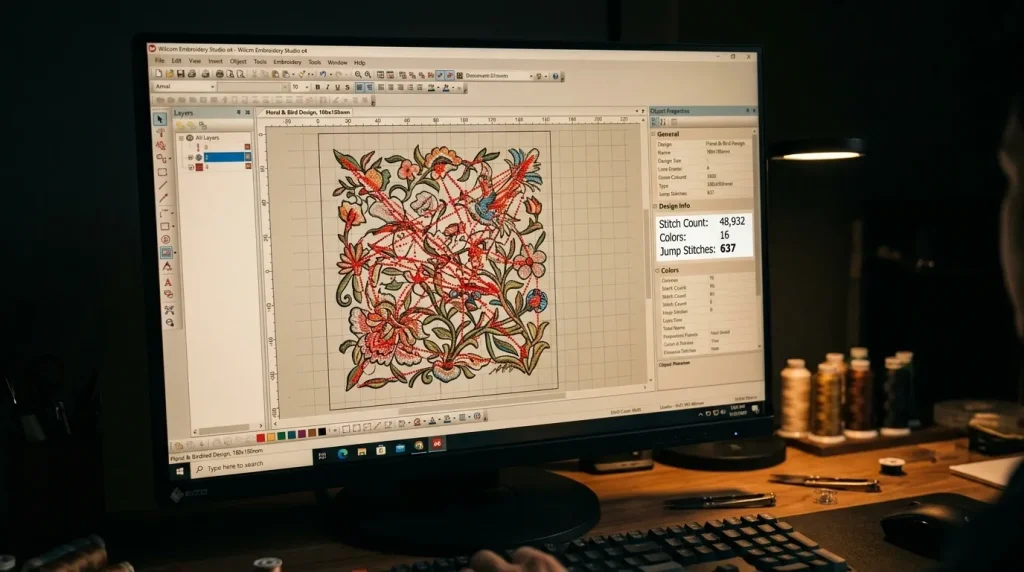
Open your design in your embroidery digitizing software and activate the jump stitch display. In Wilcom and most professional software, jump stitches appear as highlighted paths or dotted lines. These lines show every point where the needle lifts and travels without stitching.
Count the total jump stitches in your design. As a general benchmark:
- Simple logo under 5 elements: 3 to 5 jump stitches maximum
- Medium logo with 6 to 10 elements: 5 to 10 jump stitches acceptable
- Complex multi-element design: 10 to 15 jump stitches maximum
If your design exceeds these numbers significantly, the file needs re-pathing. Note which areas have the highest concentration of jump stitches these are your primary re-pathing targets.
Next, check the trim count relative to the color count. If your design has 3 colors but 20 trims, most trims come from jump stitches within color sections not from color changes. This tells you the pathing problem is inside the color sections rather than between them.
Excessive trims also directly cause slow embroidery machine performance because every trim stop adds physical time to the production run the machine decelerates, cuts, and re-accelerates for every single trim point in the file.
Step 2: Re-Path Your Design Elements
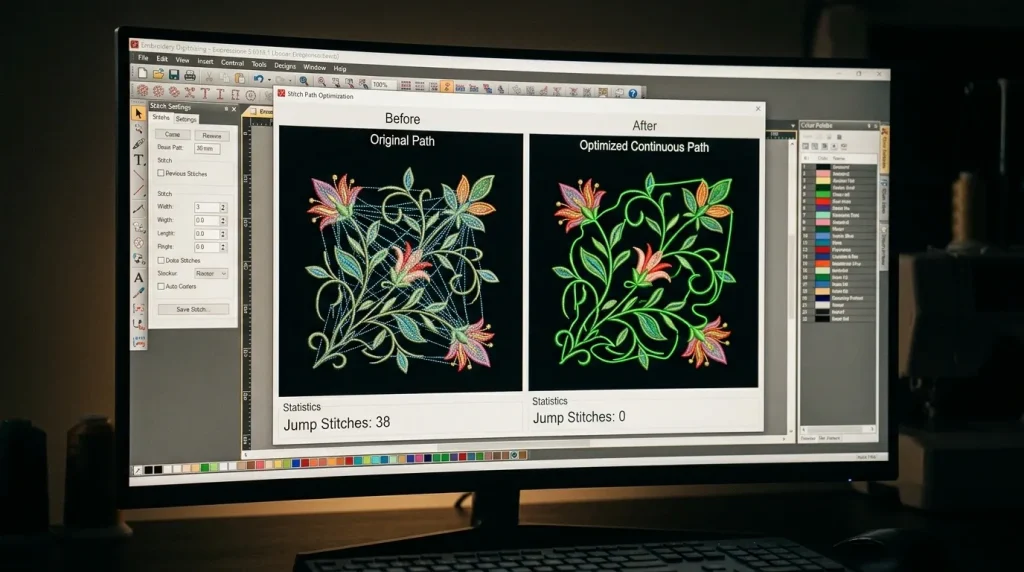
Re-pathing means manually changing the order and route in which design elements stitch out. The goal is to move the needle logically from one element to the next without lifting.
The key principle is simple: the needle should always exit one element at the point closest to the entry point of the next element. This minimizes travel distance. Often, it eliminates the need for a jump stitch entirely because the travel distance becomes short enough to cover with a running stitch instead.
Re-pathing process:
- Open the sequence panel and review the current stitch order
- Identify elements that are stitching out far from each other when they could stitch in a closer sequence
- Reorder elements so adjacent elements in the design stitch consecutively rather than jumping across the design to unrelated elements
- For circular or badge designs, use a spiral or clockwise sequence that moves continuously around the design without doubling back
Correct sew sequence is also the foundation of why cap logos must sew bottom-up or center-out the same logical pathing principle that reduces trims also controls fabric push direction on cap panels.
Step 3: Replace Jump Stitches With Running Stitch Connections
After re-ordering elements, eliminate remaining jump stitches by replacing them with running stitch travel paths. A running stitch travel path carries the needle from one element to the next at the fabric surface. It stays invisible under the top stitching but eliminates the need for a trim entirely.
How to add running stitch connections:
- In your digitizing software, select the jump stitch between two elements
- Replace it with a running stitch object set to 2mm to 2.5mm stitch length
- Route the running stitch path under an area that will be covered by subsequent stitching so it is hidden in the final design
- Where no coverage is available, route the path along the design outline so it blends with the border satin stitch
Running stitch travel connections are the same foundational technique used in fixing messy embroidery lettering outlines the running stitch paths between letters replace jump stitches and keep the machine running continuously through the text element.
Pro Tip: Not every jump stitch can be eliminated with a running stitch connection. When elements are far apart with no coverage path available, a single trim is acceptable. The goal is not zero trims it is the minimum necessary trims given the design structure.
Step 4: Merge Unnecessary Color Sections
The final trim reduction step is reviewing color separations. Open your color sequence and look for adjacent elements that use visually identical thread colors but were digitized as separate color objects. Each separation adds a trim and a color change stop.
Where two elements share the same thread color and sit physically adjacent in the design, merge them into a single color object. Consequently, the machine stitches both elements without stopping, trimming, or changing thread eliminating two trim points per merged pair.
This step is especially valuable for reducing stitch count and improving embroidery machine speed on complex multi-color designs where unnecessary color separations are adding production time across every single garment in a batch run.
Professional Digitizing vs. Auto-Digitized Files

Auto-digitizing tools create excessive trims because they process design elements in artwork detection order rather than production logic order. They do not evaluate travel distances, cannot plan running stitch connections between elements, and frequently create separate color objects for elements that share a thread color.
Manual digitizing by an experienced digitizer plans the complete stitch path before assigning a single stitch considering element sequence, travel routes, running stitch connections, and color merging simultaneously. This is a core reason manual digitizing consistently outperforms AI auto-digitizing on production efficiency as well as stitch quality.
At Sassy Digitizing, every file is path-optimized manually in Wilcom before delivery minimizing trims, eliminating unnecessary jump stitches, and ensuring the machine runs as continuously as possible through every design. Check our digitizing services and pricing to get your design optimized correctly.
Summary
Too many trims in an embroidery design come from excessive jump stitches — and all jump stitches are fixable in the digitizing file:
- Fix 1: Count and locate jump stitches using the jump stitch display in your digitizing software
- Fix 2: Re-path elements so adjacent design parts stitch consecutively without doubling back
- Fix 3: Replace remaining jump stitches with running stitch travel paths routed under subsequent coverage
- Fix 4: Merge adjacent elements that share the same thread color into single color objects
For professionally path-optimized embroidery files with minimum trims and maximum production efficiency, Sassy Digitizing handles every file manually. Visit our digitizing services page to get started.
FAQs
1. What causes excessive trims in embroidery? Every trim corresponds to one jump stitch in the digitizing file. Excessive trims come from poor stitch pathing, unnecessary color separations, and disconnected small design elements that each require their own entry and exit point.
2. Can I reduce trims without professional digitizing software? Basic machine software does not offer path re-ordering or running stitch connection tools. Professional digitizing software like Wilcom is required to re-path elements and replace jump stitches with running stitch travel connections.
3. How many trims is normal for an embroidery design? A simple logo should have 3 to 5 trims maximum. A medium complexity design with 6 to 10 elements should have 5 to 10 trims. Complex multi-element designs should stay under 15 trims. Significantly more than these numbers indicates a pathing problem in the file.
4. Do more trims mean worse embroidery quality? Excessive trims slow production, create loose thread tails that require cleanup, and increase the risk of thread breaks at re-start points. They do not directly affect stitch quality but significantly affect production efficiency and finished garment presentation.
About the Author
Keith Blair | Senior Quality Control (HOD) Keith Blair serves as the Head of Department for Quality Control at Sassy Digitizing, bringing 12 years of commercial embroidery experience to the team. He specializes in stitch density, underlay construction, and pull and push compensation adjustments across all fabric types ensuring every digitized file is production-ready before it reaches the customer.