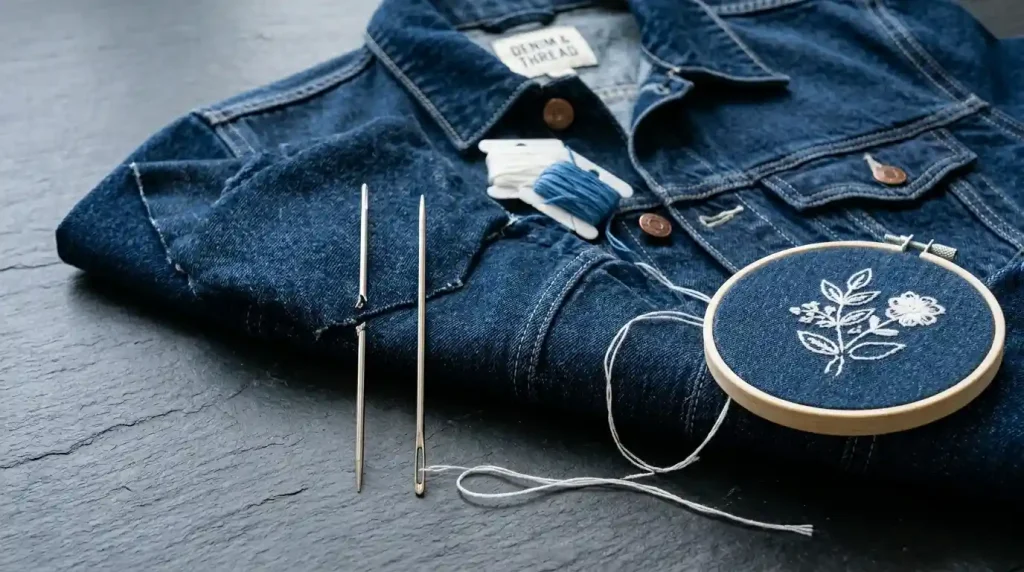
When your embroidery needle keeps breaking, production stops completely every time it happens and if it keeps happening in the same spot, same design, or same fabric, the cause is specific and fixable. Needle breakage is never random. Every break traces back to one of four causes: wrong needle size for the fabric, excessive stitch density in the digitizing file, incorrect hooping and fabric tension, or a timing or mechanical issue with the machine itself.
This guide covers all four causes and gives you the exact fix for each one.
Why Embroidery Needles Break

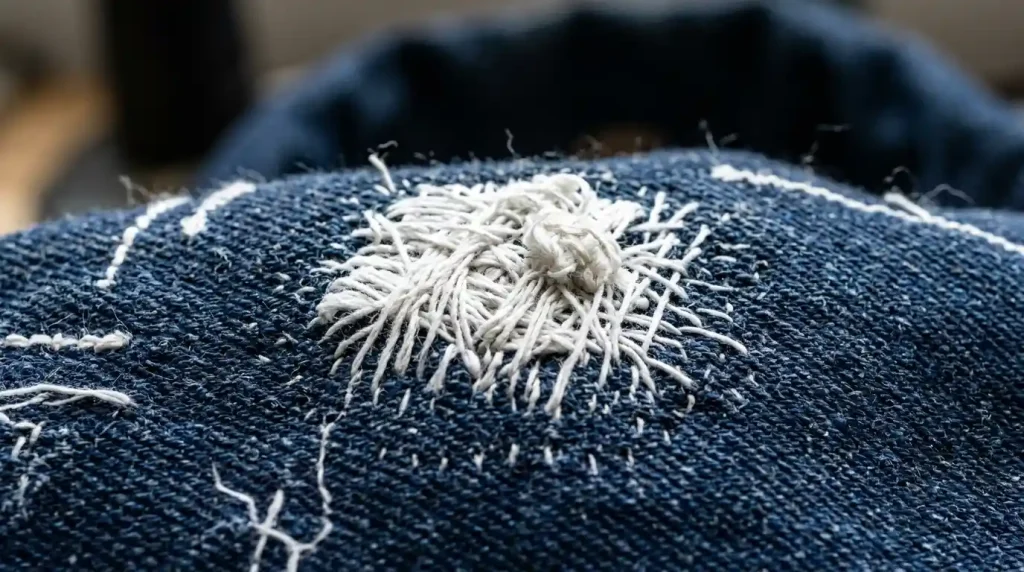
Embroidery needles break when they deflect sideways under pressure rather than punching cleanly through the fabric. A needle punching straight down through fabric and thread encounters manageable resistance. A needle that deflects even slightly catches the hook or bobbin case on the way down and snaps instantly.
Four things cause this deflection:
Wrong needle size a needle too thin for the fabric thickness cannot handle the resistance and bends sideways under the pressure of dense fabric layers.
Over-dense stitching when the digitizing file packs too many stitches into a small area, the needle must punch through layers of compacted thread rather than just fabric. The resistance in over-stitched areas is far higher than the needle is designed for.
Loose fabric in the hoop fabric that shifts under needle pressure causes the needle entry point to move as the needle descends. The needle lands off-center from its intended path and deflects against the thread or fabric edge.
Machine timing drift over time or after impact, the machine’s needle-to-hook timing shifts slightly. When timing is off, the needle deflects against the hook on every stitch cycle rather than passing cleanly beside it.
Understanding which cause is responsible tells you exactly where to apply the fix and stops you from replacing needles endlessly without solving the underlying problem. This same deflection issue also produces jump stitches and thread breaks visible in the finished embroidery when the deflection is not severe enough to break the needle but still disrupts the stitch formation.
Cause 1: Wrong Needle Size for the Fabric
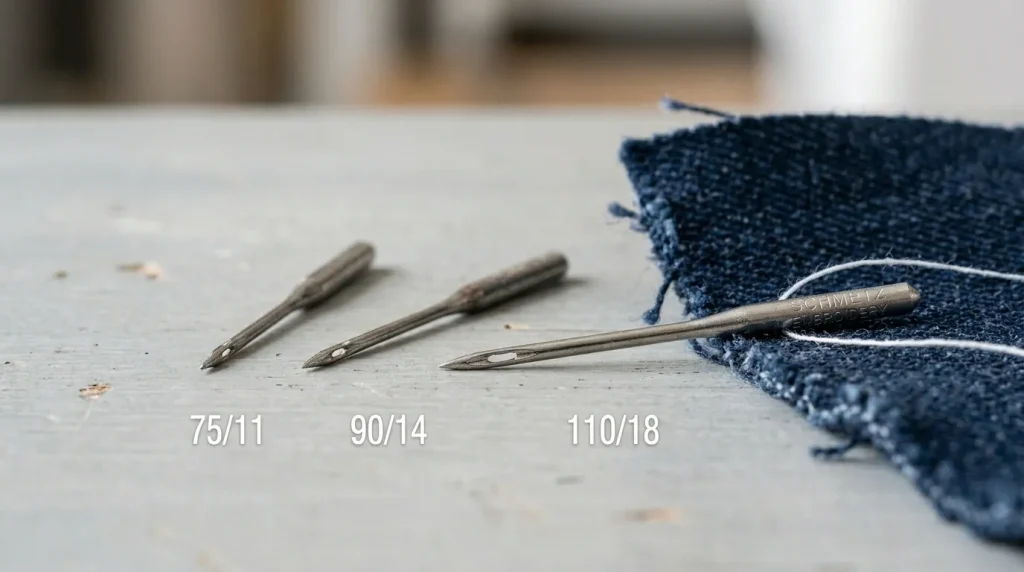
Needle size must match fabric weight. Using a needle that is too small for a thick or tightly woven fabric is the single most common cause of needle breakage in commercial embroidery production.
Correct needle sizes by fabric type:
- Light fabrics (organza, chiffon, thin jersey): Size 65/9 to 75/11
- Medium fabrics (polo shirt, standard cotton, light canvas): Size 75/11 to 80/12
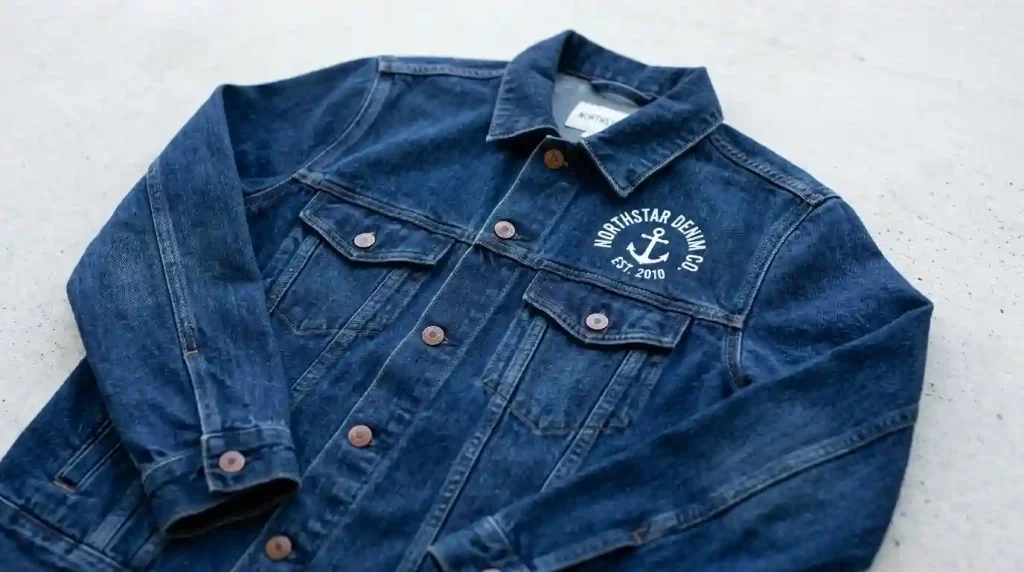
- Heavy fabrics (denim, canvas, heavy twill, jacket material): Size 90/14 to 100/16
- Very heavy or layered fabrics (thick denim, leather, multiple layers): Size 100/16 to 110/18
- Specialty (3D puff foam embroidery): Size 90/14 to 100/16 with a sharp point type
If your needle is breaking on denim or heavy jacket fabric and you are using a 75/11 or smaller, switching to a 90/14 immediately resolves most breakage issues on those materials. The larger needle shaft handles the resistance without deflecting.
Also check the needle type not just the size. For woven fabrics, use a sharp-point needle. For knit fabrics, use a ball-point needle. Using a sharp point on knit or a ball point on dense woven fabric adds resistance that contributes to breakage even when the size is correct.
Correct needle selection is also directly relevant to achieving clean results when digitizing for specific fabric types like knit caps the needle type and the digitizing underlay settings must both be correct for the fabric simultaneously.
Cause 2: High Stitch Density in the Digitizing File
If your needle breaks consistently in the same area of the same design across multiple garments, the cause is almost certainly the digitizing file specifically, over-dense stitching in that area of the design.
Open your design in your embroidery digitizing software and check the stitch density in the area where breakage occurs. Signs of over-dense digitizing:
- Row spacing set below 0.35mm in fill areas
- Multiple underlay types stacked on top of each other creating excessive base layers
- Short stitches under 1mm packed together in a small area
- Satin stitch columns over 6mm wide using the same density as narrow columns
Fix: Reduce row spacing to 0.4mm to 0.45mm in the problem area. Remove redundant underlay layers. Convert any satin columns over 6mm to fill stitch, which distributes density more evenly across the area. Check that no short stitch values are set below 1mm in the problem zone.
Over-dense stitching is also what causes embroidery to run slow and create machine performance problems across a production batch the same density correction that prevents needle breakage also improves machine speed and reduces thread consumption per garment.
Cause 3: Incorrect Hooping and Fabric Tension
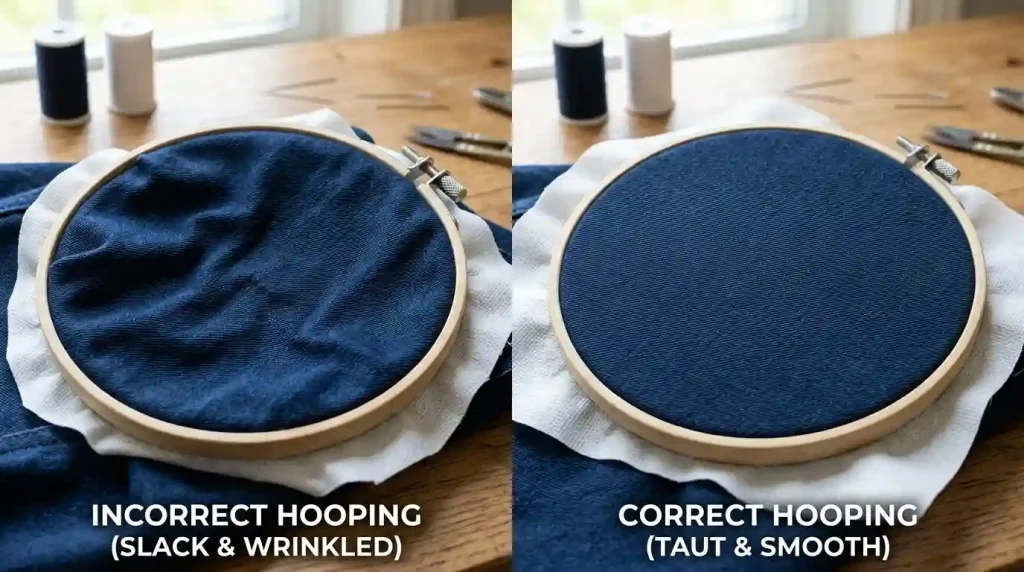
Loose fabric inside the embroidery hoop is the third most common cause of needle breakage and the easiest to fix without any software changes.
When fabric is not hooped drum-tight, it shifts slightly with each needle strike. This shift moves the needle’s landing point as it descends, causing it to catch the edge of an existing stitch or the fabric weave at an angle rather than punching straight through. The angular impact deflects the needle sideways into the hook mechanism.
Correct hooping checklist for denim and heavy fabrics:
- Pull the fabric evenly in all four directions before tightening the hoop
- The fabric surface should produce a drum sound when tapped lightly after hooping
- Use a cutaway stabilizer under heavy fabrics tear-away stabilizers do not provide enough resistance to prevent fabric shift on denim
- For jackets and thick garments, use a magnetic hoop or cap frame clamp system rather than standard hoops to prevent the extra fabric layers from pulling the hooped area out of tension during stitching
Also check that the hoop itself is not damaged. A warped or cracked hoop cannot maintain even tension the fabric will shift in the weak areas regardless of how tightly you pull it during hooping. Replace any hoop that shows visible damage or uneven spring tension.
Cause 4: Machine Timing and Mechanical Issues
If needle breakage persists after correcting needle size, density, and hooping the cause is mechanical. Machine timing drift is the most likely culprit.
Signs of timing issues:
- Needle breaks at the same point in every stitch cycle regardless of fabric
- Thread shredding or fraying at the needle eye during normal stitching
- Unusual sound during the needle descent a clicking or catching sound that was not present before
Timing adjustment requires a qualified machine technician and is not a user-serviceable repair on most commercial embroidery machines. Schedule a maintenance check if you suspect timing drift attempting to adjust timing without proper tools and training damages the hook mechanism and creates more severe production problems.
Also check these mechanical items before calling a technician:
- Needle installed correctly: The needle flat side must face the correct direction as specified in your machine manual an incorrectly installed needle deflects against the hook on every cycle
- Needle fully seated: Push the needle all the way up into the clamp before tightening a partially seated needle sits at a slightly different height and misses the hook clearance
- Hook area clean: Thread debris in the hook race area catches the needle tip and causes deflection clean the hook race after every 8 to 10 hours of production
Keeping your machine correctly maintained also ensures that your embroidery digitizing files produce the clean results they were designed to produce a well-digitized file on a poorly maintained machine still produces breakage and quality problems.
When the Problem Is the Digitizing File
If you have checked needle size, hooping, and machine timing and needle breakage still happens consistently in the same design area the digitizing file needs correction. Over-dense areas, stacked underlays, and short stitch values in the file are creating resistance that exceeds what any needle size or machine setting can compensate for.
At Sassy Digitizing, our quality control team checks every file for over-dense areas, excessive underlay stacking, and short stitch problems before delivery. Every file we deliver is tested for production runnability meaning it is designed to run cleanly on standard commercial machines without causing needle breakage, thread breaks, or machine stress. This thorough file review is part of why manual digitizing produces better production results than auto-digitizing a human reviews every density value while an algorithm simply assigns defaults. Check our digitizing services and pricing to get a production-ready file.
Summary
Embroidery needle breakage has four specific causes each with a direct fix:
- Fix 1: Match needle size to fabric weight use 90/14 to 100/16 for denim and heavy fabrics
- Fix 2: Reduce stitch density in the digitizing file set row spacing to 0.4mm to 0.45mm and remove stacked underlays
- Fix 3: Hoop fabric drum-tight with cutaway stabilizer eliminate any fabric shift during stitching
- Fix 4: Check needle installation, clean the hook race, and schedule a timing check if mechanical causes are suspected
For digitizing files that are production-ready and needle-safe from the first run, Sassy Digitizing handles every density and underlay setting manually. Visit our digitizing services page to get started.
FAQs
1. Why does my embroidery needle keep breaking in the same spot? Consistent breakage in the same design area points to over-dense stitching in the digitizing file at that location. The needle is punching through compacted thread layers and deflecting against the hook. Reduce row spacing and remove stacked underlays in that area of the design.
2. What needle size should I use for denim embroidery? Use a 90/14 to 100/16 sharp-point needle for standard denim. For very thick denim, multiple layers, or heavily structured jacket material, use a 100/16 to 110/18 needle.
3. Can incorrect hooping cause needle breakage? Yes. Loose fabric shifts under needle pressure, moving the needle entry point as it descends. The needle lands off-center and deflects against the hook mechanism, causing breakage. Hoop fabric drum-tight with a cutaway stabilizer to eliminate shift.
4. How often should I replace embroidery needles? Replace needles every 8 to 10 hours of production stitching, or immediately after any breakage event. A broken needle can leave micro-burrs or bends that cause thread breaks even if the needle appears intact after breaking.
About the Author
Keith Blair | Senior Quality Control (HOD) Keith Blair serves as the Head of Department for Quality Control at Sassy Digitizing, bringing 12 years of commercial embroidery experience to the team. He specializes in stitch density, underlay construction, and pull and push compensation adjustments across all fabric types ensuring every digitized file is production-ready before it reaches the customer.